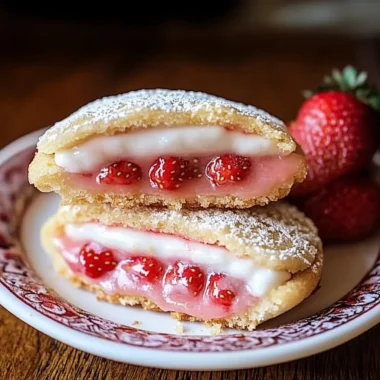
Buttery Pistachio Thumbprint Cookies are an incredible treat that will elevate any dessert table. These delightful cookies feature a soft, buttery base and are filled with a luscious jam or chocolate, creating a perfect balance of flavors and textures. Each bite is a heavenly experience, showcasing the rich taste of pistachios complemented by the sweetness of the filling. Whether you’re baking for a special occasion or just treating yourself, these cookies are sure to impress.
Imagine the aroma of freshly baked cookies filling your kitchen, enticing everyone with their nutty fragrance. The Buttery Pistachio Thumbprint Cookies not only taste wonderful but also look beautiful with their signature thumbprint indentation, inviting a splash of color from your chosen filling. As you share these cookies with friends and family, the smiles they bring will be heartwarming. This guide will walk you through the simple steps to create these amazing cookies, ensuring you achieve perfect results every time.
The combination of rich butter, crunchy pistachios, and a sweet filling makes these cookies irresistible. Perfect for holiday gatherings, tea parties, or simply to satisfy your sweet tooth, they are a versatile addition to any dessert lineup. Let’s dive into what makes Buttery Pistachio Thumbprint Cookies a must-try recipe for your baking endeavors.
Why You’ll Love This Recipe
Buttery Pistachio Thumbprint Cookies are not just another cookie recipe; they are a delightful experience that brings joy with every bite. Here are some reasons why you will fall in love with this recipe:
1. Rich Flavor Profile – The buttery cookie base paired with pistachios creates a luxurious flavor that’s hard to resist.
2. Simple Ingredients – Most of the ingredients are pantry staples, making it easy to whip up a batch whenever the craving strikes.
3. Customizable Filling – You can use any jam, chocolate, or even nut butter for the thumbprint filling, allowing for endless variations.
4. Perfect for Sharing – These cookies are great for gift-giving or sharing at gatherings, making them a crowd-pleaser.
5. Beautiful Presentation – The vibrant colors of the fillings against the golden cookies create a stunning visual appeal.
6. Easy to Make – With straightforward instructions, even novice bakers can achieve perfect results.
With all these factors combined, it’s no wonder that Buttery Pistachio Thumbprint Cookies have become a favorite among cookie lovers. Each cookie offers a delightful crunch followed by a soft, buttery texture that melts in your mouth, leaving you wanting more.
Preparation and Cooking Time
In total, preparing Buttery Pistachio Thumbprint Cookies will take about 1 hour and 15 minutes, which includes preparation and baking. Here’s a breakdown of the time required:
– Preparation Time: 30 minutes
– Cooking Time: 12-15 minutes
– Cooling Time: 10-15 minutes
These times may vary slightly based on your experience and kitchen equipment, but this framework should provide a good estimate.
Ingredients
– 1 cup unsalted butter, softened
– ½ cup granulated sugar
– ¼ cup powdered sugar
– 1 teaspoon vanilla extract
– 2 cups all-purpose flour
– 1 cup finely ground pistachios
– ½ teaspoon salt
– ½ cup jam or chocolate for filling (your choice)
– Whole pistachios, for garnish (optional)
Step-by-Step Instructions
Creating Buttery Pistachio Thumbprint Cookies can be a delightful process if you follow these simple steps:
1. Preheat Oven: Preheat your oven to 350°F (175°C) and line a baking sheet with parchment paper.
2. Cream Butter and Sugars: In a large mixing bowl, cream together the softened butter, granulated sugar, and powdered sugar until light and fluffy.
3. Add Vanilla: Mix in the vanilla extract until well combined.
4. Combine Dry Ingredients: In another bowl, whisk together the all-purpose flour, ground pistachios, and salt.
5. Mix Together: Gradually add the dry mixture to the wet mixture, stirring until just combined. Do not overmix.
6. Shape Cookies: Scoop tablespoon-sized portions of dough and roll them into balls. Place them on the prepared baking sheet, spacing them about 2 inches apart.
7. Create Thumbprint: Use your thumb or the back of a spoon to make an indentation in the center of each cookie.
8. Fill Indentations: Spoon your chosen jam or chocolate into the center of each thumbprint.
9. Bake: Place the baking sheet in the preheated oven and bake for 12-15 minutes, or until the edges are lightly golden.
10. Cool: Remove from the oven and let the cookies cool on the baking sheet for about 10 minutes. Then transfer them to a wire rack to cool completely.
11. Garnish (Optional): If desired, press a whole pistachio into the center of each cookie after filling for added decoration.
These steps will guide you in creating these incredible cookies effortlessly!
How to Serve
To make a lasting impression, consider the following when serving Buttery Pistachio Thumbprint Cookies:
1. Presentation: Arrange the cookies on a decorative platter, showcasing their vibrant colors and inviting shapes.
2. Accompaniments: Serve with a side of coffee or tea to enhance the experience. A light dusting of powdered sugar on top can also add an elegant touch.
3. Storage: These cookies can be stored in an airtight container for up to a week, making them perfect for snacking throughout the week.
4. Gift Idea: Consider packaging them in a beautiful box or jar as a thoughtful homemade gift for friends or family.
By putting thought into how you serve the cookies, you elevate the entire experience, making it memorable for you and your guests. Enjoy creating and sharing these delightful Buttery Pistachio Thumbprint Cookies!
Additional Tips
– Use Fresh Ingredients: For the best flavor, ensure that your butter and eggs are fresh and at room temperature.
– Don’t Overmix: When combining the wet and dry ingredients, mix until just combined to maintain a tender texture.
– Experiment with Fillings: Try different jams, such as raspberry or apricot, or use creamy fillings like Nutella for a unique twist.
– Adjust for Altitude: If you live at a high altitude, you may need to adjust the flour and baking time for the best results.
Recipe Variation
Feel free to get creative with your Buttery Pistachio Thumbprint Cookies! Here are some fun variations to consider:
1. Chocolate Pistachio Cookies: Incorporate cocoa powder into the dough for a chocolatey base, and use chocolate ganache as the filling.
2. Spiced Cookies: Add a pinch of cinnamon or nutmeg to the dough for a warm, spiced flavor.
3. Citrus Zest: Mix in some lemon or orange zest to the dough for a refreshing citrusy note.
4. Nut Variations: Substitute pistachios with other nuts like almonds or walnuts for a different texture and flavor.
Freezing and Storage
– Storage: Keep the cookies in an airtight container at room temperature. They will stay fresh for about a week.
– Freezing: You can freeze the baked cookies for up to three months. Place them in a single layer on a baking sheet until frozen, then transfer to a freezer-safe container.
– Filling Considerations: If freezing, consider leaving the filling out until you’re ready to serve for the best texture.
Special Equipment
While you don’t need too much specialized equipment to make Buttery Pistachio Thumbprint Cookies, the following tools can help ensure your baking goes smoothly:
– Mixing Bowls: A set of different sizes for mixing ingredients.
– Electric Mixer: For creaming the butter and sugars more efficiently.
– Cookie Scoop: This helps in portioning out the dough evenly.
– Parchment Paper: To line your baking sheets for easy removal and cleanup.
Frequently Asked Questions
Can I substitute the pistachios with other nuts?
Yes, you can use any finely ground nuts, such as almonds or hazelnuts.
What type of jam works best for the filling?
Any jam that suits your taste works well! Raspberry, apricot, or even lemon curd can be delicious options.
How can I make these cookies gluten-free?
Replace the all-purpose flour with a gluten-free flour blend, ensuring it includes xanthan gum for structure.
Can I make the dough ahead of time?
Absolutely! You can refrigerate the dough for up to 48 hours before baking. Just let it soften slightly at room temperature before scooping.
Why didn’t my cookies spread?
If the dough is too cold or if you overmixed it, it may not spread. Make sure to scoop and bake them when the dough is at room temperature.
Conclusion
Buttery Pistachio Thumbprint Cookies are not just a treat; they are an experience that brings joy with every bite. The combination of buttery goodness, crunchy pistachios, and a sweet filling creates a delightful balance of flavors. Whether you’re sharing them with loved ones or enjoying them yourself, these cookies are bound to impress. So gather your ingredients, follow the steps, and indulge in the deliciousness of these amazing cookies!

Buttery Pistachio Thumbprint Cookies: An Amazing Ultimate Recipe
- Total Time: 33 minute
Ingredients
– 1 cup unsalted butter, softened
– ½ cup granulated sugar
– ¼ cup powdered sugar
– 1 teaspoon vanilla extract
– 2 cups all-purpose flour
– 1 cup finely ground pistachios
– ½ teaspoon salt
– ½ cup jam or chocolate for filling (your choice)
– Whole pistachios, for garnish (optional)
Instructions
Creating Buttery Pistachio Thumbprint Cookies can be a delightful process if you follow these simple steps:
1. Preheat Oven: Preheat your oven to 350°F (175°C) and line a baking sheet with parchment paper.
2. Cream Butter and Sugars: In a large mixing bowl, cream together the softened butter, granulated sugar, and powdered sugar until light and fluffy.
3. Add Vanilla: Mix in the vanilla extract until well combined.
4. Combine Dry Ingredients: In another bowl, whisk together the all-purpose flour, ground pistachios, and salt.
5. Mix Together: Gradually add the dry mixture to the wet mixture, stirring until just combined. Do not overmix.
6. Shape Cookies: Scoop tablespoon-sized portions of dough and roll them into balls. Place them on the prepared baking sheet, spacing them about 2 inches apart.
7. Create Thumbprint: Use your thumb or the back of a spoon to make an indentation in the center of each cookie.
8. Fill Indentations: Spoon your chosen jam or chocolate into the center of each thumbprint.
9. Bake: Place the baking sheet in the preheated oven and bake for 12-15 minutes, or until the edges are lightly golden.
10. Cool: Remove from the oven and let the cookies cool on the baking sheet for about 10 minutes. Then transfer them to a wire rack to cool completely.
11. Garnish (Optional): If desired, press a whole pistachio into the center of each cookie after filling for added decoration.
These steps will guide you in creating these incredible cookies effortlessly!
- Prep Time: 15 minutes
- Cook Time: 12-15 minutes
Nutrition
- Serving Size: 24 cookies
- Calories: 120 kcal
- Fat: 7g
- Protein: 2g