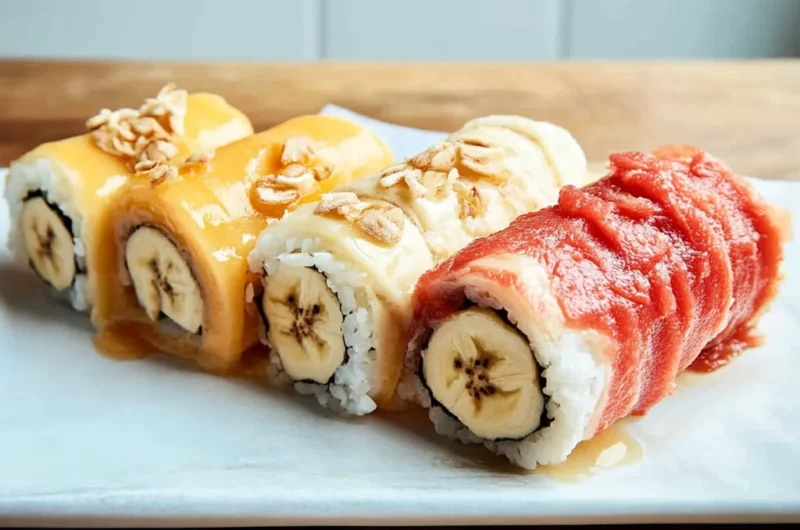
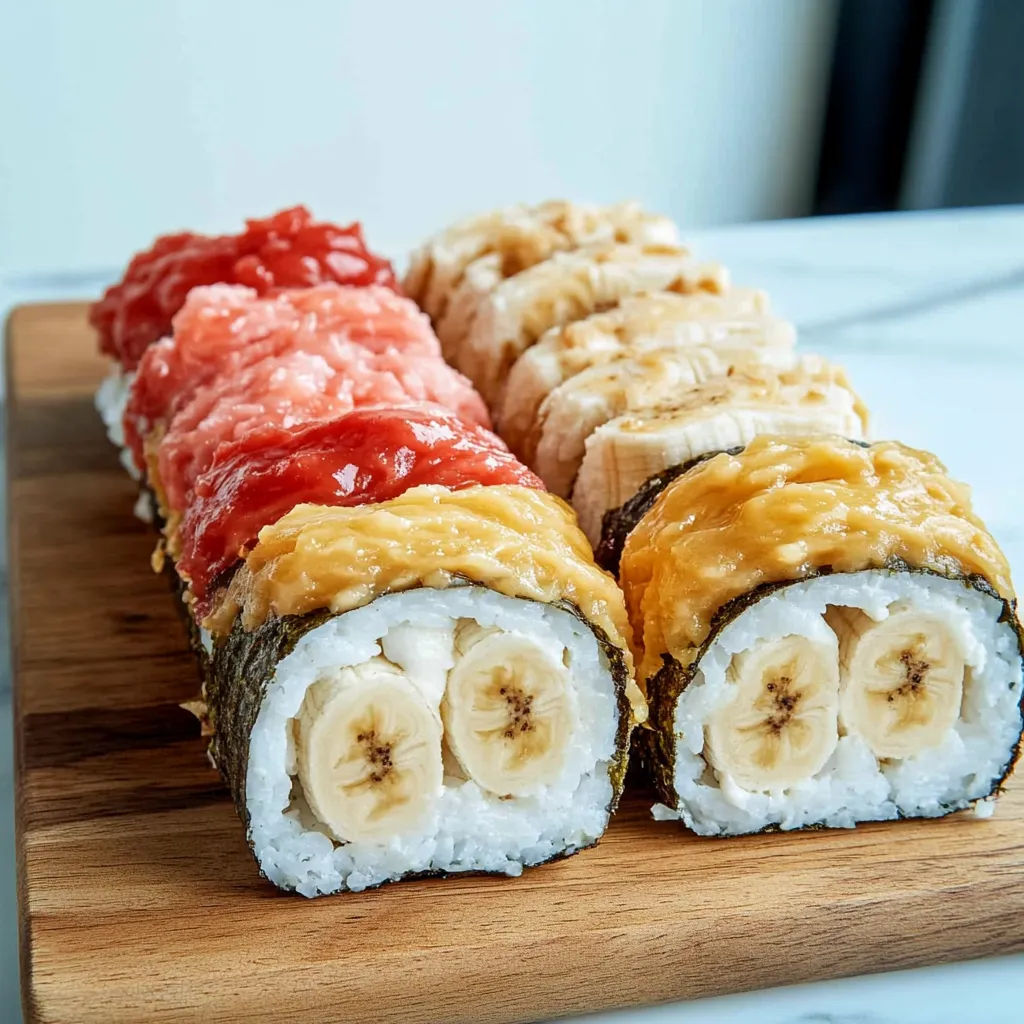
Okay, I’ll admit it: the first time I made Banana Sushi, it was 100% for the cute Instagram pic. But after one bite, I was totally hooked. It’s the perfect combo of creamy, crunchy, sweet, and chewy—and the flavor combos are endless. Plus, it takes literally 5 minutes to make. No oven. No stove. Just you, a banana, and your imagination.
Today we’re making 3 fun flavors of banana sushi that are perfect for any mood or craving:
- Chocolate Hazelnut Crunch
- Peanut Butter & Pretzel
- Coconut Yogurt & Berry
Each version is rolled, sliced, and topped to look like adorable little sushi rolls—but instead of seaweed and fish, we’re going full snack-style with spreads, granola, pretzels, and fruit. Let’s get into it!
Why You’ll Love This Recipe
- No baking required: These are totally no-cook and ready in minutes.
- Healthy-ish: Made with real fruit and customizable toppings.
- Kid-friendly: Let little ones “roll their own” banana sushi—it’s fun and hands-on!
- Perfect for parties: Serve them on a platter with little chopsticks or toothpicks for dipping.
- Endlessly customizable: You can make these dairy-free, nut-free, or full dessert-mode with just a few tweaks.
Preparation Time and Servings
- Prep Time: 10 minutes
- Cook Time: 0 minutes
- Total Time: 10 minutes
- Servings: Makes 3 banana sushi rolls (about 6–8 pieces each)
- Calories per roll (varies by flavor): ~150–250
Ingredients
Base Ingredients (for all 3):
- 3 ripe but firm bananas
- 3 whole wheat or flour tortillas (or use thin flatbreads)
Flavor #1: Chocolate Hazelnut Crunch
- 2 tablespoons chocolate hazelnut spread (like Nutella or a halal-friendly brand)
- 1 tablespoon chopped roasted hazelnuts
- 1 tablespoon mini chocolate chips
- ½ teaspoon crushed cornflakes or crispy rice cereal (optional for crunch)
Flavor #2: Peanut Butter & Pretzel
- 2 tablespoons natural peanut butter (or almond/sunflower butter for nut-free)
- 1 tablespoon crushed pretzels
- 1 teaspoon mini chocolate chips or dried cranberries
- ½ banana, sliced into coins (for layering)
Flavor #3: Coconut Yogurt & Berry
- 2 tablespoons thick coconut yogurt (or Greek yogurt)
- 1 teaspoon honey or maple syrup
- 2 tablespoons chopped fresh strawberries and blueberries
- 1 tablespoon toasted shredded coconut
Ingredient Notes:
- Use room-temp spreads so they’re easy to spread.
- Tortillas make the best wrap, but you can also use crepes or lavash.
- Bananas should be ripe but still firm enough to slice cleanly.
Step-by-Step Instructions
This is where the fun begins! All three banana sushi flavors follow the same basic steps.
Step 1: Prep Your Wrap
- Lay your tortilla flat on a clean surface or cutting board.
- Spread your chosen base (Nutella, peanut butter, or yogurt) in a thin layer across the tortilla—leaving about ½-inch border around the edges.
Step 2: Add the Banana
- Place one peeled banana horizontally along the bottom edge of the tortilla.
- For the Peanut Butter & Pretzel version, you can also layer banana slices along the spread instead of using a whole banana if you prefer more filling.
Step 3: Roll It Up
- Gently roll the tortilla up over the banana as tightly as possible without squishing it.
- Place seam-side down and chill in the fridge for 5–10 minutes (optional, but makes slicing easier!).
Step 4: Slice and Top
- Slice the roll into 6–8 bite-sized “sushi” pieces using a sharp knife.
- Sprinkle your toppings of choice on top or roll the edges in toppings for extra cuteness.
How to Serve
Serve banana sushi as a snack tray, on a board, or in little bento boxes. Here are some fun ideas:
- With dipping sauces: A little dish of melted chocolate, almond butter, or honey.
- As part of a snack board: Pair with grapes, apple slices, and cheese cubes.
- Party platter: Serve a variety of flavors with toothpicks for easy grabbing.
Additional Tips for Success
- Chill before slicing: A short trip to the fridge makes cleaner cuts.
- Use a serrated or very sharp knife: To avoid squishing the banana when slicing.
- Thin layers are best: Too much spread can make things messy.
- Add crunch: Rolling in crushed cereal, pretzels, or toasted coconut gives great texture.
- Go nut-free if needed: Use sunflower seed butter or oat-based spreads for allergy-friendly options.
Recipe Variations
Here are a few other flavor combos to try:
- S’mores Banana Sushi: Marshmallow fluff + crushed graham crackers + mini chocolate chips.
- Tropical Vibes: Mango yogurt + pineapple chunks + toasted coconut.
- Cookie Butter Delight: Cookie butter + cinnamon + crushed speculoos or graham crackers.
- Halal Turkish Delight-Inspired: Rose yogurt + chopped dates + pistachios.
Serving Suggestions
These little bites are super versatile:
- For kids: Serve with apple juice or milk.
- For adults: Pair with chai, matcha, or iced coffee.
- At brunch: Add to a fruit and yogurt board with granola and mini muffins.
Freezing and Storage
Banana sushi is best eaten fresh, but you can prep ahead a bit.
- Store in fridge: Keep wrapped in plastic or an airtight container for up to 24 hours.
- Avoid freezing: Bananas don’t thaw well and get mushy.
- Meal prep tip: Prep the spreads and toppings ahead so you can assemble in seconds.
Special Equipment
Nothing fancy here! Just:
- A sharp knife (for clean slicing)
- Cutting board
- Spoon or offset spatula (for spreading)
- Toothpicks or mini forks (for party presentation)
FAQ
Can I use a different fruit instead of banana?
You can, but bananas work best because of their shape and texture. Strawberries or kiwi could work for open-faced versions.
Can I make this gluten-free?
Yes! Just use gluten-free tortillas or crepes.
How do I keep the bananas from browning?
A squeeze of lemon juice on the banana helps, especially if you’re prepping ahead.
Is this safe for toddlers?
Totally! Just skip any hard toppings like nuts or pretzels and cut into small, safe pieces.
Can I use crepes instead of tortillas?
Absolutely! Crepes make a softer, more dessert-like banana sushi.
What spreads are best for nut-free versions?
Try sunflower seed butter, oat spread, coconut yogurt, or even halva paste for a fun twist.
Can I make this dairy-free?
Yes! Use plant-based yogurt and dairy-free chocolate or nut butters.
What if my banana is too soft?
Use slightly underripe bananas—they slice and roll better.
How long will these keep?
Best eaten within a few hours. They’ll last 1 day in the fridge, but bananas may darken.
Can I serve this as dessert?
Yes! Add whipped cream, drizzle with chocolate, and sprinkle with sprinkles for a fun dessert version.
Conclusion
Banana sushi is proof that snack time doesn’t have to be boring. With just a few pantry staples and some ripe bananas, you can whip up a tray of fun, flavor-packed bites that everyone—kids and adults alike—will love. Whether you go sweet, salty, or fruity, there’s a banana sushi flavor for every craving.
Try all three versions, mix and match toppings, and make it your own. And if you do, don’t forget to snap a pic and tag me—can’t wait to see your rolls!
Print
3 Flavors of Banana Sushi
- Total Time: 20 min
Description
Using bananas as the “sushi roll,” each version is coated in a different spread and topping combo, then sliced into fun, sushi-style bites!
Ingredients
-
2 ripe bananas (not overly soft)
-
3 tbsp peanut butter, Nutella, or other spread of choice
-
Toppings for each flavor (see below)
Instructions
1️⃣ Classic PB&Choco-Crunch
-
Spread: Peanut butter
-
Topping: Crushed chocolate chips or mini chocolate chips
-
Optional drizzle: Honey
Instructions:
Spread peanut butter over banana. Roll in crushed chocolate chips. Slice into rounds.
2️⃣ Tropical Delight
-
Spread: Greek yogurt (plain or vanilla)
-
Topping: Toasted coconut flakes and chopped dried pineapple or mango
Instructions:
Coat banana in yogurt. Roll in coconut and fruit. Freeze 10–15 minutes for easier slicing, then cut into rounds.
3️⃣ Nutella Berry Crunch
-
Spread: Nutella or chocolate hazelnut spread
-
Topping: Crushed freeze-dried strawberries or raspberries
Instructions:
Spread Nutella on banana. Roll in crushed freeze-dried berries. Slice and serve!
Notes
-
Slice each “sushi” banana into ½–1 inch rounds before serving.
-
Serve immediately or chill for 15 minutes to firm up.
-
Great as a DIY snack activity for kids!
- Prep Time: 10 min