1. Introduction
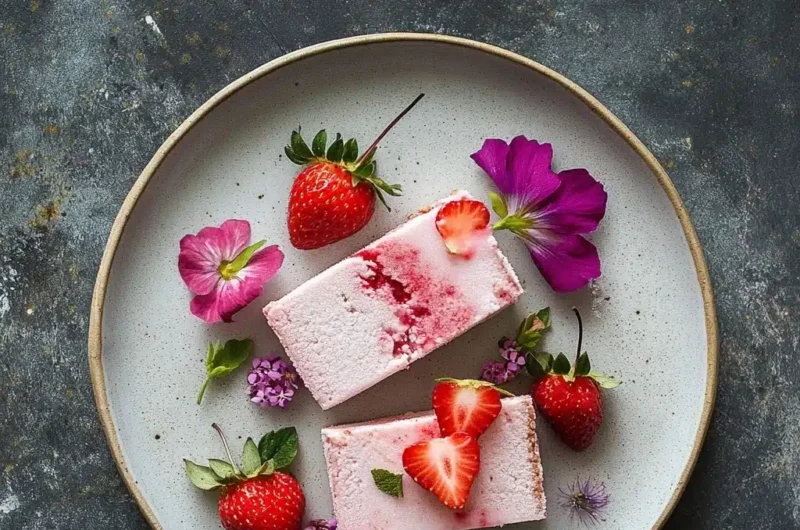
Strawberry Cheesecake Paletas are a delightful fusion of two beloved desserts: the creamy richness of cheesecake and the refreshing chill of traditional Mexican paletas (ice pops). These frozen treats have gained immense popularity as a summer dessert for their unique flavor, beautiful presentation, and versatility.
Paletas are a cornerstone of Mexican culinary culture, loved for their natural ingredients and creative flavor combinations. The addition of a cheesecake layer elevates these humble ice pops into a gourmet dessert, perfect for both casual enjoyment and special occasions.
Why make them at home? Crafting your own paletas offers endless possibilities to customize flavors, control ingredients, and impress family and friends with your creativity.
2. Ingredients Overview
The magic of Strawberry Cheesecake Paletas lies in their simple yet rich ingredients. Here’s what you need:
- Fresh or Frozen Strawberries: The star of the show! Fresh strawberries are ideal for a natural flavor, but frozen ones work just as well, especially when strawberries are out of season.
- Cream Cheese: Adds the classic cheesecake flavor and creaminess to the paletas.
- Heavy Cream or Milk: For a smooth and luscious texture. Use heavy cream for richer paletas or milk for a lighter version.
- Sweetener: Choose your preferred option—granulated sugar, honey, agave syrup, or even a natural alternative like stevia.
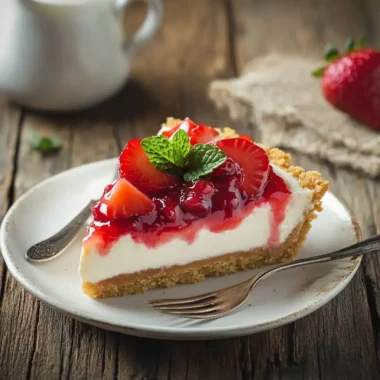
- Crushed Graham Crackers or Crust: Optional, but it adds a delightful crunch and authenticity to the cheesecake layer.
- Optional Add-ins: Vanilla extract, lemon zest, or even a pinch of cinnamon can enhance the flavor.
Tip: For a dairy-free version, use coconut cream or almond milk and dairy-free cream cheese.
3. Benefits of Making Paletas at Home
Making Strawberry Cheesecake Paletas at home isn’t just about the final product—it’s about the journey and benefits that come with it:
- Control Over Ingredients: Avoid artificial flavors, colors, and preservatives. Opt for organic strawberries and natural sweeteners for a healthier treat.
- Cost-Effectiveness: Store-bought gourmet paletas can be pricey. Homemade versions save money while offering better quality.
- Customization: Whether you prefer extra strawberries, a thicker cheesecake layer, or unique add-ins like chocolate chips, homemade paletas cater to your taste.
Plus, the joy of creating something delicious from scratch adds an extra layer of satisfaction!
4. Equipment Needed
Before you start, gather the essential tools to make the process smooth and enjoyable:
- Paleta Molds: Available in various shapes and sizes, silicone molds are recommended for easy unmolding.
- Popsicle Sticks: Wooden sticks work best and lend an authentic touch.
- Blender or Food Processor: For blending the strawberry mixture and cheesecake base into smooth layers.
- Measuring Cups and Spoons: Precision matters for balancing flavors.
- Mixing Bowls: Keep separate bowls for the strawberry and cheesecake mixtures.
Pro Tip: If you don’t have dedicated molds, you can use small paper cups or ice cube trays as alternatives.
5. Preparing the Strawberry Mixture
The strawberry layer is where the fruity essence of this dessert shines. Here’s how to prepare it:
- Choose Your Strawberries: Wash and hull fresh strawberries or thaw frozen ones if you’re using those.
- Blend to Perfection: Combine the strawberries with your chosen sweetener in a blender or food processor. Adjust the sweetness based on the natural tartness of the fruit.
- Optional Chunky Texture: For a rustic feel, blend part of the strawberries into a puree and chop the rest into small chunks. This adds bursts of fruity goodness in every bite.
- Taste and Adjust: Before finalizing the mixture, taste it! Add more sweetener or a splash of lemon juice if needed.
Once the strawberry mixture is ready, set it aside. It’s now time to focus on the creamy cheesecake base that will complement the vibrant strawberry layer.
6. Creating the Cheesecake Base
The cheesecake layer is the heart of the Strawberry Cheesecake Paleta. It provides the creamy, indulgent texture and tangy flavor that balances the fresh fruitiness of strawberries. Follow these steps to make the perfect cheesecake base:
- Gather Ingredients: You’ll need cream cheese, heavy cream (or milk for a lighter texture), sweetener, and optional vanilla extract for added flavor.
- Soften the Cream Cheese: Let the cream cheese sit at room temperature for about 15–20 minutes. This ensures it blends smoothly without lumps.
- Blend Until Creamy: In a blender or food processor, combine the cream cheese, heavy cream, and sweetener. Blend until the mixture is silky smooth.
- Pro Tip: Start with less sweetener and adjust based on your taste preference.
- Optional Enhancements:
- Add vanilla extract or lemon zest for a subtle flavor boost.
- Mix in a small amount of yogurt for tanginess, if desired.
Once blended, transfer the cheesecake mixture into a separate bowl and keep it chilled until you’re ready to assemble the paletas.
7. Layering the Paletas
The layering process gives these paletas their iconic look and flavor contrast. Here’s how to layer them perfectly:
- Start with the Strawberry Mixture:
- Pour a thin layer of the strawberry puree into the bottom of the mold (about ⅓ of the mold’s height).
- Optional: Add small chunks of fresh strawberries for texture.
- Freeze the First Layer:
- Place the molds in the freezer for about 15–20 minutes to set the strawberry layer slightly. This prevents the layers from mixing.
- Add the Cheesecake Base:
- Gently pour or spoon the cheesecake mixture over the frozen strawberry layer. Fill the molds up to about ⅔ of their height.
- Optional: Sprinkle crushed graham crackers or cookie crumbs for added texture and a “crust” feel.
- Repeat or Customize:
- For a more complex look, you can alternate layers or swirl the two mixtures together for a marbled effect.
Pro Tip: Use a small spoon or a piping bag to control the layering process for clean, defined layers.
8. Freezing Tips for Best Results
The freezing stage is critical for achieving the ideal texture and flavor in your paletas. Follow these tips to freeze them perfectly:
- Insert the Sticks:
- After adding all the layers, place the popsicle sticks into the molds. If the mixture isn’t thick enough to hold the sticks upright, cover the mold with foil and poke the sticks through for stability.
- Freeze for the Right Amount of Time:
- Allow the paletas to freeze completely, which typically takes 6–8 hours. For best results, freeze them overnight.
- Avoid Ice Crystals:
- Cover the molds with plastic wrap or a lid to minimize exposure to air and prevent ice crystal formation.
- Ensure the freezer is set to the proper temperature (0°F or -18°C).
- Do Not Rush the Process:
- Resist the urge to check the paletas frequently, as opening the freezer repeatedly can affect the freezing process.
Pro Tip: If you’re in a hurry, consider using a quick-freeze popsicle maker, which reduces freezing time significantly.
9. Unmolding the Paletas
The final step is removing your paletas from the molds without breaking or damaging them. Here’s how:
- Warm the Molds Gently:
- Run warm (not hot) water over the outside of the molds for about 10–15 seconds.
- Alternatively, dip the mold briefly into a shallow pan of warm water.
- Loosen the Paletas:
- Gently wiggle the sticks back and forth to loosen the paletas. Avoid pulling too hard, as this can break the popsicle.
- Serve Immediately or Store:
- Once unmolded, serve your Strawberry Cheesecake Paletas immediately for the freshest taste.
- If you’re saving them for later, wrap each paleta individually in plastic wrap or parchment paper and store them in an airtight container in the freezer.
Pro Tip: To keep the paletas from sticking together during storage, layer parchment paper between them.
10. Variations of Strawberry Cheesecake Paletas
While the classic Strawberry Cheesecake Paleta is delicious on its own, experimenting with variations can take your paletas to the next level. Here are some creative twists to try:
- Chocolate Drizzle or Chips:
- Drizzle melted chocolate over the finished paletas for a decadent touch.
- Sprinkle mini chocolate chips into the cheesecake layer for a fun surprise.
- Fruit Infusions:
- Replace or combine strawberries with other fruits like mango, raspberry, or blueberry to create a mixed-fruit paleta.
- Layer strawberry puree with mango or pineapple for a tropical twist.
- Nutty Crunch:
- Add chopped nuts (almonds, pistachios, or pecans) to the layers or sprinkle them on top of the paletas after unmolding.
- Marbled or Swirled Paletas:
- Use a skewer or toothpick to gently swirl the strawberry and cheesecake layers together before freezing for a marbled effect.
- Specialty Flavors:
- Add a touch of coffee or caramel to the cheesecake base for a bold flavor combination.
- Infuse the strawberry layer with fresh mint leaves or basil for a sophisticated taste.
Pro Tip: Let your creativity shine by mixing flavors and textures, and don’t hesitate to experiment with seasonal fruits or your favorite dessert inspirations.
11. Serving Suggestions
Presentation matters, especially if you’re serving these paletas for a party or special occasion. Here are some fun ways to serve them:
- On a Dessert Platter:
- Arrange the paletas on a platter lined with crushed ice and garnish with fresh strawberries and mint leaves for a beautiful display.
- Dipped in Chocolate:
- Dip the top half of the paletas in melted chocolate and immediately sprinkle them with crushed nuts, shredded coconut, or sprinkles.
- Pairing with Other Treats:
- Serve alongside other summer desserts like fruit salads, mini cheesecakes, or tropical drinks.
- Custom Wrapping:
- Wrap individual paletas in colorful wax paper or parchment paper and tie them with twine for a rustic, gift-ready look.
- Create a Paleta Bar:
- Offer guests a variety of toppings (e.g., crushed cookies, syrups, fruit chunks) so they can customize their paletas to their liking.
Pro Tip: For a party setting, label each paleta flavor with small tags to help guests choose their favorite.
12. Storage and Shelf Life
Homemade paletas can be stored for weeks while maintaining their freshness, provided they are stored correctly. Here’s how to ensure your Strawberry Cheesecake Paletas last:
- Individual Wrapping:
- Wrap each paleta in plastic wrap or parchment paper to prevent them from sticking together.
- For an eco-friendly option, use reusable silicone bags.
- Airtight Containers:
- Place the wrapped paletas in a freezer-safe airtight container to protect them from freezer burn and preserve their flavor.
- Shelf Life:
- Homemade paletas typically last 2–4 weeks in the freezer without significant loss of flavor or texture. For the best experience, consume them within the first two weeks.
- Avoid Freezer Odors:
- Store paletas away from foods with strong odors (like onions or garlic) to prevent them from absorbing unwanted flavors.
- Quick Tips for Re-freezing:
- If a paleta begins to soften after removal from the freezer, avoid re-freezing it, as this can impact its texture and cause ice crystals to form.
Pro Tip: Label the storage container with the preparation date so you can track how fresh your paletas are.
13. Health Considerations
Strawberry Cheesecake Paletas can be made indulgent or health-conscious depending on your preferences. Here are some tips to keep them nutritious while maintaining their deliciousness:
- Nutritional Benefits of Fresh Ingredients:
- Using fresh strawberries provides a natural source of antioxidants, vitamins, and fiber.
- Avoid artificial flavorings or colors to keep the paletas wholesome.
- Reducing Sugar Content:
- Substitute granulated sugar with natural sweeteners like honey, maple syrup, or stevia.
- Use ripe, in-season strawberries for natural sweetness, reducing the need for added sugar.
- Dairy-Free Alternatives:
- Swap cream cheese with plant-based options like cashew cream cheese or coconut-based cream cheese.
- Use coconut milk or almond milk instead of heavy cream for a vegan-friendly version.
- Portion Control:
- Paletas are naturally portioned as single servings, making it easier to enjoy them as a treat without overindulging.
- Low-Calorie Variations:
- Skip the graham cracker crust or use whole-grain, sugar-free crackers.
- Opt for low-fat cream cheese and milk if you prefer a lighter option.
Pro Tip: Label your paletas as “low-sugar” or “dairy-free” at parties to cater to guests with dietary restrictions.
14. Paletas as a Party Dessert
Strawberry Cheesecake Paletas are a perfect dessert for gatherings, thanks to their vibrant appearance and refreshing flavor. Here’s how to make them the highlight of your event:
- Customizing for Parties:
- Use themed molds (stars, hearts, etc.) to match the event.
- Create multiple flavor variations, such as strawberry-mango or chocolate-strawberry, to offer guests options.
- Batch Preparation:
- Make the paletas in advance to save time on the day of the event.
- Double or triple the recipe for large gatherings.
- Serving as a Paleta Bar:
- Set up a DIY paleta bar where guests can dip their paletas in chocolate or sprinkle them with toppings like nuts, crushed cookies, or candies.
- Provide toppings that cater to a variety of tastes, including healthy options like granola or dried fruit.
- Kid-Friendly Ideas:
- Add edible decorations like sprinkles or edible glitter to make the paletas more appealing to children.
- Offer smaller-sized paletas for little hands.
- Festive Packaging:
- Wrap the paletas in bright-colored paper and display them in a cooler filled with crushed ice to keep them fresh.
Pro Tip: Use small chalkboard signs to label each flavor at the paleta bar or dessert station.
15. FAQs
Here are answers to common questions about making and serving Strawberry Cheesecake Paletas:
- Can I use dairy-free alternatives?
- Absolutely! Use plant-based cream cheese and coconut milk or almond milk to create a dairy-free version.
- How can I make them less sweet?
- Reduce the amount of added sweetener and rely on the natural sweetness of the strawberries. You can also try using a tart fruit like raspberries for a less sugary taste.
- Can I add graham crackers?
- Yes! Crushed graham crackers make an excellent addition to the cheesecake layer or as a topping. Just ensure they’re finely crushed for smooth layering.
- How do I prevent ice crystals?
- Blend the mixtures thoroughly to avoid air pockets. Cover the molds with plastic wrap before freezing to minimize air exposure.
- What if I don’t have molds?
- No molds? No problem! Use small paper cups or silicone muffin tins as substitutes. Insert popsicle sticks once the mixture begins to set.
- Can I use fresh cream instead of heavy cream?
- Yes, fresh cream works well, but the texture may be slightly lighter. For a richer consistency, stick with heavy cream.
- How long do they take to freeze?
- Paletas typically take 6–8 hours to freeze completely. Freezing them overnight is ideal for the best texture.
- Can I use frozen strawberries instead of fresh?
- Absolutely! Frozen strawberries are a great alternative, especially when fresh ones are out of season. Just thaw them before blending.
Pro Tip: Always experiment with small batches to find the perfect balance of sweetness, creaminess, and texture.


