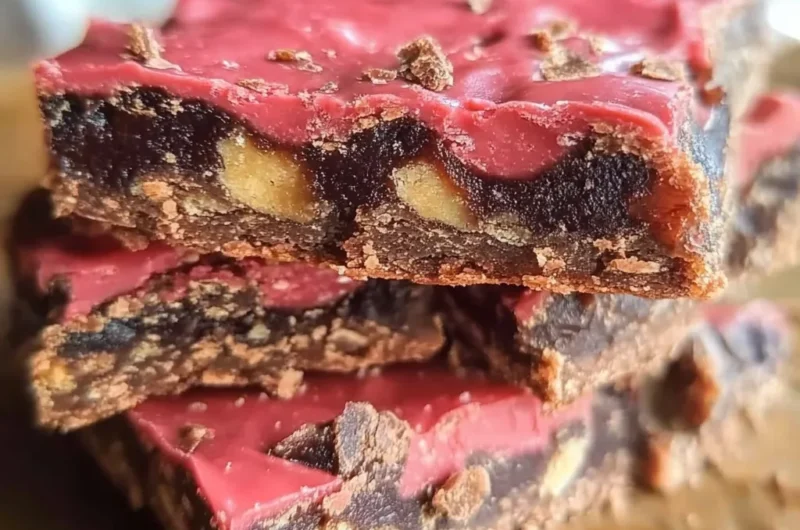
Cherry Mash Bars are not just desserts; they are a delightful testament to the harmony of chocolate, cherry, and nuts. This incredible treat will captivate your senses and offer a perfect indulgence for any occasion. The combination of flavors and textures makes Cherry Mash Bars a standout dessert that evokes fond memories of childhood sweets or special gatherings. With a rich chocolate base, cherry filling, and topped with a luscious layer of chocolate, these bars deliver an amazing experience in every bite.
If you are a dessert lover or a chocolate aficionado, you will appreciate the ingenious fusion of flavors that make Cherry Mash Bars irresistible. Not only do they taste divine, but they also present beautifully, making them perfect for potlucks, parties, or simply as a sweet treat at home. The intensity of the cherry flavor perfectly complements the richness of the chocolate, creating a balance that is simply to die for. Through this guide, you will discover why this recipe stands out, how to prepare it, and essential serving tips to impress your friends and family.
Let’s take a closer look at what makes Cherry Mash Bars a must-try recipe for everyone.
Why You’ll Love This Recipe
Cherry Mash Bars will quickly become a favorite for numerous reasons. The wonderful marriage of flavors and textures creates an unforgettable experience. Here’s why you will fall in love with this recipe:
1. Easy Ingredients: Most of the ingredients are staples you already have in your pantry.
2. Quick to Prepare: This recipe comes together in under an hour, making it perfect for last-minute cravings.
3. Perfect for Any Occasion: Whether it’s a birthday, a holiday, or just a treat for yourself, these bars fit right in.
4. Unique Flavor Profile: The combination of chocolate and cherries is both nostalgic and exciting.
5. Visual Appeal: Topped with chocolate and sprinkled with nuts, the bars are as beautiful as they are delicious.
6. Kid-Friendly Recipe: The delightfully sweet flavors are sure to please even the pickiest eaters.
With these amazing qualities, it’s no wonder Cherry Mash Bars are loved by so many. They evoke a sense of joy and bring people together over a shared love for dessert.
Preparation and Cooking Time
Making these Cherry Mash Bars is not only easy but also quick. Here’s how the timing breaks down:
– Preparation Time: 20 minutes
– Cooking Time: 30 minutes
– Cooling Time: 15-20 minutes
In total, you should expect to spend around 1 hour to prepare and enjoy your Cherry Mash Bars. These times may vary slightly, depending on your baking experience and kitchen setup.
Ingredients
– 1 cup all-purpose flour
– 1 cup granulated sugar
– 1/2 cup unsweetened cocoa powder
– 1/2 teaspoon baking soda
– 1/4 teaspoon salt
– 1/2 cup unsalted butter, melted
– 2 large eggs
– 1 teaspoon vanilla extract
– 1 cup cherry pie filling
– 1/2 cup semi-sweet chocolate chips
– 1 cup chopped nuts (e.g., pecans or walnuts, optional)
– 1/2 cup powdered sugar (for dusting)
Step-by-Step Instructions
Creating Cherry Mash Bars is both fun and straightforward. Follow these steps to whip up your delicious bars:
1. Preheat the Oven: Begin by preheating your oven to 350°F (175°C). Grease a 9×9-inch baking dish or line it with parchment paper.
2. Mix Dry Ingredients: In a large mixing bowl, whisk together the flour, granulated sugar, cocoa powder, baking soda, and salt until well combined.
3. Combine Wet Ingredients: In another bowl, mix the melted butter, eggs, and vanilla extract until smooth.
4. Combine Mixtures: Gradually add the wet mixture to the dry ingredients, stirring until a thick batter forms.
5. Spread the Batter: Pour half of the chocolate batter into the prepared baking dish and spread it evenly.
6. Add Cherry Filling: Spoon the cherry pie filling over the chocolate batter, spreading it gently to cover as much as possible.
7. Top with Remaining Batter: Carefully dollop the remaining chocolate batter over the cherry filling. Do not worry if the filling peeks through; it adds to the rustic look.
8. Sprinkle with Nuts: If using, sprinkle the chopped nuts on top of the batter and gently press them in.
9. Bake: Place the baking dish in the preheated oven and bake for about 25-30 minutes or until a toothpick inserted comes out clean.
10. Cool and Dust: Remove from the oven and allow the bars to cool in the pan. Once cooled, dust with powdered sugar before cutting into squares.
How to Serve
Serving Cherry Mash Bars thoughtfully can elevate your dessert experience. Here are some tips to make a lasting impression:
1. Presentation: Cut the bars into equal squares and arrange them on a decorative platter.
2. Accompaniments: Pair with a scoop of vanilla ice cream or whipped cream for an extra treat.
3. Beverage Pairing: Serve alongside coffee or a refreshing cherry soda for a delightful pairing.
4. Garnish: Consider garnishing with fresh cherries or chocolate shavings for added flair.
5. Storage: Keep any leftovers in an airtight container at room temperature for up to a week, maintaining their delicious flavor and texture.
By focusing on how you serve Cherry Mash Bars, you enhance the overall experience, making moments spent with loved ones even more special. Embrace these simple touches to create lasting memories around this incredible dessert.
Additional Tips
– Use Fresh Ingredients: For the best flavor, choose the freshest cherries you can find if you opt for cherry pie filling made from scratch. This will elevate the overall taste of your Cherry Mash Bars significantly.
– Measure Accurately: Proper measuring of ingredients ensures that your bars come out with the right texture and consistency. Consider using a kitchen scale for precise measurements.
– Let Them Cool Completely: Allow the Cherry Mash Bars to cool completely before cutting. This will help maintain their shape and make them easier to slice.
– Customize Toppings: Feel free to add a drizzle of white chocolate or even a sprinkle of sea salt on top for an extra flavor dimension.
– Taste Test: Before serving, conduct a taste test with close friends or family to gauge if any adjustments need to be made to the sweetness or texture.
Recipe Variation
There are numerous ways to customize your Cherry Mash Bars to suit your preferences. Here are some ideas:
1. Cheesecake Layer: Add a layer of cream cheese mixed with powdered sugar and vanilla over the cherry filling for a cheesecake twist.
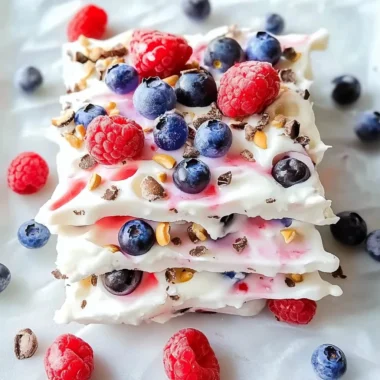
2. Different Fruit Options: Replace cherries with raspberries, blueberries, or mixed berries for a delightful change in flavor.
3. Vegan Version: Substitute eggs with flax eggs and use dairy-free chocolate chips and butter to make a vegan version of these bars.
4. Chocolate Variations: Experiment with dark chocolate or white chocolate to change the flavor profile slightly. Each offers a distinctive taste experience.
5. Add Spices: Sprinkle a hint of cinnamon or nutmeg into the chocolate layer to add warmth and depth to the flavor.
Freezing and Storage
To ensure your Cherry Mash Bars maintain their deliciousness, proper storage is vital. Here are some tips:
– Cooling: Allow the bars to cool completely at room temperature.
– Storage: Place the bars in an airtight container. They can stay at room temperature for up to one week or in the refrigerator for up to two weeks.
– Freezing: To freeze, wrap individual slices tightly in plastic wrap and then in aluminum foil. They will keep well in the freezer for up to three months.
– Thawing: When ready to enjoy, let the bars thaw at room temperature or place them in the refrigerator overnight.
Special Equipment
Utilizing the right equipment can make the process of creating Cherry Mash Bars smoother. Here are some necessities:
– Mixing Bowls: Use at least two separate bowls for mixing dry and wet ingredients.
– Whisk: A good whisk or electric mixer will ensure your ingredients are well combined.
– Spatula: A rubber spatula will help you scrape down the sides of the bowl for thorough mixing.
– 9×9-inch Baking Pan: This is essential for the right baking size to achieve the desired bar thickness.
– Cooling Rack: A cooling rack allows the bars to cool evenly, especially if you’re using the same pan for multiple batches.
Frequently Asked Questions
Can I use fresh cherries instead of cherry pie filling?
Yes, fresh cherries can be a great substitute! Just pit and chop them, and you may want to add a bit of sugar to enhance their sweetness.
What if I don’t have cocoa powder?
You can substitute an equal amount of carob powder or use a chocolate cake mix as a shortcut.
Are these bars gluten-free?
To make gluten-free Cherry Mash Bars, substitute the all-purpose flour with a gluten-free blend. This adjustment will cater to those with gluten sensitivities.
How can I adjust the sweetness of the bars?
If you prefer less sweetness, reduce the sugar in the recipe lightly or use dark chocolate chips with a higher cocoa content.
How do I ensure the bars don’t stick to the pan?
Greasing the pan well with butter or using parchment paper will help prevent sticking.
Conclusion
Cherry Mash Bars are a splendid choice for any dessert lover. These bars combine rich chocolate, sweet cherries, and crunchy nuts to create a dessert that delights both the eyes and taste buds. With simple ingredients and easy preparation, you can whip them up in no time. Ideal for celebrations or as everyday treats, they promise not to disappoint. Dive into the magic of cherries and chocolate with this incredible recipe, and watch your friends and family rave about these delicious creations!
Cherry Mash Bars: An Incredible Ultimate Recipe for Chocolate Lovers
- Total Time: 45 minutes
Ingredients
– 1 cup all-purpose flour
– 1 cup granulated sugar
– 1/2 cup unsweetened cocoa powder
– 1/2 teaspoon baking soda
– 1/4 teaspoon salt
– 1/2 cup unsalted butter, melted
– 2 large eggs
– 1 teaspoon vanilla extract
– 1 cup cherry pie filling
– 1/2 cup semi-sweet chocolate chips
– 1 cup chopped nuts (e.g., pecans or walnuts, optional)
– 1/2 cup powdered sugar (for dusting)
Instructions
Creating Cherry Mash Bars is both fun and straightforward. Follow these steps to whip up your delicious bars:
1. Preheat the Oven: Begin by preheating your oven to 350°F (175°C). Grease a 9×9-inch baking dish or line it with parchment paper.
2. Mix Dry Ingredients: In a large mixing bowl, whisk together the flour, granulated sugar, cocoa powder, baking soda, and salt until well combined.
3. Combine Wet Ingredients: In another bowl, mix the melted butter, eggs, and vanilla extract until smooth.
4. Combine Mixtures: Gradually add the wet mixture to the dry ingredients, stirring until a thick batter forms.
5. Spread the Batter: Pour half of the chocolate batter into the prepared baking dish and spread it evenly.
6. Add Cherry Filling: Spoon the cherry pie filling over the chocolate batter, spreading it gently to cover as much as possible.
7. Top with Remaining Batter: Carefully dollop the remaining chocolate batter over the cherry filling. Do not worry if the filling peeks through; it adds to the rustic look.
8. Sprinkle with Nuts: If using, sprinkle the chopped nuts on top of the batter and gently press them in.
9. Bake: Place the baking dish in the preheated oven and bake for about 25-30 minutes or until a toothpick inserted comes out clean.
10. Cool and Dust: Remove from the oven and allow the bars to cool in the pan. Once cooled, dust with powdered sugar before cutting into squares.
- Prep Time: 15 minutes
- Cook Time: 30 minutes
Nutrition
- Serving Size: 12 bars
- Calories: 320 kcal
- Fat: 15g
- Protein: 5g