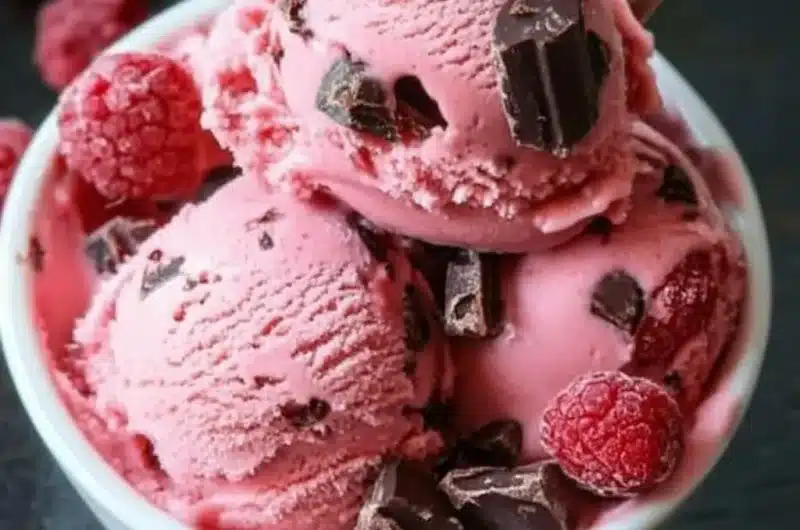
Raspberry Chocolate Chunk Ice Cream is a delightful combination of rich chocolate and tart raspberries. Each spoonful offers a luxurious texture and balanced flavor that is both refreshing and indulgent. This ice cream is not just a summer treat; it’s a year-round dessert guaranteed to please everyone. The mingling of fresh raspberries and chocolate chunks elevates this dessert from simple homemade ice cream to an incredible experience that excites the taste buds.
If you’ve ever savored the thrill of biting into a piece of chocolate while the fresh tang of raspberries dances on your palate, you understand what makes this combination so special. Imagine enjoying a scoop on a hot day, or serving it at a family gathering, and watching faces light up with joy. This Raspberry Chocolate Chunk Ice Cream recipe is crafted to inspire homemade versions that taste better than store-bought options. In this article, we will explore why this recipe is worth your time, how to prepare it, and serving suggestions that will elevate your experience.
Let’s get started on this delectable journey into the world of Raspberry Chocolate Chunk Ice Cream that truly captures the essence of the season!
Why You’ll Love This Recipe
Raspberry Chocolate Chunk Ice Cream is adored for various reasons, which make it a must-try dessert for everyone. Here are some of the standout features that will win you over:
1. Easy to Make: With minimal ingredients and straightforward steps, making ice cream at home is accessible even to novice cooks.
2. Fresh Ingredients: Using fresh raspberries means you control the quality and flavor, making every scoop taste incredible.
3. Unique Flavor Combination: The sweet yet tart raspberries paired with rich chocolate provide a delightful contrast that’s hard to resist.
4. Perfectly Creamy Texture: The ice cream base offers a velvety richness that melts in your mouth, ensuring a satisfying experience.
5. Customizable: Feel free to switch up the ingredients! You can use dark, milk, or white chocolate, or even experiment with other fruits.
6. A Crowd-Pleaser: Whether at birthday parties or casual get-togethers, this flavor combination satisfies varied palates, making it a versatile choice.
These compelling reasons show why making your own Raspberry Chocolate Chunk Ice Cream is a delicious and rewarding activity. It’s decadent without being overly rich, a perfect balance that ensures everyone returns for seconds!
Preparation and Cooking Time
Preparing your own Raspberry Chocolate Chunk Ice Cream takes a little effort, but the results are well worth it. Here’s a breakdown of the time required:
– Preparation Time: 20 minutes
– Chilling Time: 4-6 hours (or overnight)
– Total Time: Approximately 4 to 6 hours, plus additional time for serving
These times provide a good estimate, but keep in mind that the chilling time is essential for the best texture.
Ingredients
– 2 cups fresh raspberries
– 1 cup granulated sugar
– 1 tablespoon lemon juice
– 1 cup heavy cream
– 1 cup whole milk
– 1 teaspoon vanilla extract
– ½ cup dark chocolate chunks (or chips)
– ¼ teaspoon salt
Step-by-Step Instructions
Creating your own Raspberry Chocolate Chunk Ice Cream can be an enjoyable experience when you follow these easy steps:
1. Prepare the Raspberries: In a medium bowl, mash 1 cup of fresh raspberries with a fork. Stir in ½ cup of granulated sugar and lemon juice. Allow it to sit for about 15-20 minutes to let the flavors blend.
2. Make the Ice Cream Base: In a separate bowl, whisk together the heavy cream, whole milk, remaining ½ cup of sugar, vanilla extract, and salt until well combined.
3. Combine Ingredients: Gently fold the mashed raspberry mixture into the cream mixture until evenly distributed. Be careful to keep some small raspberry pieces intact for texture and bursts of flavor.
4. Chill the Mixture: Cover the bowl with plastic wrap and refrigerate the mixture for at least 4 hours, or overnight for maximum flavor.
5. Churn the Ice Cream: Once chilled, pour the mixture into an ice cream maker. Follow the manufacturer’s instructions to churn the ice cream until it thickens, usually around 20-25 minutes.
6. Add Chocolate Chunks: During the last few minutes of churning, add the dark chocolate chunks to the mixture. Allow them to incorporate evenly.
7. Transfer to Container: Scoop the mixture into an airtight container and smooth the top. Press a piece of parchment paper against the surface to minimize ice crystals forming.
8. Freeze: Freeze for at least 2-4 hours or until firm.
9. Serve: Once set, allow the ice cream to sit at room temperature for a few minutes before scooping, making it easier to serve.
Following these steps will lead you to a homemade Raspberry Chocolate Chunk Ice Cream that exceeds your wildest expectations!
How to Serve
To create the perfect serving experience for your Raspberry Chocolate Chunk Ice Cream, consider these tips:
1. Presentation: Serve the ice cream in elegant bowls or cones. Add a sprig of mint or a few fresh raspberries on top for visual appeal.
2. Add Toppings: Consider drizzling with chocolate sauce, or sprinkling crushed nuts or graham crackers for texture and additional flavor.
3. Pair with Desserts: This ice cream pairs wonderfully with brownies, pie, or crêpes, making it a versatile addition to your dessert table.
4. Beverage Pairing: Serve with a refreshing iced tea or a glass of dessert wine to enhance your dining experience.
5. Festive Touches: For special occasions, you can add a scoop atop a slice of cake to create a yummy dessert layering that guests will love.
By considering these serving suggestions, you’ll ensure that your Raspberry Chocolate Chunk Ice Cream not only tastes fantastic but also looks stunning on your table. Enjoy sharing this homemade treat with friends and family—it’s bound to make lasting memories!
Additional Tips
– Use Fresh Raspberries: For the best flavor, opt for ripe, plump raspberries. They’ll enhance the overall taste of your ice cream.
– Experiment with Sweetness: Taste the raspberry mixture before adding it to the cream base. You can adjust the sugar based on the tartness of the raspberries.
– Try Using Different Chocolates: While dark chocolate chunks are recommended, feel free to substitute with milk or white chocolate for a unique twist.
Recipe Variation
Feel free to tailor this Raspberry Chocolate Chunk Ice Cream recipe to suit your taste preferences:
1. Berry Blend: Add in blueberries or strawberries alongside raspberries for a mixed berry flavor.
2. Chocolate Swirl: Incorporate a chocolate fudge swirl for an extra chocolatey experience.
3. Nutty Crunch: Add toasted almond slivers or chopped hazelnuts for a delightful crunch in each bite.
Freezing and Storage
– Storage: Store your Raspberry Chocolate Chunk Ice Cream in an airtight container. It will maintain its quality for about 2-3 weeks.
– Freezing: For best texture, allow the ice cream to soften for about 5 minutes before scooping. This will make serving easier.
Special Equipment
You will need a few essential tools to make this ice cream successfully:
– Ice Cream Maker: Essential for churning the mixture to achieve a creamy texture.
– Mixing Bowls: Use these for combining ingredients and preparing raspberry mixes.
– Whisk: Handy for mixing the cream and milk base together smoothly.
– Rubber Spatula: Ideal for folding the raspberry mixture into the cream without overmixing.
Frequently Asked Questions
Can I use frozen raspberries instead of fresh?
Yes, but make sure to thaw and drain them well before use to prevent excess liquid in the ice cream mixture.
How long does it take to churn the ice cream?
Typically, it should take about 20-25 minutes to churn in an ice cream maker.
Is this recipe suitable for those with dairy allergies?
You can create a dairy-free version by using coconut cream or any other non-dairy milk and a dairy-free chocolate alternative.
Can I skip the churning step?
Churning is necessary to create a creamy texture. However, you can place the mixture in the freezer and stir it every 30 minutes until it reaches the desired consistency for a no-churn approach.
What can I do if my ice cream is too hard?
Allow it to sit at room temperature for a few minutes before scooping. This helps soften the ice cream for easier serving.
Conclusion
Making Raspberry Chocolate Chunk Ice Cream from scratch is not just rewarding; it’s an enjoyable culinary adventure. With vibrant flavors, creamy texture, and delightful bursts of chocolate, this dessert is sure to become a favorite. Whether you’re indulging on a summer afternoon or impressing guests at a dinner party, this homemade ice cream brings joy and satisfaction. Now that you have the knowledge and steps, it’s time to dive in and create your own batch!

Raspberry Chocolate Chunk Ice Cream: An Amazing Ultimate Recipe
- Total Time: 45 minutes
Ingredients
– 2 cups fresh raspberries
– 1 cup granulated sugar
– 1 tablespoon lemon juice
– 1 cup heavy cream
– 1 cup whole milk
– 1 teaspoon vanilla extract
– ½ cup dark chocolate chunks (or chips)
– ¼ teaspoon salt
Instructions
Creating your own Raspberry Chocolate Chunk Ice Cream can be an enjoyable experience when you follow these easy steps:
1. Prepare the Raspberries: In a medium bowl, mash 1 cup of fresh raspberries with a fork. Stir in ½ cup of granulated sugar and lemon juice. Allow it to sit for about 15-20 minutes to let the flavors blend.
2. Make the Ice Cream Base: In a separate bowl, whisk together the heavy cream, whole milk, remaining ½ cup of sugar, vanilla extract, and salt until well combined.
3. Combine Ingredients: Gently fold the mashed raspberry mixture into the cream mixture until evenly distributed. Be careful to keep some small raspberry pieces intact for texture and bursts of flavor.
4. Chill the Mixture: Cover the bowl with plastic wrap and refrigerate the mixture for at least 4 hours, or overnight for maximum flavor.
5. Churn the Ice Cream: Once chilled, pour the mixture into an ice cream maker. Follow the manufacturer’s instructions to churn the ice cream until it thickens, usually around 20-25 minutes.
6. Add Chocolate Chunks: During the last few minutes of churning, add the dark chocolate chunks to the mixture. Allow them to incorporate evenly.
7. Transfer to Container: Scoop the mixture into an airtight container and smooth the top. Press a piece of parchment paper against the surface to minimize ice crystals forming.
8. Freeze: Freeze for at least 2-4 hours or until firm.
9. Serve: Once set, allow the ice cream to sit at room temperature for a few minutes before scooping, making it easier to serve.
Following these steps will lead you to a homemade Raspberry Chocolate Chunk Ice Cream that exceeds your wildest expectations!
- Prep Time: 20 minutes
- Cook Time: 25 minutes
Nutrition
- Serving Size: 8
- Calories: 250 kcal
- Fat: 15g
- Protein: 3g