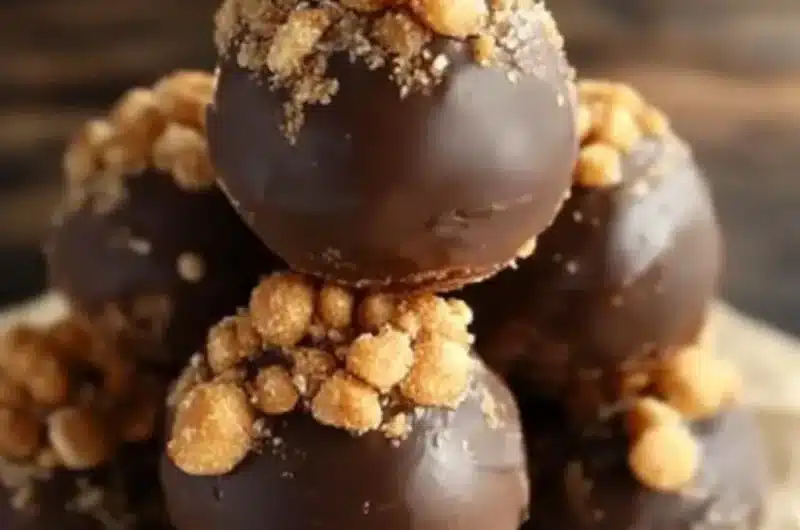
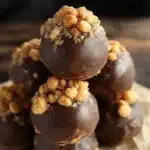
Butterfinger Balls are a delicious treat that satisfies any chocolate lover’s cravings. These delightful bites combine creamy peanut butter, smooth chocolate, and the signature crunch of Butterfinger candy bars. The result is an amazing treat that melts in your mouth, offering a blend of flavors and textures that keep you coming back for more. This recipe is perfect for gatherings, holidays, or just a little indulgence during movie nights.
If you’ve ever had the joy of tasting a Butterfinger Ball, you understand how addictive they can be. The creamy and crunchy mixture captures the essence of comfort food while packing a punch of rich chocolate. Plus, they’re incredibly easy to make, which adds to their charm. In this article, you will discover everything you need to know about making these incredible treats, including why they are a crowd favorite, preparation and cooking time, essential ingredients, and step-by-step instructions to get you started.
Get ready to elevate your dessert game with these wonderful Butterfinger Balls that are sure to impress your family and friends!
Why You’ll Love This Recipe
Butterfinger Balls are not only scrumptious; there are countless reasons to love this recipe:
1. Simple to Make: With easy-to-follow instructions, you don’t need any advanced baking skills.
2. No Baking Required: This recipe doesn’t involve any baking, making it ideal for quick treats.
3. Irresistibly Delicious: The combination of peanut butter and chocolate is always a hit.
4. Perfect for Sharing: Whether it’s a party, holiday gathering, or just a treat for your family, Butterfinger Balls are sure to please.
5. Customizable Options: Feel free to play around with different toppings or coatings based on your preferences.
6. Great for Any Occasion: From casual get-togethers to festive occasions, these balls fit right in.
With their delightful flavor and lovely presentation, Butterfinger Balls are a fantastic addition to your dessert repertoire. You’ll find that each bite brings a wonderful experience you won’t forget!
Preparation and Cooking Time
Preparing these iconic Butterfinger Balls will take about 30 minutes in total. Here’s a breakdown of the time needed for this delightful treat:
– Preparation Time: 20 minutes
– Chilling Time: 10-15 minutes
These times can vary slightly, depending on your kitchen setup, but this estimate should help guide you.
Ingredients
– 1 cup creamy peanut butter
– 1 cup powdered sugar
– 1 cup crushed Butterfinger candy bars (about 4-5 fun-sized bars)
– 2 cups chocolate chips (milk or semi-sweet)
– 1 tablespoon coconut oil (optional, for a smoother chocolate coating)
Step-by-Step Instructions
Creating the amazing Butterfinger Balls can be easy if you follow these steps:
1. Mix Peanut Butter and Sugar: In a large mixing bowl, combine the creamy peanut butter and powdered sugar. Stir until well combined and smooth.
2. Add Butterfinger Pieces: Fold in the crushed Butterfinger pieces, mixing evenly throughout the peanut butter mixture.
3. Form Balls: Use your hands or a small cookie scoop to form small balls, about 1 inch in diameter. Place them on a parchment-lined baking sheet.
4. Chill the Balls: Place the baking sheet in the refrigerator and let the balls chill for about 10-15 minutes until they firm up.
5. Melt Chocolate: While the balls are chilling, melt the chocolate chips in a microwave-safe bowl. Heat in 30-second intervals, stirring after each, until completely smooth. Add coconut oil if you want a smoother finish.
6. Coat the Balls: Once the peanut butter balls have chilled, dip each one into the melted chocolate using a fork. Make sure they’re fully coated, then let any excess chocolate drip off.
7. Set on Baking Sheet: Place the coated balls back onto the parchment-lined baking sheet. Repeat until all balls are coated.
8. Chill Again: Refrigerate the coated Butterfinger Balls until the chocolate hardens completely (about 30 minutes).
9. Enjoy: Once the chocolate is set, they are ready to eat!
These steps will guide you in creating Butterfinger Balls that everyone will adore!
How to Serve
When it comes to serving Butterfinger Balls, presentation can heighten the experience. Here are some tips:
1. Use a Decorative Platter: Arrange the balls on a beautiful serving dish to showcase their delightful appearance.
2. Garnishing: Consider drizzling extra melted chocolate on top or sprinkling crushed Butterfinger pieces for a decorative touch.
3. Pair with Beverages: Serve alongside milk, coffee, or hot chocolate for the ultimate indulgent experience.
4. Packaging for Gifting: If you’re giving them as gifts, package the Butterfinger Balls in clear cellophane bags tied with ribbons. They make wonderful homemade gifts!
With these tips in mind, your Butterfinger Balls will be an unforgettable treat for any gathering. Enjoy every delicious bite!
Additional Tips
– Use High-Quality Chocolate: The flavor of your Butterfinger Balls will greatly depend on the quality of chocolate you choose. For the best results, opt for high-quality chocolate chips or bars.
– Ensure Proper Chilling: Allowing your balls to chill sufficiently between steps is key to achieving the perfect texture. Adequate chilling creates a firmer consistency that makes dipping easier.
– Experiment with Toppings: While classic chocolate is delicious, consider using fun toppings. Try drizzling white chocolate or sprinkles for added flair.
Recipe Variation
There are several exciting ways to customize Butterfinger Balls. Here are a few ideas:
1. Crunchy Coating: Instead of coating with chocolate, roll the balls in crushed nuts or graham crackers for an added crunch.
2. Flavored Variations: Experiment with flavored chocolate, such as dark chocolate or white chocolate, to change the flavor profile of your Butterfinger Balls.
3. Add a Little Salt: For a sweet and salty treat, sprinkle a pinch of sea salt on top after coating them in chocolate.
Freezing and Storage
– Storage: Keep your Butterfinger Balls in an airtight container in the refrigerator. They can last up to two weeks.
– Freezing: For longer storage, you can freeze Butterfinger Balls. Place them in a single layer on a parchment-lined baking sheet before transferring to an airtight container. They can be frozen for up to 3 months. Just thaw in the fridge before serving.
Special Equipment
The preparation of Butterfinger Balls requires minimal equipment. Here’s what you will need:
– Mixing bowls
– Baking sheet lined with parchment paper
– Microwave-safe bowl for melting chocolate
– Fork or chocolate dipping tools for coating
Frequently Asked Questions
Can I use crunchy peanut butter instead of creamy?
Yes, using crunchy peanut butter adds a delightful texture to the Butterfinger Balls. It enhances the overall experience.
What can I substitute for powdered sugar?
If you don’t have powdered sugar, you can blend regular granulated sugar in a blender or food processor until it reaches a fine powder consistency.
Can I make these gluten-free?
Absolutely! Simply ensure that the Butterfinger candy bars are gluten-free, and you can enjoy this treat without worry.
How should I serve these?
Butterfinger Balls are delicious on their own, but consider serving them alongside coffee or milk for the ultimate experience.
Conclusion
Butterfinger Balls are a delightful, no-bake treat perfect for any occasion. Their rich peanut butter, chocolate, and crunchy combinations make them a favorite for gatherings or for personal indulgence. These easy-to-make bites will leave your guests asking for seconds, making them a must-have in your dessert arsenal. Plus, with the ability to customize and adjust the recipe, you can make these treats your own. So gather your ingredients, follow the steps, and enjoy the delightful experience of creating and sharing Butterfinger Balls with your friends and family!
Butterfinger Balls: An Incredible Ultimate Recipe for Chocolate Lovers
- Total Time: 15 minutes
Ingredients
– 1 cup creamy peanut butter
– 1 cup powdered sugar
– 1 cup crushed Butterfinger candy bars (about 4-5 fun-sized bars)
– 2 cups chocolate chips (milk or semi-sweet)
– 1 tablespoon coconut oil (optional, for a smoother chocolate coating)
Instructions
Creating the amazing Butterfinger Balls can be easy if you follow these steps:
1. Mix Peanut Butter and Sugar: In a large mixing bowl, combine the creamy peanut butter and powdered sugar. Stir until well combined and smooth.
2. Add Butterfinger Pieces: Fold in the crushed Butterfinger pieces, mixing evenly throughout the peanut butter mixture.
3. Form Balls: Use your hands or a small cookie scoop to form small balls, about 1 inch in diameter. Place them on a parchment-lined baking sheet.
4. Chill the Balls: Place the baking sheet in the refrigerator and let the balls chill for about 10-15 minutes until they firm up.
5. Melt Chocolate: While the balls are chilling, melt the chocolate chips in a microwave-safe bowl. Heat in 30-second intervals, stirring after each, until completely smooth. Add coconut oil if you want a smoother finish.
6. Coat the Balls: Once the peanut butter balls have chilled, dip each one into the melted chocolate using a fork. Make sure they’re fully coated, then let any excess chocolate drip off.
7. Set on Baking Sheet: Place the coated balls back onto the parchment-lined baking sheet. Repeat until all balls are coated.
8. Chill Again: Refrigerate the coated Butterfinger Balls until the chocolate hardens completely (about 30 minutes).
9. Enjoy: Once the chocolate is set, they are ready to eat!
These steps will guide you in creating Butterfinger Balls that everyone will adore!
- Prep Time: 15 minutes
- Cook Time: 0 minutes
Nutrition
- Serving Size: 24 balls
- Calories: 130 kcal
- Fat: 7g
- Protein: 3g