Homemade Rainbow Sherbet Recipe is an amazing way to cool down and indulge in something sweet. This vibrant dessert is not only visually stunning but also bursting with flavor. Imagine a refreshing combination of fruit flavors blending harmoniously to create a delightful treat. Rainbow sherbet is often a nostalgic reminder of childhood summer days, filled with laughter and sunshine. You can easily recreate this unforgettable experience in your kitchen!
If you’ve ever been to an ice cream shop, you’ve likely encountered the colorful layers of rainbow sherbet. The delightful swirl of flavors—including raspberry, orange, and lime—invites you to take a scoop. Making your own version of this invigorating dessert can be both fun and rewarding. With the right ingredients and a few simple steps, you’ll be ready to serve up smiles to friends and family alike.
This guide will explore why you’ll love this homemade rainbow sherbet recipe, the preparation and cooking times, a complete list of ingredients, and step-by-step instructions. Additionally, you will learn how to serve this vibrant treat elegantly, ensuring that every scoop is a celebration of flavor and color. Together, we will embark on this delightful journey to create a wonderful homemade dessert that is sure to impress everyone around you!
Why You’ll Love This Recipe
The Homemade Rainbow Sherbet Recipe is more than just a dessert; it’s an experience that captivates the senses. With each bite, you’ll appreciate the unique combination of flavors blended into a colorful masterpiece. Here are just a few reasons you’ll fall in love with this recipe:
1. Simple Ingredients – You don’t need any unusual items. Most ingredients are likely already in your pantry or easily accessible.
2. Customization Potential – Adjust the fruit flavors according to your personal preference. Want to add mango or blueberry? Go for it!
3. Perfect for Hot Days – This sherbet is refreshing and perfect for cooling down during hotter months.
4. Family Fun – Making this rainbow sherbet can be a fun activity for the entire family. Get creative with designs or colors!
5. Kids Approved – Kids love the vibrant colors and fruity flavors, making it a hit at birthday parties or summer gatherings.
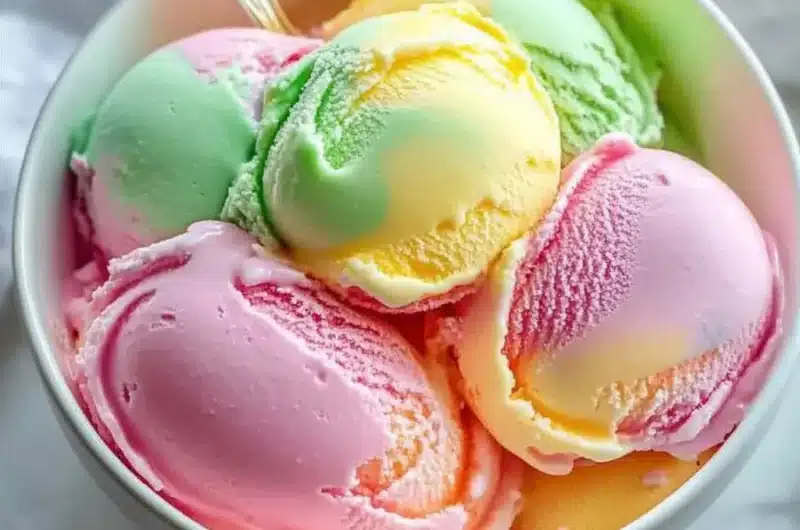
6. Visually Stunning – The beautiful array of colors makes for an appealing dessert that everyone will want to try.
These reasons collectively highlight why this homemade rainbow sherbet is an extraordinary treat worthwhile for anyone to enjoy. Each scoop will bring smiles, laughter, and joy to those you serve it to!
Preparation and Cooking Time
Creating this delicious homemade rainbow sherbet doesn’t take too long. Here’s how the time adds up:
– Preparation Time: 15 minutes
– Chilling Time: 4–6 hours or overnight for best results
– Total Time: Approximately 4 hours and 15 minutes to 6 hours and 15 minutes
Keep in mind that the majority of your time will be spent waiting for the sherbet to freeze thoroughly. It’s worth the wait as the flavors meld together perfectly, leading to an incredible taste experience.
Ingredients
– 2 cups fresh fruit puree (raspberries, oranges, and lime juice)
– 1 cup granulated sugar
– 2 cups whole milk
– 1 cup heavy cream
– 1 teaspoon vanilla extract
– Pinch of salt
– Food coloring (optional, for extra vibrancy)
Step-by-Step Instructions
Creating the Homemade Rainbow Sherbet is straightforward. Follow these easy steps:
1. Prepare the Fruit: Start by making fruit purees. Choose your favorite fruits (raspberries, oranges, limes) and blend them until smooth.
2. Make the Base: In a large bowl, combine the fruit purees, sugar, whole milk, heavy cream, vanilla extract, and salt. Stir well until the sugar dissolves completely.
3. Divide the Base: Separate the mixture evenly into three bowls, one for each flavor.
4. Add Color (optional): If you want extra vibrancy, add a few drops of food coloring to each bowl. Mix well until the desired color is achieved.
5. Layering: In an ice-cream-safe container, start layering the fruit mixtures. Pour one layer, freeze for about an hour, remove and then add the next layer. Repeat this process for all layers until each one has been added.
6. Final Freeze: Once all layers are complete, cover the container and freeze for at least 4 hours or overnight until fully set.
7. Serve: When ready to serve, remove from the freezer and allow it to sit for a minute to soften slightly. Scoop into bowls or cones.
With these steps, you’ll have created a delightful rainbow sherbet that captures the essence of summer and is perfect for any occasion!
How to Serve
Serving Homemade Rainbow Sherbet can be as fun and inviting as making it. Consider these suggestions for a memorable experience:
1. Colorful Bowls: Use bright and cheerful bowls or cups to showcase the rainbow colors.
2. Garnish: Top each scoop with fresh fruit, whipped cream, or even a sprig of mint for added freshness.
3. Presentation: Use a decorative platter or ice cream cone holder for a professional touch.
4. Sundae Bar: Create a DIY sundae bar where guests can add toppings such as sprinkles, nuts, or chocolate sauce to their scoops.
5. Pair with Drinks: Serve alongside tropical juices or lemonade for an invigorating combination.
By putting thought into how you serve the dessert, you enhance the experience and create lasting memories for those enjoying your Homemade Rainbow Sherbet.
Indulge in this delightful creation that is every bit as refreshing as it is eye-catching, inviting everyone to enjoy a colorful treat!
Additional Tips
– Use Fresh Fruits: The quality of your fresh fruit puree will significantly impact the flavor of your homemade rainbow sherbet. Choose ripe, flavorful fruits for the best results.
– Experiment with Flavors: Don’t hesitate to mix and match flavors! You can create tropical variations by adding pineapple or mango.
– Taste and Adjust: Always taste your mixture before freezing. If you prefer it sweeter, add a little more sugar. Likewise, if you want a tangier flavor, add more citrus.
– Blend Well: Ensure your fruit purees are thoroughly blended to avoid any chunks. A smooth puree enhances the creamy texture of the sherbet.
– Serve Cold: For the best eating experience, serve your sherbet straight from the freezer after allowing it to sit out for a few minutes to soften slightly.
Recipe Variation
Feel free to get creative with your homemade rainbow sherbet! Here are some unique variations to consider:
1. Vegan Version: Substitute whole milk and heavy cream with coconut cream and almond milk for a dairy-free treat.
2. Sorbet Style: For a lighter version, omit the dairy entirely for a fruity sorbet that bursts with flavor.
3. Mixed Berry Delight: Combine blueberries, strawberries, and blackberries to create a mixed-berry sherbet that captures the essence of summer.
4. Nutty Addition: Blend in some finely chopped nuts for added texture and crunch.
Freezing and Storage
– Storage: Keep your homemade rainbow sherbet in an airtight container to prevent it from absorbing other flavors in the freezer. Properly stored, it should maintain its quality for up to 2 weeks.
– Freezing: If your sherbet becomes too hard after freezing, let it sit at room temperature for a few minutes before scooping. This will make it easier to serve.
Special Equipment
To create your homemade rainbow sherbet successfully, you will need a few essential tools:
– Blender or food processor for making fruit purees
– Mixing bowls for combining ingredients
– Ice cream-safe container for layering the sherbet
– Whisk or electric mixer for mixing the base thoroughly
Frequently Asked Questions
Can I use frozen fruit?
Absolutely! Frozen fruit can be used as a substitute for fresh fruit. Just ensure to thaw it slightly before blending for the right consistency.
How do I prevent ice crystals from forming?
To minimize ice crystal formation, ensure that your mixture is smooth and well-mixed before freezing. Also, consider using an ice cream maker if you have one, as it churns while freezing.
Is this recipe suitable for kids?
Yes, this homemade rainbow sherbet is a hit with children! Its vibrant colors and fruity flavors make it an exciting treat for any kid-friendly gathering.
Can I make this recipe without dairy?
Yes, you can create a dairy-free version by using plant-based milk and cream alternatives, such as almond milk or coconut cream.
What’s the best way to serve this?
Serving it in colorful bowls or cones enhances the fun experience of enjoying this treat. You can also add toppings like sprinkles or fresh fruit.
Conclusion
Creating a Homemade Rainbow Sherbet Recipe is not only an enjoyable experience but also a delightful way to bring a splash of color and flavor to any occasion. Whether you’re cooling off on a hot summer day or celebrating a special moment, this treat is sure to brighten anyone’s day. The vibrant layers of flavor combined with the nostalgic feeling it invokes make it a cherished addition to any dessert table. Share it with friends and family, and watch their faces light up with delight as they scoop into the colorful masterpiece you’ve created!

Homemade Rainbow Sherbet Recipe: An Incredible Secret to a Wonderful Treat
- Total Time: 38 minute
Ingredients
– 2 cups fresh fruit puree (raspberries, oranges, and lime juice)
– 1 cup granulated sugar
– 2 cups whole milk
– 1 cup heavy cream
– 1 teaspoon vanilla extract
– Pinch of salt
– Food coloring (optional, for extra vibrancy)
Instructions
Creating the Homemade Rainbow Sherbet is straightforward. Follow these easy steps:
1. Prepare the Fruit: Start by making fruit purees. Choose your favorite fruits (raspberries, oranges, limes) and blend them until smooth.
2. Make the Base: In a large bowl, combine the fruit purees, sugar, whole milk, heavy cream, vanilla extract, and salt. Stir well until the sugar dissolves completely.
3. Divide the Base: Separate the mixture evenly into three bowls, one for each flavor.
4. Add Color (optional): If you want extra vibrancy, add a few drops of food coloring to each bowl. Mix well until the desired color is achieved.
5. Layering: In an ice-cream-safe container, start layering the fruit mixtures. Pour one layer, freeze for about an hour, remove and then add the next layer. Repeat this process for all layers until each one has been added.
6. Final Freeze: Once all layers are complete, cover the container and freeze for at least 4 hours or overnight until fully set.
7. Serve: When ready to serve, remove from the freezer and allow it to sit for a minute to soften slightly. Scoop into bowls or cones.
With these steps, you’ll have created a delightful rainbow sherbet that captures the essence of summer and is perfect for any occasion!
- Prep Time: 15 minutes
- Cook Time: 4–6 hours
Nutrition
- Serving Size: 6 servings
- Calories: 230 kcal
- Fat: 10g
- Protein: 4g