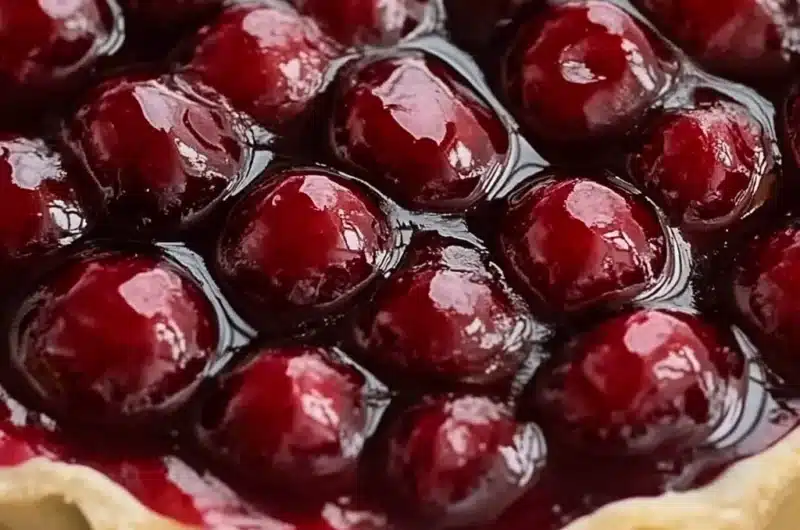
Homemade Cherry Pie Filling is a wonderful way to capture the delicious essence of cherries in a jar. Whether you’re making a classic pie or simply want to indulge in the sweet tang of cherries, this recipe is sure to impress. From baking seasonal pies to jazzing up desserts like ice cream sundaes or pancakes, having a jar of homemade cherry pie filling on hand can transform your culinary creations. Let’s explore why this recipe stands out and how to prepare it perfectly.
Imagine the first bite of dessert as the flavors of sweet, juicy cherries dance on your palate. The delightful aroma wafts through your kitchen, inviting everyone to gather around the table. A dish made with Homemade Cherry Pie Filling is not just about satisfying your sweet tooth; it’s about sharing treasured moments with family and friends. Whether it’s a summer gathering or a cozy winter treat, this filling will elevate any occasion.
Making your cherry pie filling gives you complete control over the sweetness and flavor, ensuring that every spoonful is just the way you like it. The ability to adapt the recipe based on your tastes makes it both rewarding and fun. In this guide, you’ll learn all the tips and tricks for creating amazing Homemade Cherry Pie Filling that your loved ones will rave about!
Why You’ll Love This Recipe
Creating your own Homemade Cherry Pie Filling has several amazing benefits that make it irresistible:
1. Fresh Ingredients – You control the quality of cherries, ensuring each bite is flavorful and fresh.
2. Adjustable Sweetness – Customize the level of sweetness according to your preferences.
3. No Preservatives – A homemade filling avoids the artificial additives often found in store-bought options.
4. Versatile Usage – Use it for pies, tarts, toppings, or even fillings for pastries and cakes.
5. Simple to Make – The recipe is straightforward, making it accessible for both beginner and experienced cooks.
6. Lasting Impressions – Homemade cherry filling adds a personal touch to your desserts that store-bought versions simply can’t match.
These points showcase why so many people cherish homemade versions of their favorite foods, and cherry pie filling is no exception!
Preparation and Cooking Time
The total time required for making Homemade Cherry Pie Filling is around 45 minutes. Here’s a simple breakdown of the various stages:
– Preparation Time: 15 minutes
– Cooking Time: 20-25 minutes
– Cooling Time: 10 minutes
These estimates are based on an average setup in the kitchen and might fluctuate slightly depending on your experience level.
Ingredients
– 4 cups fresh or frozen cherries (pitted)
– 1 cup granulated sugar
– 1/4 cup cornstarch
– 1 tablespoon lemon juice
– 1 teaspoon vanilla extract
– 1/4 teaspoon almond extract
– 1/4 teaspoon salt
– 1/2 teaspoon cinnamon (optional)
– 1/2 cup water
Step-by-Step Instructions
Creating a delightful batch of Homemade Cherry Pie Filling is easy when you follow these steps:
1. Prepare the Cherries: If using fresh cherries, wash them thoroughly and remove the pits. If using frozen, allow them to thaw.
2. Combine Ingredients: In a medium saucepan, mix the cherries, sugar, cornstarch, lemon juice, vanilla extract, almond extract, salt, cinnamon (if using), and water.
3. Heat the Mixture: Place the saucepan over medium heat and stir gently to combine all ingredients.
4. Cook Until Thickened: Continue stirring the mixture until it starts to thicken and bubble, about 20-25 minutes.
5. Check Consistency: If the filling is too thick, add a splash more water. It should be thick enough to hold together but still pourable.
6. Cool the Filling: Remove the saucepan from the heat and let the filling cool for about 10 minutes. It will thicken further as it cools.
7. Store or Use: Use the filling immediately in your favorite dessert, or store it in an airtight container in the refrigerator for up to one week. For longer storage, consider canning or freezing.
With these steps, you’ll have an incredible Homemade Cherry Pie Filling that’s ready to delight everyone.
How to Serve
To make the most of your Homemade Cherry Pie Filling, consider the following serving suggestions:
1. Classic Cherry Pie: Use the filling in a buttery pie crust for a timeless dessert.
2. Topping for Ice Cream: Spoon it over vanilla ice cream for an easy yet impressive treat.
3. Pancake Companion: Add it as a topping for pancakes or waffles on a weekend brunch.
4. Fill Pastries: Use the filling as a delicious component in pastries like danishes or turnovers.
5. Layer in Yogurt: Mix it into your morning yogurt for a fruity, flavorful breakfast.
6. Baking Base: Incorporate the filling into cakes or brownies for an added cherry flavor.
These suggestions will not only enhance your dishes but also ensure that every bite of your Homemade Cherry Pie Filling shines in various delightful ways. Now, go ahead, and enjoy your cherry-filled creations!
Additional Tips
– Use Quality Cherries: Always choose ripe, fresh cherries for the best flavor. If using frozen, select high-quality options without added sugars.
– Taste Before Adding Sugar: Depending on the tartness of your cherries, you may wish to taste before adding all the sugar. Adjust as needed.
– Experiment with Spices: While cinnamon is optional, you can explore other spices such as nutmeg or even a hint of ginger for unique flavors.
– Don’t Skip the Lemon Juice: It enhances the cherries’ flavor and balances sweetness, giving depth to the filling.
– Make It Ahead: Prepare your cherry filling in advance and let the flavors meld for an even richer taste.
Recipe Variation
Feel free to modify the recipe to suit your preferences or seasonal ingredients:
1. Berry Blend: Combine cherries with strawberries or blueberries for a mixed berry pie filling.
2. Alcohol Infusion: Add a splash of cherry liqueur or brandy to elevate the flavor and add complexity.
3. Tart Cherries: For a more tart filling, use sour cherries instead of sweet ones, adjusting the sugar as necessary.
4. Gluten-Free Adaptation: Use gluten-free thickening agents like arrowroot powder in place of cornstarch for gluten-sensitive diets.
5. No-Cook Filling: For a fresh dessert topping, mix fresh cherries with sugar and let them macerate in the refrigerator for a simple, no-cook option.
Freezing and Storage
– Storage: Keep your Homemade Cherry Pie Filling in an airtight container. It stays fresh in the refrigerator for about one week.
– Freezing: For longer storage, freeze the filling in freezer-safe bags or containers. It can last up to six months. Be sure to label it for easy identification. To thaw, place it overnight in the refrigerator before using.
Special Equipment
While you can make homemade cherry pie filling with basic kitchen tools, having the following equipment will streamline the process:
– Medium saucepan: For cooking and thickening the filling.
– Mixing spoon: Use a wooden or heat-resistant spoon for stirring.
– Measuring cups and spoons: To measure out all ingredients accurately.
– Colander or sieve: If you need to drain excess liquid from defrosted cherries.
– Airtight containers: For storing your filling safely.
Frequently Asked Questions
Can I use frozen cherries directly?
Yes, you can use frozen cherries straight from the package. Just thaw them beforehand to make the cooking process smoother.
How long does the cherry filling need to cool before using?
Let it cool for about 10 minutes to thicken further. You can use it warm, but cooling improves its texture.
Is this filling suitable for canning?
Yes, it can be canned using proper canning techniques. Ensure to follow safe canning practices to preserve freshness.
Can I use other types of fruit?
Absolutely! This recipe can be adapted for other fruits like peaches or blueberries, but you may need to adjust cooking times and sweetness.
What can I do if my filling turns out too runny?
If the filling is too runny, return it to the saucepan and simmer longer, stirring continuously until thickened.
Conclusion
Homemade Cherry Pie Filling is not only delicious but also simple to make. Its versatility allows it to be used in various desserts and treats. With fresh ingredients and the freedom to customize sweetness, this recipe promises to brighten any dish. Create unforgettable dessert moments with your family and friends by whipping up this cherry delight!
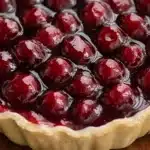
Homemade Cherry Pie Filling: An Incredible Ultimate Recipe
- Total Time: 25 minute
Ingredients
– 4 cups fresh or frozen cherries (pitted)
– 1 cup granulated sugar
– 1/4 cup cornstarch
– 1 tablespoon lemon juice
– 1 teaspoon vanilla extract
– 1/4 teaspoon almond extract
– 1/4 teaspoon salt
– 1/2 teaspoon cinnamon (optional)
– 1/2 cup water
Instructions
Creating a delightful batch of Homemade Cherry Pie Filling is easy when you follow these steps:
1. Prepare the Cherries: If using fresh cherries, wash them thoroughly and remove the pits. If using frozen, allow them to thaw.
2. Combine Ingredients: In a medium saucepan, mix the cherries, sugar, cornstarch, lemon juice, vanilla extract, almond extract, salt, cinnamon (if using), and water.
3. Heat the Mixture: Place the saucepan over medium heat and stir gently to combine all ingredients.
4. Cook Until Thickened: Continue stirring the mixture until it starts to thicken and bubble, about 20-25 minutes.
5. Check Consistency: If the filling is too thick, add a splash more water. It should be thick enough to hold together but still pourable.
6. Cool the Filling: Remove the saucepan from the heat and let the filling cool for about 10 minutes. It will thicken further as it cools.
7. Store or Use: Use the filling immediately in your favorite dessert, or store it in an airtight container in the refrigerator for up to one week. For longer storage, consider canning or freezing.
With these steps, you’ll have an incredible Homemade Cherry Pie Filling that’s ready to delight everyone.
- Prep Time: 15 minutes
- Cook Time: 20-25 minutes
Nutrition
- Serving Size: Approximately 2 cups
- Calories: 120 kcal per serving
- Fat: 0g
- Protein: 1g