Homemade Rainbow Sherbet Recipe is a delightful treat that brings joy to any occasion. This colorful and refreshing dessert combines fruity flavors that not only satisfy your sweet tooth but also evoke fond summer memories. The vibrant hues of this sherbet remind us of sunny days spent enjoying nature and sharing fun times with friends and family. Making rainbow sherbet at home is not only easy but also allows you to control the ingredients, ensuring a healthier and more natural dessert option.
If you’ve ever tasted store-bought rainbow sherbet, you know it can sometimes be overly sweet or artificial. Making your own version at home will ensure you experience incredible flavors without any additives! In this comprehensive guide, you will learn about the benefits of this recipe, how to prepare it, and tips on serving it beautifully. Get ready to impress your guests with an incredible homemade dessert that everyone will love!
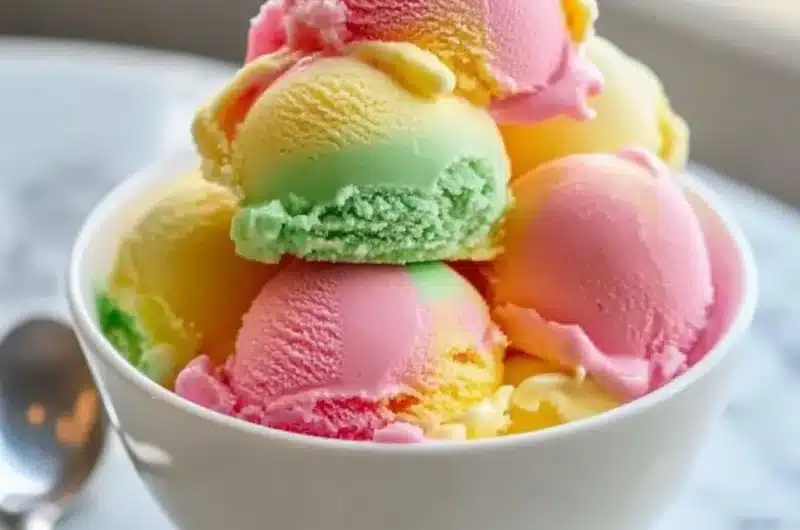
The bright, luscious colors of rainbow sherbet will undoubtedly put a smile on your face. It’s a great way to indulge without the guilt, as you can incorporate fresh fruits and adjust the sweetness to your liking. Whether you’re looking for something refreshing after a hearty meal or you want to create a fantastic dessert for parties, this recipe has got you covered. We’ll dive into the details so you can achieve the amazing flavors of perfectly smooth and creamy rainbow sherbet right in your kitchen.
Why You’ll Love This Recipe
There are numerous reasons to fall in love with this homemade rainbow sherbet recipe. Below are some fantastic aspects that make it a must-try:
1. Bright and Colorful: The beautiful layers of colors make this sherbet visually stunning and perfect for any occasion.
2. Natural Ingredients: You have the freedom to select fresh fruits, leading to a healthier dessert option without artificial colors or preservatives.
3. Unlimited Flavor Combinations: Feel free to play with fruit flavors, making it customizable to please any palate.
4. Easy to Make: The recipe’s simple steps ensure anyone can create this delightful treat successfully.
5. Great for Summer: No dessert screams summer like rainbow sherbet, making it an essential treat during the hotter months.
6. Perfect for Gatherings: It’s an impressive dessert that can easily serve a crowd, making gathering around it all the more enjoyable.
With these attributes, it’s clear that this Homemade Rainbow Sherbet Recipe is a fantastic choice for anyone looking to indulge in something special. It seamlessly combines flavors and colors, producing a memory-making experience!
Preparation and Cooking Time
Creating your own rainbow sherbet does not require hours in the kitchen. Here’s a breakdown of the time commitment you can expect:
– Preparation Time: 15 minutes
– Chilling Time: 30 minutes (per layer)
– Total Time: Approximately 2 hours
These times can fluctuate slightly based on your efficiency and kitchen setup, but this timeline provides an accurate estimate to help you plan your dessert-making adventure!
Ingredients
1. 2 cups fresh strawberries, pureed
2. 2 cups fresh oranges, juiced and pulped
3. 2 cups fresh blueberries, pureed
4. 1 cup granulated sugar (adjust based on sweetness preference)
5. 2 cups whole milk
6. 1 cup heavy cream
7. 2 tablespoons lemon juice
8. 1 teaspoon vanilla extract
9. Pinch of salt
Step-by-Step Instructions
Creating your homemade rainbow sherbet involves one important process: layering flavors. Here are the step-by-step instructions:
1. Prepare Fruit Purees: Start by washing and chopping the fruits. For strawberries and blueberries, puree them in a blender until smooth, adding a little sugar if desired. For oranges, juice and pulp them, ensuring no seeds remain.
2. Make Sherbet Base: In a medium bowl, whisk together the milk, heavy cream, granulated sugar, lemon juice, vanilla extract, and a pinch of salt until well combined and the sugar is dissolved.
3. Mix Strawberry Layer: Divide the sherbet base into three bowls. Mix the strawberry puree into one bowl until fully incorporated. This will be your red layer.
4. Mix Orange Layer: In the second bowl, add the orange juice mixture, ensuring it’s blended well. This will be your orange layer.
5. Mix Blueberry Layer: Finally, combine the blueberry puree with the last bowl of the sherbet base. This will form your blue layer.
6. Layering: In an appropriate container, pour in the strawberry mixture first, spreading it out evenly. Follow with the orange layer, then the blueberry layer on top. Smooth the surface as needed.
7. Freeze: Cover the container, ensuring it’s airtight to prevent ice crystals from forming. Freeze the sherbet for 2-4 hours or until it is firm.
8. Scoop and Serve: Once ready, remove from the freezer and allow it to sit at room temperature for about 5-10 minutes for easier scooping.
These steps will guide you in creating the ultimate rainbow sherbet that will amaze everyone who gets to share in this treat!
How to Serve
Serving your homemade rainbow sherbet impressively will enhance the experience even further. Here are some ideas on how to serve it beautifully:
1. Beautiful Bowls: Use clear glass bowls or elegant dessert glasses to showcase the delightful layers of color.
2. Garnish: Add fresh fruit slices or berries on top for a colorful garnish. Mint leaves can also add a lovely touch.
3. Serve with Toppings: Offer toppings such as sprinkles, chocolate chips, or whipped cream for guests to customize their servings.
4. Pair with Snacks: Consider serving alongside chocolate wafers or shortbread cookies for a delightful crunch that complements the creamy texture.
5. Creative Presentation: Try serving in fun shapes or even in cones for a whimsical touch!
By thoughtfully putting together your rainbow sherbet, you elevate the experience and create delightful memories for everyone enjoying this homemade treat.
Additional Tips
– Use Fresh Fruits: For the most vibrant flavors, use fresh, ripe fruits. They will enhance the overall taste and color of your homemade rainbow sherbet.
– Experiment with Juices: Try various fruit juices if your favorite fruits aren’t in season. This can still create delightful flavors.
– Avoid Over-Freezing: To keep the texture perfect, avoid leaving the sherbet in the freezer for too long. Too much time can lead to an icy texture instead of a smooth one.
– Taste as You Go: Don’t hesitate to taste each layer mix before freezing. Adjust sweetness or flavor as you find necessary.
Recipe Variation
Feel free to get creative! Here are some fun variations to consider:
1. Tropical Twist: Substitute pineapple and coconut water for a refreshing tropical sherbet.
2. Berry Blend: Use mixed berries like raspberries or blackberries for a different flavor profile.
3. Citrus Mix: Combine grapefruit, lemon, and lime for a zesty rainbow sherbet.
Freezing and Storage
– Storage: Store your rainbow sherbet in an airtight container to keep it fresh. It can be kept in the freezer for up to a month.
– Serving Tips: When ready to serve, remove it from the freezer about 5-10 minutes before scooping. This will soften the sherbet, making it easier to serve.
Special Equipment
To successfully create your homemade rainbow sherbet, you’ll need a few essential kitchen tools:
– Blender or food processor for pureeing fruits
– Mixing bowls for combining ingredients
– A container for layering and freezing the sherbet
– Whisk for mixing the base ingredients
– Ice cream scooper for easy serving
Frequently Asked Questions
Can I use frozen fruits for the rainbow sherbet?
Yes, frozen fruits work well! Just thaw them slightly before pureeing.
How can I adjust the sweetness?
Adjust the sugar amount based on your personal taste. Honey or agave syrup can also be excellent natural substitutes.
Is it necessary to include dairy?
You can use non-dairy alternatives, such as almond milk or coconut cream, to make a dairy-free version.
How can I make it vegan?
Use plant-based milk and replace the heavy cream with coconut cream or a store-bought vegan option.
Can I add food coloring?
Yes, you can add natural food coloring if you want more vibrant layers, but it’s optional!
Conclusion
This Homemade Rainbow Sherbet Recipe is not only beautiful but also incredibly delicious and customizable. Its vibrant colors and fresh flavors make it an ideal treat for any occasion, especially during hot summer days. Impress your friends and family by crafting this delightful dessert at home, and enjoy the satisfaction that comes from serving a treat made with love. With a little effort, you’ll create lasting memories with every delicious scoop!

Homemade Rainbow Sherbet Recipe: An Amazing Ultimate Guide
- Total Time: 45 minutes
Ingredients
1. 2 cups fresh strawberries, pureed
2. 2 cups fresh oranges, juiced and pulped
3. 2 cups fresh blueberries, pureed
4. 1 cup granulated sugar (adjust based on sweetness preference)
5. 2 cups whole milk
6. 1 cup heavy cream
7. 2 tablespoons lemon juice
8. 1 teaspoon vanilla extract
9. Pinch of salt
Instructions
Creating your homemade rainbow sherbet involves one important process: layering flavors. Here are the step-by-step instructions:
1. Prepare Fruit Purees: Start by washing and chopping the fruits. For strawberries and blueberries, puree them in a blender until smooth, adding a little sugar if desired. For oranges, juice and pulp them, ensuring no seeds remain.
2. Make Sherbet Base: In a medium bowl, whisk together the milk, heavy cream, granulated sugar, lemon juice, vanilla extract, and a pinch of salt until well combined and the sugar is dissolved.
3. Mix Strawberry Layer: Divide the sherbet base into three bowls. Mix the strawberry puree into one bowl until fully incorporated. This will be your red layer.
4. Mix Orange Layer: In the second bowl, add the orange juice mixture, ensuring it’s blended well. This will be your orange layer.
5. Mix Blueberry Layer: Finally, combine the blueberry puree with the last bowl of the sherbet base. This will form your blue layer.
6. Layering: In an appropriate container, pour in the strawberry mixture first, spreading it out evenly. Follow with the orange layer, then the blueberry layer on top. Smooth the surface as needed.
7. Freeze: Cover the container, ensuring it’s airtight to prevent ice crystals from forming. Freeze the sherbet for 2-4 hours or until it is firm.
8. Scoop and Serve: Once ready, remove from the freezer and allow it to sit at room temperature for about 5-10 minutes for easier scooping.
These steps will guide you in creating the ultimate rainbow sherbet that will amaze everyone who gets to share in this treat!
- Prep Time: 15 minutes
- Cook Time: 30 minutes (chilling time)
Nutrition
- Serving Size: About 8 servings
- Calories: 150 kcal (per serving)
- Fat: 7g
- Protein: 2g