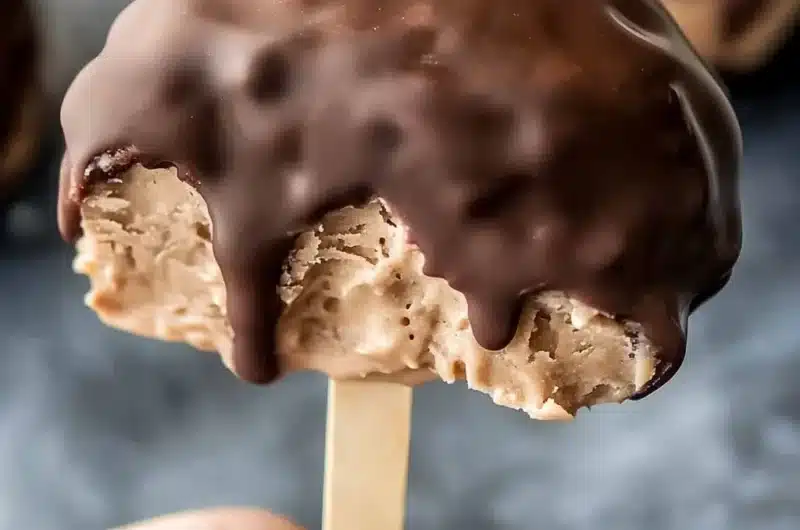
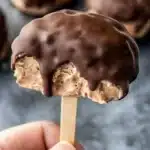
Creamy Peanut Butter Frozen Yogurt Bars are the perfect sweet treat for warm days and cozy evenings alike. These delectable bars combine the heartiness of peanut butter with the smoothness of frozen yogurt, delivering an indulgent yet healthy dessert option that everyone will love. Made with natural ingredients and easy to prepare, these bars are not only delicious but also guilt-free. Imagine a creamy, cold delight that melts in your mouth while providing a rich flavor punch—this recipe has it all!
If you’re a fan of peanut butter, you’re in for a real treat. Creamy Peanut Butter Frozen Yogurt Bars are not just a dessert; they’re an experience. Each bite is filled with the wonderful, rich taste of peanut butter swirled into a luscious yogurt base. Furthermore, they’re incredibly easy to make, requiring minimal prep time and just a few simple ingredients. Whether you’re hosting a summer gathering or just craving a sweet snack, these frozen yogurt bars will always hit the spot.
Understanding why these bars stand out is quite simple. Not only are they rich in flavor, but they are also customizable! You can easily tweak the recipe to suit different preferences, whether it’s adding a drizzle of dark chocolate or sprinkling crushed nuts on top. In this guide, you will discover the detailed steps for making these delightful treats, from preparation time to serving suggestions. Let’s dive into what makes Creamy Peanut Butter Frozen Yogurt Bars an essential addition to your dessert repertoire!
Why You’ll Love This Recipe
Creamy Peanut Butter Frozen Yogurt Bars combine flavors and textures in an incredible way that you simply cannot resist. Here are several reasons why you will fall head over heels for this recipe:
1. Nutritious Ingredients: Made with yogurt and peanut butter, these bars offer a healthier alternative to traditional desserts.
2. No Baking Required: This recipe is straightforward and doesn’t require any baking, making it easy for anyone to whip up.
3. Quick Freezing Time: They freeze relatively quickly, so you won’t have to wait long to indulge in them.
4. Family-Friendly: Perfect for kids and adults alike, these bars make great after-school snacks or dessert options.
5. Customizable Options: You can add various toppings, like chocolate chips or fruit, to suit your taste preferences.
6. Easy to Make in Batches: With the ability to make these bars in larger quantities, they’re perfect for gatherings or meal prep!
With these incredible benefits in mind, it’s no wonder that people rave about these delightful bars. Each bite is a blend of creaminess and flavor that evokes feelings of joy and satisfaction!
Preparation and Cooking Time
Making Creamy Peanut Butter Frozen Yogurt Bars is quick and efficient. Below is a breakdown of the total time required:
– Preparation Time: 15 minutes
– Freezing Time: 4-6 hours (or overnight for best results)
– Total Time: 4 hours 15 minutes to 6 hours 15 minutes
This relatively short time commitment for such a delightful treat makes it even more appealing—not to mention that the minimal effort is rewarded with a delicious result!
Ingredients
– 2 cups plain or vanilla Greek yogurt
– 1 cup creamy peanut butter
– ½ cup honey or maple syrup (adjust to taste)
– 1 teaspoon vanilla extract
– ¼ teaspoon salt
– Optional toppings: chocolate chips, chopped nuts, or sliced bananas
Step-by-Step Instructions
Creating Creamy Peanut Butter Frozen Yogurt Bars is as simple as following these clear steps:
1. Prepare the Pan: Line an 8×8-inch baking dish with parchment paper, allowing some overhang for easier removal later.
2. Mix Ingredients: In a large mixing bowl, combine the Greek yogurt, creamy peanut butter, honey or maple syrup, vanilla extract, and salt. Mix well until smooth and creamy.
3. Taste and Adjust: Sample the mixture and adjust sweetness, adding more honey or maple syrup if needed.
4. Transfer to Pan: Spoon the yogurt mixture into the prepared baking dish, spreading it evenly with a spatula.
5. Add Toppings: If desired, sprinkle chocolate chips, chopped nuts, or sliced bananas over the top of the mixture and gently press them in.
6. Freeze: Cover the baking dish with plastic wrap or aluminum foil. Place in the freezer for at least 4-6 hours until fully set.
7. Cut Bars: Once frozen, remove the dish from the freezer and lift the frozen mixture out using the parchment paper. Place it on a cutting board and slice into bars of your desired size.
8. Store Properly: Store unsliced bars in the freezer for later enjoyment in an airtight container. If fully sliced, keep them separated by parchment paper to avoid sticking.
Each step in this process helps ensure that you end up with wonderfully creamy bars that will be the highlight of any gathering.
How to Serve
Serving Creamy Peanut Butter Frozen Yogurt Bars can elevate the overall experience for you and your guests. Here are some thoughtful ways to present and enjoy them:
1. Plating: Arrange the bars on a decorative platter. Consider drizzling some melted chocolate or caramel sauce over them for an elegant touch.
2. Garnishing: Top each bar with crushed nuts, granola, or fresh berries to add color and extra flavor.
3. Pairing Suggestions: These bars pair wonderfully with a glass of cold milk, a cup of coffee, or a refreshing iced tea.
4. Portion Control: Serve smaller slices for guests to encourage them to try multiple flavors if you’ve made different variations.
5. Fun Add-ons: Create a dessert bar where guests can customize their yogurt bars with additional toppings like shredded coconut, sprinkles, or dried fruits.
With these simple yet effective serving ideas, Creamy Peanut Butter Frozen Yogurt Bars will be a hit at any event, guaranteed to leave everyone satisfied and asking for more!
Additional Tips
– Use Creamy Peanut Butter: For the best texture and flavor, select a high-quality creamy peanut butter without added sugars or oils.
– Chill Your Utensils: Before mixing, chill your mixing bowls and utensils to keep the yogurt cold while you prepare the recipe.
– Adjust Sweetness to Your Liking: The sweetness of the bars can vary based on personal preference. Taste the mixture and adjust honey or maple syrup accordingly.
– Don’t Skip the Salt: A pinch of salt enhances the peanut butter flavor, making it richer and more satisfying.
– Experiment with Yogurt: Greek yogurt provides a thicker consistency, but regular yogurt can be used for a lighter texture. You can also try flavored yogurt for a different taste.
Recipe Variation
Mix things up with these alternative ideas:
1. Chocolate Swirl Version: Swirl in melted chocolate or cocoa powder for a rich chocolate-peanut flavor.
2. Fruit Infusions: Add mashed bananas or pureed strawberries into the yogurt mixture for a fruity twist.
3. Nutty Crunch: Substitute or mix in almond or cashew butter for a different nutty flavor profile.
4. Dairy-Free Option: Use coconut yogurt and a dairy-free sweetener for a completely vegan treat.
5. Protein Boost: Stir in a scoop of your favorite protein powder for a post-workout snack.
Freezing and Storage
– Storing Leftovers: Keep the bars in an airtight container in the freezer for up to three months.
– Before Serving: Allow the bars to thaw for 5-10 minutes at room temperature for easier cutting.
– Individual Wrapping: For convenience, wrap each bar in parchment paper before freezing to grab them on the go.
– Avoid Freezer Burn: Ensure that the bars are tightly sealed to maintain their creamy texture and flavor.
Special Equipment
You’ll need a few essential tools to create your Creamy Peanut Butter Frozen Yogurt Bars:
– 8×8-inch baking dish: This is the perfect size for creating thick yogurt bars.
– Parchment paper: For easy removal after freezing.
– Mixing bowls: A large bowl for combining your ingredients thoroughly.
– Spatula: Useful for spreading the mixture evenly in the baking dish.
– Knife: For slicing the frozen bars into portions.
Frequently Asked Questions
Can I add other flavors to the mix?
Absolutely! Consider adding flavor extracts like almond or coconut for a twist.
How do I know when my bars are ready?
They should be completely firm after at least 4-6 hours in the freezer.
Is it possible to use alternative sweeteners?
Yes, you can use agave nectar, stevia, or any other sweetener compatible with your diet.
Can I use crunchy peanut butter instead?
Yes, using crunchy peanut butter will add texture, but be aware that it will change the mouthfeel of the bars slightly.
How do I cut the bars neatly?
Dip your knife in warm water before cutting to create clean edges.
Conclusion
Creamy Peanut Butter Frozen Yogurt Bars are a delightful way to satisfy your sweet tooth while staying healthy. This simple recipe combines the rich flavor of peanut butter with the creamy goodness of yogurt, creating an enjoyable and guilt-free dessert. Perfect for warm weather gatherings or cozy nights at home, these bars are bound to become a favorite in your recipe repertoire. Experiment with variations and toppings to discover your perfect version of this delicious treat!
Creamy Peanut Butter Frozen Yogurt Bars: An Amazing Ultimate Recipe
- Total Time: 15 minutes
Ingredients
– 2 cups plain or vanilla Greek yogurt
– 1 cup creamy peanut butter
– ½ cup honey or maple syrup (adjust to taste)
– 1 teaspoon vanilla extract
– ¼ teaspoon salt
– Optional toppings: chocolate chips, chopped nuts, or sliced bananas
Instructions
Creating Creamy Peanut Butter Frozen Yogurt Bars is as simple as following these clear steps:
1. Prepare the Pan: Line an 8×8-inch baking dish with parchment paper, allowing some overhang for easier removal later.
2. Mix Ingredients: In a large mixing bowl, combine the Greek yogurt, creamy peanut butter, honey or maple syrup, vanilla extract, and salt. Mix well until smooth and creamy.
3. Taste and Adjust: Sample the mixture and adjust sweetness, adding more honey or maple syrup if needed.
4. Transfer to Pan: Spoon the yogurt mixture into the prepared baking dish, spreading it evenly with a spatula.
5. Add Toppings: If desired, sprinkle chocolate chips, chopped nuts, or sliced bananas over the top of the mixture and gently press them in.
6. Freeze: Cover the baking dish with plastic wrap or aluminum foil. Place in the freezer for at least 4-6 hours until fully set.
7. Cut Bars: Once frozen, remove the dish from the freezer and lift the frozen mixture out using the parchment paper. Place it on a cutting board and slice into bars of your desired size.
8. Store Properly: Store unsliced bars in the freezer for later enjoyment in an airtight container. If fully sliced, keep them separated by parchment paper to avoid sticking.
Each step in this process helps ensure that you end up with wonderfully creamy bars that will be the highlight of any gathering.
- Prep Time: 15 minutes
- Cook Time: 0 minutes
Nutrition
- Serving Size: 12 bars
- Calories: 150 kcal
- Fat: 8g
- Protein: 6g