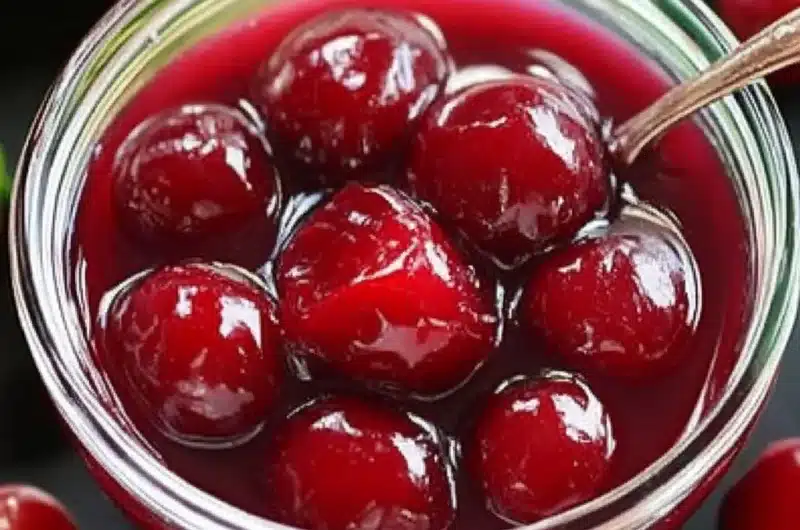
Simple Cherry Pie Filling is a delicious and versatile addition to many desserts. This incredible recipe allows you to create a sweet, tangy treat in no time. Whether you’re preparing a classic cherry pie, topping off a scoop of vanilla ice cream, or using it in a different dessert, this filling will never disappoint. The combination of juicy cherries, sugar, and a hint of lemon creates a flavor explosion that is truly delightful. If you’re craving a simple yet satisfying cherry filling, you’re in the right place!
Fortunately, making a Simple Cherry Pie Filling is easier than you might think. With just a few ingredients and straightforward steps, you’ll have a delicious cherry filling that can be enjoyed year-round. Whether you’re using fresh cherries in the summer or canned cherries in the winter, your taste buds will thank you. In this guide, you will discover why this recipe is so beloved, the preparation process, and tips for serving it.
Cherry pie has long been a symbol of American baking history. Its sweetness paired with tartness evokes nostalgia for many. This filling recipe stands out because it highlights the natural flavors of the cherries while keeping things simple. Everyone from novice cooks to seasoned bakers can appreciate its charm.
Let’s explore the amazing features of this recipe and get ready to savor the flavors!
Why You’ll Love This Recipe
Simple Cherry Pie Filling is appealing for numerous reasons. Here are some key aspects that make this recipe a favorite:
1. Quick and Easy Preparation – This filling can be made in under 30 minutes, allowing for spontaneity in dessert-making.
2. Perfect for Any Occasion – Whether it’s a holiday gathering or a casual family dinner, this cherry filling fits right in.
3. Versatile Use – Use it in pies, tarts, pancakes, or as a topping for yogurt and ice cream.
4. Minimal Ingredients – Most of the ingredients are pantry staples, making it accessible to everyone.
5. Incredible Flavor – The balance of sweet and tart brings out the best in cherries, ensuring satisfaction with each bite.
With these irresistible qualities, it’s no wonder that Simple Cherry Pie Filling remains a household favorite. Each spoonful brings forth delightful nostalgia and happiness!
Preparation and Cooking Time
In total, making Simple Cherry Pie Filling will take about 25-30 minutes. Here’s a breakdown of the time required:
– Preparation Time: 10 minutes
– Cooking Time: 15-20 minutes
This time frame allows for a seamless experience in the kitchen, making it perfect for those busy days when you crave a sweet treat!
Ingredients
– 4 cups fresh or frozen cherries, pitted
– 1 cup granulated sugar
– ¼ cup cornstarch
– 1 teaspoon lemon juice
– 1 teaspoon almond extract (optional)
– ¼ teaspoon salt
– 1 cup water (or cherry juice for more flavor)
Step-by-Step Instructions
Creating Simple Cherry Pie Filling is straightforward when you follow these easy steps:
1. Prepare the Cherries: If using fresh cherries, wash and pit them. For frozen cherries, ensure they are thawed and drained.
2. Combine Ingredients: In a medium saucepan, combine the cherries, sugar, cornstarch, lemon juice, salt, and water (or cherry juice).
3. Cook Mixture: Place the saucepan over medium heat. Stir the mixture occasionally as it heats.
4. Thicken the Filling: Once the mixture starts to bubble, continue to cook for an additional 2-3 minutes, or until it thickens to your desired consistency.
5. Add Flavor: If using almond extract, stir it in after removing the filling from heat.
6. Cool the Filling: Transfer the filling to a bowl and let it cool completely before using it in your recipe.
These steps will guide you in preparing an incredible cherry filling that can elevate your desserts!
How to Serve
When it comes to serving Simple Cherry Pie Filling, there are plenty of delicious options:
1. Classic Cherry Pie: Use the filling to create a traditional cherry pie, topped with lattice crust or a buttery pie crust.
2. Ice Cream Topping: Spoon the cherry filling over a generous scoop of vanilla ice cream for a delightful sundae.
3. Pancake Delight: Pour the warm filling over fluffy pancakes or waffles for a decadent breakfast treat.
4. Garnish for Yogurt: Mix the cherry filling with Greek yogurt for a nutritious and flavorful snack.
5. Pair with Cheesecake: Swirl the filling over cheesecake for a refreshing contrast of flavors.
With these serving ideas, you can enjoy Simple Cherry Pie Filling in various delightful ways, making every meal a sweet success!
Additional Tips
– Fresh vs. Frozen: While fresh cherries are delicious, frozen cherries can be just as good. They are often picked at peak ripeness, which helps lock in flavor.
– Sweetness Balance: Taste the filling as it cooks. If you prefer a sweeter filling, feel free to add a little more sugar.
– Taste the Lemon: The lemon juice is essential for balancing flavor. Adjust according to your preference, but be cautious not to overpower the cherry taste.
Recipe Variation
There are countless ways to tweak this Simple Cherry Pie Filling recipe. Here are some ideas:
1. Spiced Cherry Filling: Add a dash of cinnamon or nutmeg for a warm, spiced flavor perfect for fall desserts.
2. Tropical Twist: Incorporate crushed pineapple or coconut for a tropical flavor profile, making the filling unique and refreshing.
3. Cherry Almond Surprise: Use both almond extract and a splash of Amaretto liqueur for a sophisticated, nutty flavor.
4. Reduced Sugar Option: Substitute half the sugar with honey or agave syrup for a lighter sweetness without sacrificing taste.
Freezing and Storage
– Storage: Store leftover cherry filling in an airtight container in the refrigerator for up to one week. Ensure it is completely cooled before sealing.
– Freezing: For longer storage, you can freeze the filling. Transfer it to a freezer-safe container and keep it frozen for up to 3 months. Thaw in the fridge overnight before using.
Special Equipment
You don’t need much to make Simple Cherry Pie Filling. Here’s the basic equipment you’ll need:
– Medium Saucepan: A sturdy saucepan is essential for cooking the filling.
– Mixing Spoon: A wooden or silicone spoon works best for stirring the mixture without scratching your pan.
– Measuring Cups and Spoons: Accurate measurements are key to a delicious filling.
– Cutting Board and Knife: If using fresh cherries, a good chopping surface and a sharp knife are necessary for pitting the cherries.
Frequently Asked Questions
Can I use other fruits for filling?
Yes! This method works well with other fruits like blueberries, raspberries, or peaches. Adjust sugar and thickening as needed.
Is this filling gluten-free?
Yes! This filling is naturally gluten-free, as it does not contain wheat or gluten-containing ingredients.
How should I store leftover filling?
Keep it in an airtight container in the fridge. It stays fresh for about a week.
Can I use this recipe for other desserts?
Absolutely! You can use this cherry filling for ice cream sundaes, pancakes, or as a topping for cheesecake. The possibilities are endless.
What’s the best way to use this filling in pies?
Chill the filling before adding it to the pie crust. It helps set the filling and prevents a soggy bottom.
Conclusion
Simple Cherry Pie Filling is a fantastic recipe that can add a burst of flavor to a variety of desserts. Its ease of preparation and delicious taste make it a go-to for any occasion. This filling allows you to experience the rich, tangy flavor of cherries in many forms. So, whether you bake a classic cherry pie, serve it over ice cream, or use it as a topping for pancakes, this filling promises to bring joy and satisfaction to your dessert table!

Simple Cherry Pie Filling: An Amazing Ultimate Recipe
- Total Time: 31 minute
Ingredients
– 4 cups fresh or frozen cherries, pitted
– 1 cup granulated sugar
– ¼ cup cornstarch
– 1 teaspoon lemon juice
– 1 teaspoon almond extract (optional)
– ¼ teaspoon salt
– 1 cup water (or cherry juice for more flavor)
Instructions
Creating Simple Cherry Pie Filling is straightforward when you follow these easy steps:
1. Prepare the Cherries: If using fresh cherries, wash and pit them. For frozen cherries, ensure they are thawed and drained.
2. Combine Ingredients: In a medium saucepan, combine the cherries, sugar, cornstarch, lemon juice, salt, and water (or cherry juice).
3. Cook Mixture: Place the saucepan over medium heat. Stir the mixture occasionally as it heats.
4. Thicken the Filling: Once the mixture starts to bubble, continue to cook for an additional 2-3 minutes, or until it thickens to your desired consistency.
5. Add Flavor: If using almond extract, stir it in after removing the filling from heat.
6. Cool the Filling: Transfer the filling to a bowl and let it cool completely before using it in your recipe.
These steps will guide you in preparing an incredible cherry filling that can elevate your desserts!
- Prep Time: 10 minutes
- Cook Time: 15-20 minutes
Nutrition
- Serving Size: About 4 cups
- Calories: 200 kcal (per 1/4 cup serving)
- Fat: 0g
- Protein: 1g


