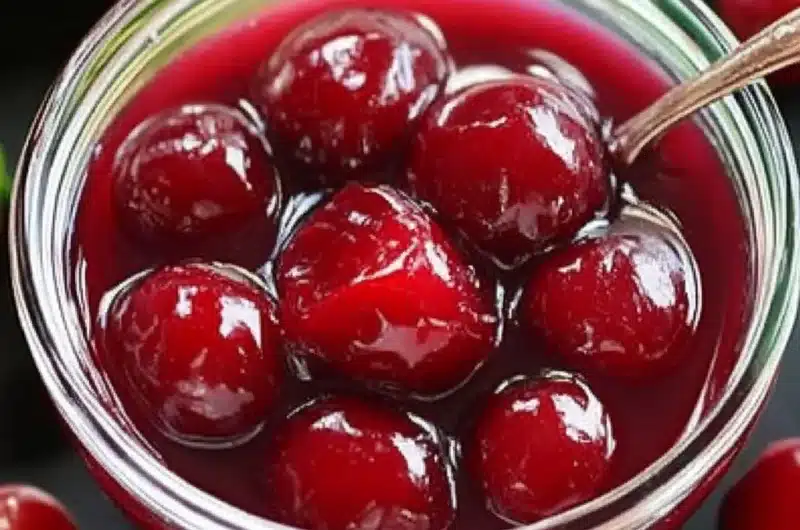
Simple Cherry Pie Filling is a delightful treat that packs an amazing burst of flavor in every bite. This recipe is perfect for creating mouthwatering cherry desserts that everyone will love. Whether you are making a classic cherry pie, topping ice cream, or creating a cherry tart, this filling is a must-have. It’s straightforward yet incredibly satisfying, taking advantage of just a few simple ingredients to achieve outstanding results.
If you’ve ever hesitated in making pie filling from scratch, you should know that Simple Cherry Pie Filling turns out wonderfully every time. This sweet and slightly tart mixture of cherries will elevate your baking game and have your friends and family asking for seconds. In this article, we’ll explore why you should fall in love with this recipe, how to prepare it, the ingredients you will need, and step-by-step instructions to guide you through the process. With this simple yet rewarding filling, you will be well on your way to creating desserts that dazzle, satisfying your sweet tooth and impressing all who share your treats.
The beauty of making Simple Cherry Pie Filling lies in its flexibility and versatility. You can adapt it with extra flavorings or enjoy it as is. Whether it’s fresh summer cherries or frozen ones, you’ll have a deliciously sweet base that can be used in various desserts. Let’s dive into everything you need to know about preparing this incredible cherry pie filling!
Why You’ll Love This Recipe
Simple Cherry Pie Filling offers a range of benefits that make it a favorite among bakers, both novice and experienced. Here’s why you’ll love this recipe:
1. Easy to Prepare: With just five simple ingredients, this recipe is straightforward to follow, making it great for beginners.
2. Quick Cooking Time: This filling can be prepared in less than 30 minutes, giving you delicious results in no time.
3. Versatile: It can be used in pies, tarts, cakes, or even as a topping for pancakes and ice cream.
4. Decadent Flavor: The combination of sweet cherries with a hint of lemon creates a refreshing and delightful taste.
5. Homemade Goodness: Making your cherry filling from scratch means you control the sweetness and flavors, and it’s free from preservatives.
6. Perfect for Sharing: This filling is sure to impress your family and friends, making it a great addition to potlucks or family gatherings.
With these enticing reasons, it’s easy to see why Simple Cherry Pie Filling is a favorite. Each spoonful carries a burst of flavor that is simply irresistible!
Preparation and Cooking Time
Getting started on your Simple Cherry Pie Filling is quick and straightforward. Here’s a helpful outline of your time commitments:
– Preparation Time: 10 minutes
– Cooking Time: 15-20 minutes
– Total Time: 25-30 minutes
These timings can slightly vary depending on your kitchen equipment and how quickly you work. However, you can count on a minimal investment of time for maximum flavor!
Ingredients
– 4 cups fresh or frozen cherries, pitted
– 1 ½ cups granulated sugar
– ⅓ cup cornstarch
– ½ teaspoon almond extract (optional)
– 1 tablespoon lemon juice
Step-by-Step Instructions
Creating your Simple Cherry Pie Filling is a breeze. Follow these easy steps:
1. Prepare the Cherries: If using fresh cherries, wash and pit them. If using frozen cherries, allow them to thaw and drain any excess liquid.
2. Combine Ingredients: In a medium saucepan, mix the cherries, granulated sugar, cornstarch, and lemon juice. If you’d like a deeper flavor, add the almond extract.
3. Cook the Mixture: Heat the saucepan over medium heat, stirring frequently to combine all ingredients thoroughly.
4. Bring to a Boil: Continue to cook until the mixture reaches a simmer. The cherries will release their juices, and the mixture will start to thicken.
5. Simmer: Cook for an additional 2-3 minutes after it boils, allowing the mixture to thicken further.
6. Cool: Remove from heat and let the filling cool completely before using it in your favorite dessert.
7. Storage: If you’re not using it right away, store it in an airtight container in the refrigerator for up to one week.
By following these step-by-step instructions, you’ll have an incredible cherry pie filling ready to use in no time!
How to Serve
Serving your Simple Cherry Pie Filling can be a delightful experience. Here are some suggestions to enhance your presentation and enjoyment:
1. Classic Cherry Pie: Use the filling to create a traditional cherry pie with a flaky crust. Serve it warm with a scoop of vanilla ice cream on the side for the ultimate indulgence.
2. Tarts: Spoon the filling into pre-baked tart shells for a lovely dessert that highlights the beautiful cherry color.
3. Ice Cream Topping: Warm the filling slightly and pour it over vanilla or chocolate ice cream for a quick yet luxurious treat.
4. Pancakes and Waffles: Add a generous dollop of cherry filling over pancakes or waffles for a fun breakfast twist.
5. Cheesecake Swirl: Incorporate the filling into cheesecake batter before baking for a cherry-flavored twist on classic cheesecake.
6. French Toast Bake: Layer the filling in a baked French toast casserole for a delightful brunch dish.
By exploring these serving ideas, you’ll not only enjoy your Simple Cherry Pie Filling but also impress everyone with how versatile it can be!
Additional Tips
– Use Fresh Cherries: When possible, opt for fresh cherries instead of frozen for a tastier filling.
– Adjust Sweetness: Depending on your preference and the ripeness of your cherries, feel free to adjust the sugar content.
– Thickening Agent: If you prefer a thicker filling, increase the cornstarch slightly.
– Flavor Enhancements: If you love almond flavors, consider increasing the almond extract for a more pronounced taste.
– Make Ahead: Prepare your cherry pie filling a day in advance for deeper flavors.
Recipe Variation
Explore these fun variations of Simple Cherry Pie Filling to keep things interesting:
1. Spiced Cherry Filling: Add a pinch of cinnamon or nutmeg for a warm, spicy flavor.
2. Berry Medley: Mix in blueberries or raspberries with your cherries for a delightful berry blend.
3. Alcohol-Infused Version: A splash of bourbon or cherry brandy can elevate the flavor complexity.
4. Citrus Twist: Experiment with orange zest in addition to lemon juice for a citrusy profile.
5. Sugar-Free Option: Use a sugar substitute or sweetener to make a sugar-free cherry filling.
Freezing and Storage
– Storage: Refrigerate your Simple Cherry Pie Filling in an airtight container. It can last up to one week in the fridge.
– Freezing: For longer storage, freeze the filling in freezer-safe containers or bags for up to three months. Always label and date your packages.
Special Equipment
While making Simple Cherry Pie Filling doesn’t require fancy tools, having the right equipment can enhance the process:
– Medium saucepan: Essential for cooking the filling.
– Wooden spoon: Useful for stirring and combining ingredients.
– Measuring cups and spoons: Accurate measurements ensure perfect results.
– Airtight container: Necessary for storing leftovers or frozen filling.
Frequently Asked Questions
Can I use canned cherries for this recipe?
Yes, you can use canned cherries. Just make sure to drain them properly to avoid excess liquid.
How do I know when the filling is ready?
The filling is ready when it has thickened and started bubbling gently for a few minutes.
Can I double this recipe?
Absolutely! Just make sure to use a larger saucepan to accommodate the increased volume.
Is it safe to freeze the filling?
Yes, Simple Cherry Pie Filling freezes well. Ensure it’s in freezer-safe containers.
Can I modify the sweetness?
Certainly! You can add more or less sugar based on your preference or the sweetness of the cherries.
Conclusion
Simple Cherry Pie Filling is not only easy to make, but it also offers a world of delightful flavors perfect for various desserts. By following the straightforward steps, you can create a luscious filling that is sure to impress. Whether you enjoy it as a classic pie, a topping, or in various other sweet treats, this recipe will elevate your baking to new heights. Now that you are equipped with tips, variations, and serving ideas, you’ll be ready to create desserts that will dazzle your friends and family every time!

Simple Cherry Pie Filling: An Incredible 5-Ingredient Recipe
- Total Time: 56 minute
Ingredients
– 4 cups fresh or frozen cherries, pitted
– 1 ½ cups granulated sugar
– ⅓ cup cornstarch
– ½ teaspoon almond extract (optional)
– 1 tablespoon lemon juice
Instructions
Creating your Simple Cherry Pie Filling is a breeze. Follow these easy steps:
1. Prepare the Cherries: If using fresh cherries, wash and pit them. If using frozen cherries, allow them to thaw and drain any excess liquid.
2. Combine Ingredients: In a medium saucepan, mix the cherries, granulated sugar, cornstarch, and lemon juice. If you’d like a deeper flavor, add the almond extract.
3. Cook the Mixture: Heat the saucepan over medium heat, stirring frequently to combine all ingredients thoroughly.
4. Bring to a Boil: Continue to cook until the mixture reaches a simmer. The cherries will release their juices, and the mixture will start to thicken.
5. Simmer: Cook for an additional 2-3 minutes after it boils, allowing the mixture to thicken further.
6. Cool: Remove from heat and let the filling cool completely before using it in your favorite dessert.
7. Storage: If you’re not using it right away, store it in an airtight container in the refrigerator for up to one week.
By following these step-by-step instructions, you’ll have an incredible cherry pie filling ready to use in no time!
- Prep Time: 10 minutes
- Cook Time: 15-20 minutes
Nutrition
- Serving Size: 4-6 servings
- Calories: 250 kcal
- Fat: 0g
- Protein: 1g


