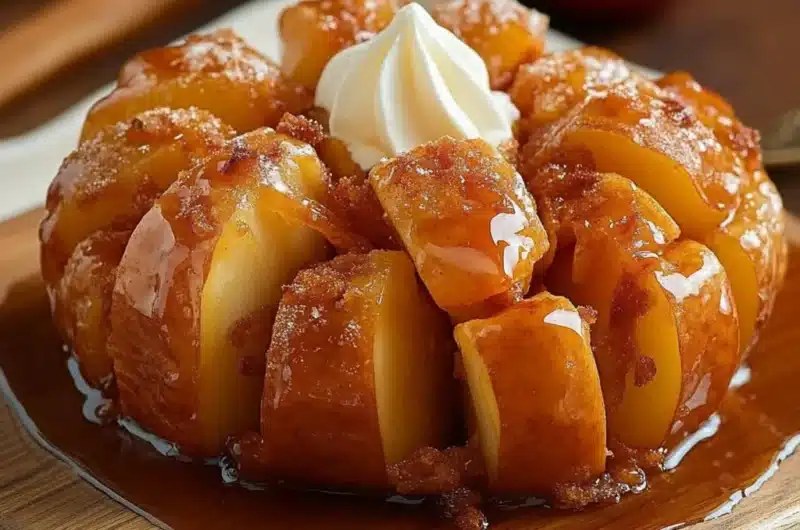
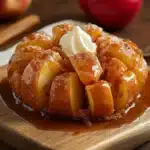
Baked Bloomin’ Apples are a delightful treat that will captivate your taste buds and warm your heart. This incredible dessert combines sweet, tender apples with a delightful blend of spices, sugar, and nuts that create a mouthwatering floral presentation. Imagine a beautifully baked apple that not only tastes divine but also looks stunning on your table—a perfect centerpiece for any gathering. Whether you’re hosting a dinner party, celebrating a special occasion, or simply indulging your sweet tooth, Baked Bloomin’ Apples offer an unforgettable experience.
These delectable desserts are deceptively simple to make and feature a harmonious blend of flavors that will leave your dessert-loving friends and family in awe. The aroma of cinnamon and baked apples filling your kitchen will evoke feelings of nostalgia, bringing to mind cherished memories of family gatherings and warm, comforting desserts. This recipe encourages you to embrace your inner baker, providing you with confidence and an outstanding result that will make you feel accomplished.
In this guide, we will explore what makes Baked Bloomin’ Apples a must-try dessert, discuss the quick preparation and cooking time, outline the necessary ingredients, and provide you with step-by-step instructions. Finally, we’ll reveal the best ways to serve this stunning dessert. Let’s dive into the world of Baked Bloomin’ Apples and discover the magic they hold!
Why You’ll Love This Recipe
Baked Bloomin’ Apples have a unique charm that is sure to win over your heart. As you explore this recipe, you’ll find several reasons to fall in love with it:
1. Impressive Presentation: The visual appeal of these blossoming apples is simply breathtaking and will impress your guests at any gathering.
2. Comforting Flavors: The sweet and spiced filling creates a wonderful flavor profile that perfectly complements the tartness of the apples.
3. Easy to Make: With just a few simple steps and readily available ingredients, even beginner bakers can master this dessert easily.
4. Customizable Recipe: Feel free to mix and match fillings and spices according to your preferences, making each batch a unique creation.
5. Healthier Option: Made with fresh apples, you can enjoy a delicious dessert that still retains some nutritional value.
6. Perfect for Any Season: This recipe shines in the fall, but its delicious taste makes it a delightful treat year-round.
By following this recipe, you’ll understand why Baked Bloomin’ Apples are adored by many. The combination of aesthetics and taste makes it a dessert worth celebrating!
Preparation and Cooking Time
Preparing Baked Bloomin’ Apples requires only a short amount of time, making it a fantastic option for both casual and special occasions. Here’s a breakdown of the time needed:
– Preparation Time: 20 minutes
– Cooking Time: 30-35 minutes
– Total Time: Approximately 50-55 minutes
These times may vary slightly based on your cooking experience and kitchen equipment but serve as a solid guideline to get you started.
Ingredients
– 4 medium-sized apples (preferably Honeycrisp or Granny Smith)
– 1/4 cup brown sugar
– 1/4 cup granulated sugar
– 1 teaspoon ground cinnamon
– 1/2 teaspoon ground nutmeg
– 1/2 cup chopped pecans or walnuts
– 1/4 cup raisins or cranberries (optional)
– 1/4 cup butter, melted
– 1 teaspoon vanilla extract
– 1/4 cup water
– Whipped cream or vanilla ice cream (for serving)
Step-by-Step Instructions
Creating Baked Bloomin’ Apples is a straightforward process that yields amazing results. Follow these steps for a delightful dessert:
1. Preheat Oven: Preheat your oven to 350°F (175°C).
2. Prepare the Apples: Core each apple, making sure to leave the bottom intact. Using a paring knife, create vertical cuts about 1/4 inch apart, from the top to the bottom of the apple without cutting all the way through.
3. Mix Filling: In a medium bowl, combine brown sugar, granulated sugar, cinnamon, nutmeg, chopped nuts, and raisins or cranberries (if using).
4. Stuff Apples: Squish the filling mixture into the crevices of each apple, ensuring that they are well-packed.
5. Place in Baking Dish: Arrange the stuffed apples in a baking dish.
6. Add Butter: Drizzle melted butter over the apples, ensuring they are well-coated.
7. Add Water: Pour the water into the bottom of the baking dish to create steam during baking.
8. Bake: Cover the dish with foil and bake in the preheated oven for 25 minutes. Afterwards, remove the foil and bake for an additional 10-15 minutes or until the apples are tender and the tops are golden.
9. Cool slightly: Once baked, let the apples cool for a few minutes before serving.
10. Serve: Enjoy your Baked Bloomin’ Apples warm, preferably with a scoop of vanilla ice cream or a dollop of whipped cream.
How to Serve
Making your Baked Bloomin’ Apples visually appealing adds to the overall experience. Here are some tips for serving:
1. Presentation: Place each bloomin’ apple on individual dessert plates or arrange them beautifully on a big platter for more impact.
2. Accompanying Sauces: Drizzle with caramel or chocolate sauce for an elevated treat that your guests will love.
3. Garnish: Sprinkle with a dash of cinnamon or garnish with mint leaves for a splash of color.
4. Pairing Suggestions: Serve with fresh whipped cream or a scoop of high-quality vanilla ice cream to complement the warmth of the baked apples.
5. Dessert Wine: To enhance the dining experience, consider pairing these apples with a dessert wine or a warm cider.
By considering these serving tips, you’ll create a memorable experience for anyone enjoying your lovely Baked Bloomin’ Apples. Prepare to be showered with compliments as you introduce this unstoppable dessert into your cooking repertoire!
Additional Tips
– Choose the Right Apples: For Baked Bloomin’ Apples, opt for firm varieties like Honeycrisp or Granny Smith. Their sturdiness helps maintain shape while baking.
– Experiment with Spices: Don’t hesitate to try different spices! A pinch of cloves or allspice can enhance the flavor profile even further.
– Serve Warm: Enjoy your Baked Bloomin’ Apples while they’re warm from the oven, as this maximizes their comforting taste.
– Add a Crunch: Consider topping your apples with a handful of granola or crushed nuts before serving. This adds an exciting texture.
– Make it Luxurious: Drizzling some homemade caramel sauce over the top elevates the dessert to a whole new level.
Recipe Variation
Feel free to get creative with these variations for your Baked Bloomin’ Apples:
1. Caramel-Stuffed Apples: Before adding the nut filling, place a small caramel piece inside each apple for a gooey surprise.
2. Fruit Medley: Mix pecans with other dried fruits such as chopped apricots or figs for a different twist.
3. Add Citrus Zest: Incorporate some lemon or orange zest into the filling for a refreshing burst of flavor.
4. Maple-Syrup Drizzle: Instead of granulated sugar, use maple syrup in the filling for a richer, more complex sweetness.
5. Chocolate Lovers: Sprinkle chocolate chips among the filling for a decadent chocolate-infused version.
Freezing and Storage
– Cooling: Allow your Baked Bloomin’ Apples to cool completely before storing them. This minimizes condensation, which can lead to sogginess.
– Refrigeration: Store any leftover apples in an airtight container in the fridge. They can last for up to 3-4 days without losing much quality.
– Freezing: For longer storage, wrap each baked apple individually in plastic wrap and place them in a freezer bag. They can be frozen for up to 3 months.
– Reheating: You can reheat the baked apples in the oven at 350°F (175°C) for about 10-15 minutes until warmed through.
Special Equipment
To create the perfect Baked Bloomin’ Apples, you might find the following tools useful:
– Baking Dish: A shallow baking dish allows the apples to bake evenly.
– Paring Knife: This small knife is excellent for coring and making precise cuts in the apples.
– Mixing Bowl: A medium bowl is necessary for combining the filling ingredients.
– Basting Brush: Use a brush to evenly coat the apples with melted butter.
– Foil: Aluminum foil is needed to cover the apples while they bake for the first 25 minutes.
Frequently Asked Questions
Can I use other fruits instead of apples?
Yes, pears can be used in a similar manner to create a delicious variation of this dessert.
What if I can’t find Honeycrisp apples?
Granny Smith apples are an excellent substitute. They provide a nice tartness that balances well with the sweet filling.
How do I know when the apples are done baking?
The apples should be tender when pierced with a fork, and the tops should be golden brown.
Can I make a larger batch?
Absolutely! Just increase the quantities of the ingredients and use a larger baking dish to accommodate more apples.
Is it possible to prepare them in advance?
Yes, you can prepare the apples, stuff them, and keep them covered in the fridge for a few hours until you’re ready to bake.
Conclusion
Baked Bloomin’ Apples are not just a dessert; they are an experience. With their beautiful presentation, delightful flavors, and simplicity of preparation, they transform any meal into a celebration. Whether for a holiday gathering or an everyday treat, these apples are sure to impress and satisfy everyone’s sweet cravings. Embrace this recipe and make it your own; you may find that this charming dessert becomes a staple in your home.
Baked Bloomin’ Apples: The Ultimate Amazing Dessert Recipe
- Total Time: 7 minute
Ingredients
– 4 medium-sized apples (preferably Honeycrisp or Granny Smith)
– 1/4 cup brown sugar
– 1/4 cup granulated sugar
– 1 teaspoon ground cinnamon
– 1/2 teaspoon ground nutmeg
– 1/2 cup chopped pecans or walnuts
– 1/4 cup raisins or cranberries (optional)
– 1/4 cup butter, melted
– 1 teaspoon vanilla extract
– 1/4 cup water
– Whipped cream or vanilla ice cream (for serving)
Instructions
Creating Baked Bloomin’ Apples is a straightforward process that yields amazing results. Follow these steps for a delightful dessert:
1. Preheat Oven: Preheat your oven to 350°F (175°C).
2. Prepare the Apples: Core each apple, making sure to leave the bottom intact. Using a paring knife, create vertical cuts about 1/4 inch apart, from the top to the bottom of the apple without cutting all the way through.
3. Mix Filling: In a medium bowl, combine brown sugar, granulated sugar, cinnamon, nutmeg, chopped nuts, and raisins or cranberries (if using).
4. Stuff Apples: Squish the filling mixture into the crevices of each apple, ensuring that they are well-packed.
5. Place in Baking Dish: Arrange the stuffed apples in a baking dish.
6. Add Butter: Drizzle melted butter over the apples, ensuring they are well-coated.
7. Add Water: Pour the water into the bottom of the baking dish to create steam during baking.
8. Bake: Cover the dish with foil and bake in the preheated oven for 25 minutes. Afterwards, remove the foil and bake for an additional 10-15 minutes or until the apples are tender and the tops are golden.
9. Cool slightly: Once baked, let the apples cool for a few minutes before serving.
10. Serve: Enjoy your Baked Bloomin’ Apples warm, preferably with a scoop of vanilla ice cream or a dollop of whipped cream.
- Prep Time: 15 minutes
- Cook Time: 30-35 minutes
Nutrition
- Serving Size: 4 apples
- Calories: 230 kcal
- Fat: 10g
- Protein: 2g