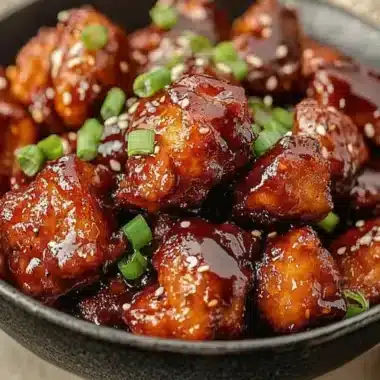
Baking Chicken Tenders is a delightful way to enjoy a classic meal that everyone loves. These tender, juicy pieces of chicken are not only easy to prepare, but they also offer a healthier alternative to frying. With a crispy coating and a burst of flavor, this recipe ensures that your chicken tenders will be a hit with family and friends alike. The aroma wafting through your kitchen will be irresistible, drawing everyone in and making their mouths water in anticipation.
If you’ve ever found yourself wondering how to achieve that perfect balance of crispy and juicy, you’re not alone. Many home cooks seek the secret to baking chicken tenders that rival those from your favorite restaurant. This guide will take you through the process step-by-step, ensuring that you create amazing chicken tenders that are both satisfying and delicious. Whether you’re preparing for a family dinner or a casual get-together, these tenders will surely impress.
What makes this recipe truly special is its versatility. You can customize the flavors to suit your palate by adjusting the seasoning or adding your favorite herbs. Plus, baking chicken tenders is a straightforward process that requires minimal effort. In this article, you will learn why this recipe stands out, how to prepare it, and tips for serving it perfectly. Let’s dive into the world of baking chicken tenders!
Why You’ll Love This Recipe
Baking Chicken Tenders offers a variety of benefits that make it a go-to option for any home cook. Here are several reasons you’re sure to love this recipe:
1. Healthier Option: By baking instead of frying, you significantly reduce the amount of oil used, making this a healthier dish.
2. Crispy Coating: The baking process allows for a wonderfully crispy exterior without compromising the juicy interior.
3. Quick and Easy: With simple ingredients and straightforward steps, you can have these tenders ready in no time.
4. Family-Friendly: Kids and adults alike enjoy chicken tenders, making this a universally loved dish.
5. Customizable Flavors: You can easily modify the spice mixture to cater to different tastes, from mild to spicy.
6. Meal Prep Friendly: These tenders are great for meal prep; they can be stored in the fridge and reheated for a quick meal later.
With these factors in mind, it’s no wonder that baking chicken tenders has become a favorite for many home cooks. The blend of flavors and textures creates a satisfying dish that everyone will rave about!
Preparation and Cooking Time
Baking Chicken Tenders is a quick process that doesn’t require hours in the kitchen. Here’s a breakdown of the time you’ll need:
– Preparation Time: 15 minutes
– Cooking Time: 20-25 minutes
– Total Time: Approximately 40 minutes
These times are estimates and may vary slightly based on your kitchen setup and experience, but they should provide a good framework for planning your cooking session.
Ingredients
– 1 pound chicken tenders
– 1 cup all-purpose flour
– 2 large eggs
– 1 cup breadcrumbs (Panko for extra crunch)
– 1 teaspoon paprika
– 1 teaspoon garlic powder
– 1 teaspoon onion powder
– ½ teaspoon salt
– ½ teaspoon black pepper
– Cooking spray or olive oil (for greasing)
Step-by-Step Instructions
Creating perfectly baked chicken tenders is easy when you follow these simple steps:
1. Preheat Oven: Preheat your oven to 425°F (220°C). Line a baking sheet with parchment paper or lightly grease it.
2. Prepare Chicken: Pat the chicken tenders dry with paper towels to remove excess moisture.
3. Set Up Breading Station:
– In one bowl, place the flour seasoned with salt, pepper, paprika, garlic powder, and onion powder.
– In a second bowl, beat the eggs until well combined.
– In a third bowl, add the breadcrumbs.
4. Bread the Chicken:
– Dredge each chicken tender in the flour, ensuring it’s fully coated.
– Dip it into the beaten eggs, allowing excess to drip off.
– Finally, coat the tender in breadcrumbs, pressing gently to adhere.
5. Arrange on Baking Sheet: Place the breaded chicken tenders on the prepared baking sheet, ensuring they are spaced apart for even cooking.
6. Spray with Oil: Lightly spray the tops of the chicken tenders with cooking spray or drizzle with olive oil for added crispiness.
7. Bake: Place in the preheated oven and bake for 20-25 minutes, flipping halfway through, until golden brown and cooked through. Internal temperature should reach 165°F (75°C).
8. Rest: Once baked, remove the chicken tenders from the oven and let them rest for a few minutes before serving.
These steps will guide you in creating amazing chicken tenders that are sure to please.
How to Serve
To elevate your baking chicken tenders experience, consider the following serving suggestions:
1. Dipping Sauces: Offer a variety of sauces such as honey mustard, barbecue sauce, ranch dressing, or sweet and sour sauce for dipping.
2. Side Dishes: Pair the tenders with sides like coleslaw, sweet potato fries, or a fresh green salad for a complete meal.
3. Presentation: Arrange the chicken tenders on a serving platter, garnished with fresh herbs or lemon wedges for a pop of color.
4. Make it a Meal: Serve the tenders in a sandwich or wrap with lettuce, tomatoes, and your favorite condiments for a delicious handheld option.
With these serving ideas, your baked chicken tenders will not only be a tasty dish but also a visually appealing centerpiece for your meal. Enjoy the process of baking and serving this incredible recipe!
Additional Tips
– Use Quality Chicken: For the best results, choose fresh, high-quality chicken tenders. Organic or free-range chicken can enhance the flavor and texture.
– Marinate for Extra Flavor: Consider marinating the chicken tenders in buttermilk or a spice blend for a few hours before breading. This will add moisture and enhance the flavor.
– Experiment with Seasonings: Don’t hesitate to try different spice blends or herbs. Italian seasoning, Cajun spices, or even a bit of parmesan cheese can add unique flavors to your tenders.
– Monitor Cooking Time: Every oven is different. Keep an eye on your chicken tenders to prevent overcooking. They should be golden brown and reach an internal temperature of 165°F (75°C).
– Use a Thermometer: To ensure your chicken is perfectly cooked, use a meat thermometer. This helps prevent dryness and guarantees safety.
Recipe Variation
Feel free to get creative! Here are some variations to enhance your baking chicken tenders experience:
1. Buffalo Chicken Tenders: Add a tablespoon of hot sauce to the breadcrumb mixture for a spicy kick. Serve with blue cheese dressing for dipping.
2. Herb-Crusted Tenders: Mix chopped fresh herbs like parsley, thyme, or rosemary into the breadcrumb mixture for a fragrant twist.
3. Cheesy Chicken Tenders: Incorporate grated cheese into the breadcrumbs for a cheesy flavor. Parmesan or cheddar works well.
4. Gluten-Free Option: Substitute all-purpose flour and breadcrumbs with gluten-free alternatives for a delicious gluten-free version.
5. Sweet and Spicy: Mix a little brown sugar with your spices for a sweet and spicy flavor profile.
Freezing and Storage
– Storage: Keep baked chicken tenders in an airtight container in the refrigerator. They should stay fresh for about 3-4 days.
– Freezing: To freeze, allow the tenders to cool completely. Then, place them in a single layer on a baking sheet to freeze. Once solid, transfer them to a freezer-safe bag or container. They can be frozen for up to 3 months.
– Reheating: To reheat, place the tenders in the oven at 375°F (190°C) for about 10-15 minutes or until heated through. This will help maintain their crispy texture.
Special Equipment
While you can make baked chicken tenders with basic kitchen tools, having the right equipment can simplify the process:
– Baking Sheet: A good quality, non-stick baking sheet is essential for even cooking.
– Parchment Paper: This helps prevent sticking and makes cleanup easier.
– Three-Bowl Setup: Use three shallow bowls for the breading process to keep everything organized.
– Meat Thermometer: This is important for checking the internal temperature of the chicken.
– Tongs: Use tongs to handle the chicken tenders without making a mess.
Frequently Asked Questions
Can I use chicken breasts instead of tenders?
Yes, you can cut chicken breasts into strips to create your own tenders.
What can I serve with baked chicken tenders?
They pair well with a variety of sides such as fries, vegetables, or salads.
How can I make them spicier?
Add cayenne pepper or hot sauce to the breadcrumb mixture for an extra kick.
Can I bake them without breadcrumbs?
Yes, you can omit breadcrumbs for a lighter option, but they will lack the crispy texture.
Are these chicken tenders suitable for a party?
Absolutely! They’re perfect for gatherings and can be served with various dipping sauces for guests to enjoy.
Conclusion
Baking chicken tenders is a fantastic way to bring a beloved comfort food to your table in a healthier way. With their crispy coating and juicy interior, these tenders are sure to be a crowd-pleaser. Whether you’re serving them at a family dinner or a casual gathering, they will undoubtedly impress. The versatility of this recipe allows you to tailor it to your taste, ensuring that every bite is satisfying. So gather your ingredients, follow the steps, and enjoy the delightful experience of baking chicken tenders!

Baking Chicken Tenders: An Amazing Ultimate Recipe
- Total Time: 19 minute
Ingredients
– 1 pound chicken tenders
– 1 cup all-purpose flour
– 2 large eggs
– 1 cup breadcrumbs (Panko for extra crunch)
– 1 teaspoon paprika
– 1 teaspoon garlic powder
– 1 teaspoon onion powder
– ½ teaspoon salt
– ½ teaspoon black pepper
– Cooking spray or olive oil (for greasing)
Instructions
Creating perfectly baked chicken tenders is easy when you follow these simple steps:
1. Preheat Oven: Preheat your oven to 425°F (220°C). Line a baking sheet with parchment paper or lightly grease it.
2. Prepare Chicken: Pat the chicken tenders dry with paper towels to remove excess moisture.
3. Set Up Breading Station:
– In one bowl, place the flour seasoned with salt, pepper, paprika, garlic powder, and onion powder.
– In a second bowl, beat the eggs until well combined.
– In a third bowl, add the breadcrumbs.
4. Bread the Chicken:
– Dredge each chicken tender in the flour, ensuring it’s fully coated.
– Dip it into the beaten eggs, allowing excess to drip off.
– Finally, coat the tender in breadcrumbs, pressing gently to adhere.
5. Arrange on Baking Sheet: Place the breaded chicken tenders on the prepared baking sheet, ensuring they are spaced apart for even cooking.
6. Spray with Oil: Lightly spray the tops of the chicken tenders with cooking spray or drizzle with olive oil for added crispiness.
7. Bake: Place in the preheated oven and bake for 20-25 minutes, flipping halfway through, until golden brown and cooked through. Internal temperature should reach 165°F (75°C).
8. Rest: Once baked, remove the chicken tenders from the oven and let them rest for a few minutes before serving.
These steps will guide you in creating amazing chicken tenders that are sure to please.
- Prep Time: 15 minutes
- Cook Time: 20-25 minutes
Nutrition
- Serving Size: 4-6 servings
- Calories: 350 kcal
- Fat: 10g
- Protein: 25g