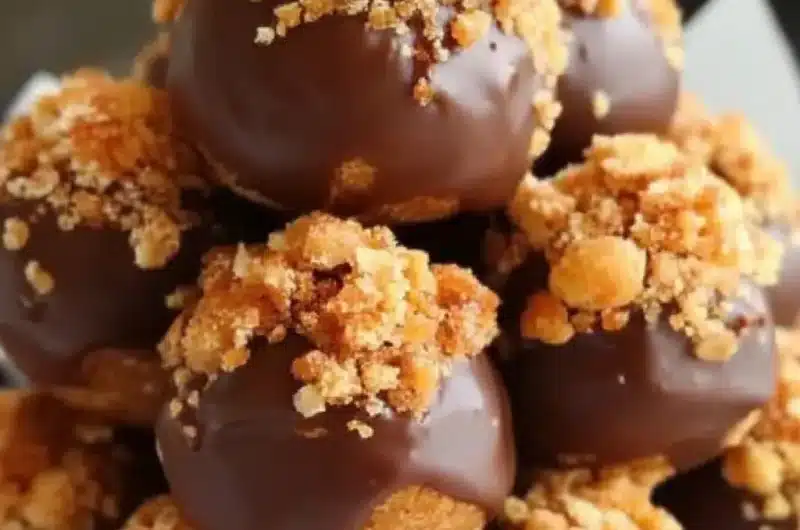
Butterfinger Balls are an amazing treat that combines the delightful flavors of peanut butter, chocolate, and crushed Butterfinger candies. These sweet bites are perfect for parties, holidays, or just satisfying your sweet tooth. With their creamy texture and crunchy bits, everyone will love them. The best part? They require minimal effort, making them a go-to dessert for bakers of all skill levels.
If you’re a fan of Butterfingers, you’ll understand the allure of these decadent balls. Imagine sinking your teeth into a rich and creamy peanut butter mixture, coated in smooth chocolate and finished with a satisfying crunch from the Butterfinger candy. This combination makes Butterfinger Balls more than just a treat; they are an experience that captures the happiness of childhood snacks wrapped in an adult-friendly dessert.
In this guide, you’ll discover what makes the Butterfinger Balls special, the reasons to try this recipe, how to prepare them, and step-by-step instructions for making these delightful episodes of happiness in your kitchen. So, prepare to impress your friends and family with this incredible dessert!
Why You’ll Love This Recipe
The appeal of Butterfinger Balls lies in their simplicity and flavor profile. Some reasons you’ll fall in love with this recipe include:
1. Quick and Easy: This recipe is straightforward and doesn’t require baking.
2. Kid-Friendly: It’s a fun recipe to make with children, letting them join in on the fun of mixing and rolling.
3. No Special Skills Needed: Whether you’re a novice or an experienced cook, these balls are easy to create.
4. Delicious Flavor Combination: The wonderful tastes of peanut butter and chocolate harmonize beautifully with crunchy Butterfinger pieces.
5. Perfect for Any Occasion: Whether it’s a birthday party, holiday gathering, or just a cozy night in, these treats are suitable everywhere.
6. Make Ahead: Butterfinger Balls can be prepared in advance and stored, making them an excellent option for party planning.
These factors make Butterfinger Balls an irresistible treat, leading you to create a delightful chocolate-peanut butter masterpiece that is sure to please.
Preparation and Cooking Time
To prepare the Butterfinger Balls, you’ll need some time for gathering ingredients and making everything come together. Here’s a breakdown of the time involved:
– Preparation Time: 15 minutes
– Chilling Time: 30 minutes
– Total Time: 45 minutes
This quick preparation means you can enjoy these amazing bites without spending all day in the kitchen!
Ingredients
– 1 cup creamy peanut butter
– 1 cup powdered sugar
– 1 cup crushed Butterfinger candy bars (about 3-4 bars)
– 1 cup semi-sweet chocolate chips
– 2 teaspoons vegetable shortening (optional, for smoother chocolate)
Step-by-Step Instructions
Creating Butterfinger Balls is simple. Follow these steps for a delicious result:
1. Combine Chewy Ingredients: In a mixing bowl, combine the creamy peanut butter and powdered sugar until smooth.
2. Add Crunch: Fold in the crushed Butterfinger candy bars until evenly distributed.
3. Form Balls: Scoop out the mixture and roll into balls about 1 inch in diameter. Place on a baking sheet lined with parchment paper.
4. Chill: Refrigerate the formed balls for about 30 minutes until they’re firm.
5. Melt Chocolate: While the balls chill, melt the semi-sweet chocolate chips in a microwave-safe bowl. Add the vegetable shortening if you desire a smoother texture.
6. Coat Balls: Remove the chilled balls from the refrigerator. Dip each ball into the melted chocolate, ensuring they are well-coated.
7. Set on Baking Sheet: Use a fork to lift them out of the chocolate and let any excess drip off. Place them back on the parchment-lined baking sheet.
8. Cool: Allow the chocolate coating to set at room temperature or refrigerate for faster results.
9. Optional Drizzle: For an attractive finish, melt some additional chocolate and drizzle it over the tops of the coated balls before the chocolate hardens completely.
Following these straightforward steps will guide you in crafting these mouthwatering Butterfinger Balls.
How to Serve
To elevate your Butterfinger Balls experience, consider these serving suggestions:
1. Presentation: Arrange the balls on a decorative platter, garnishing with extra crushed Butterfinger pieces for visual appeal.
2. Pair with Ice Cream: Serve alongside a scoop of vanilla ice cream for a delightful contrast of chilly creaminess and rich chocolate.
3. Create Gift Bags: For parties or gifts, package individual Butterfinger Balls in clear cellophane bags tied with ribbons.
4. Coffee or Tea Pairing: Serve with a side of coffee or tea, which perfectly complements the sweetness of the balls.
5. Visual Appeal: Consider using decorative cupcake liners to enhance their presentation when serving at parties.
By thoughtfully serving these Butterfinger Balls, you can create a memorable experience for yourself and your guests.
Additional Tips
– Use Fresh Butterfinger: For the best flavor, ensure your Butterfinger candy bars are fresh. This affects both crunch and taste.
– Adjust Consistency: If the mixture is too dry, add more peanut butter. If it’s too wet, add a bit more powdered sugar to achieve the perfect texture.
– Experiment with Coating: While semi-sweet chocolate is delightful, consider using milk chocolate or dark chocolate as alternatives for varying flavor profiles.
– Don’t Skip Chilling: Chilling the balls before coating them helps retain their shape, so don’t rush this crucial step.
– Try Different Nuts: For added crunch, you can mix in finely chopped nuts like almonds or peanuts with the Butterfinger mixture.
Recipe Variation
Get creative with your Butterfinger Balls! Here are a few variations to delight your taste buds:
1. White Chocolate Drizzle: After coating the balls in chocolate, add a drizzle of melted white chocolate for a sweet contrast.
2. Coconut Flakes: Add shredded coconut to the peanut butter mixture for added texture and flavor.
3. Chocolate Peanut Butter Swirl: Layer the mixture in a container, alternating chocolate and peanut butter to create a visually appealing swirl effect.
4. Spicy Option: For those who like a kick, incorporate a pinch of cayenne pepper or chili powder in the peanut butter mixture to spice things up.
Freezing and Storage
– Storage: Keep the Butterfinger Balls in an airtight container in the refrigerator. They will stay fresh for up to one week.
– Freezing: For longer storage, these delicious bites can be frozen. Place them in a single layer on a baking sheet until solid. Once frozen, transfer them to a freezer-safe bag or container. They can last up to three months in the freezer.
Special Equipment
You won’t need fancy equipment to make Butterfinger Balls, but these tools will help streamline the process:
– Mixing Bowls: For combining ingredients effectively.
– Baking Sheet: Use this for setting the formed balls before and after chilling.
– Parchment Paper: This helps prevent sticking and makes cleanup easier.
– Microwave-Safe Bowl: Required for melting chocolate, making it simple and fast.
Frequently Asked Questions
Can I use natural peanut butter?
Yes, you can use natural peanut butter. However, be aware that it may alter the creaminess and sweetness of the final product.
What if the chocolate coating cracks?
If your chocolate coating cracks, it may be due to rapid temperature changes. Make sure the balls are chilled before dipping and allow them to warm slightly at room temperature after freezing before coating.
Can I use different candy bars?
Absolutely! Feel free to replace Butterfingers with other candies like Reese’s, Snickers, or even crushed Oreos for a unique flavor.
How do I know if the Butterfinger Balls are firm enough to coat?
After the chilling time, they should feel firm to the touch and maintain their shape when rolled.
Is this recipe gluten-free?
Yes, the ingredients are naturally gluten-free, but be sure to double-check the Butterfinger package for any cross-contamination warnings.
Conclusion
Butterfinger Balls are not just another treat; they are a delightful fusion of flavors that captures the essence of childhood snacks while appealing to adults. Their simplicity, versatility, and taste make them an unforgettable dessert to impress your family and friends. With all the tips and variations provided, you’ll be creating these scrumptious bites time and time again!

Butterfinger Balls: An Incredible Secret Recipe
- Total Time: 15 minutes
Ingredients
– 1 cup creamy peanut butter
– 1 cup powdered sugar
– 1 cup crushed Butterfinger candy bars (about 3-4 bars)
– 1 cup semi-sweet chocolate chips
– 2 teaspoons vegetable shortening (optional, for smoother chocolate)
Instructions
Creating Butterfinger Balls is simple. Follow these steps for a delicious result:
1. Combine Chewy Ingredients: In a mixing bowl, combine the creamy peanut butter and powdered sugar until smooth.
2. Add Crunch: Fold in the crushed Butterfinger candy bars until evenly distributed.
3. Form Balls: Scoop out the mixture and roll into balls about 1 inch in diameter. Place on a baking sheet lined with parchment paper.
4. Chill: Refrigerate the formed balls for about 30 minutes until they’re firm.
5. Melt Chocolate: While the balls chill, melt the semi-sweet chocolate chips in a microwave-safe bowl. Add the vegetable shortening if you desire a smoother texture.
6. Coat Balls: Remove the chilled balls from the refrigerator. Dip each ball into the melted chocolate, ensuring they are well-coated.
7. Set on Baking Sheet: Use a fork to lift them out of the chocolate and let any excess drip off. Place them back on the parchment-lined baking sheet.
8. Cool: Allow the chocolate coating to set at room temperature or refrigerate for faster results.
9. Optional Drizzle: For an attractive finish, melt some additional chocolate and drizzle it over the tops of the coated balls before the chocolate hardens completely.
Following these straightforward steps will guide you in crafting these mouthwatering Butterfinger Balls.
- Prep Time: 15 minutes
- Cook Time: 0 minutes
Nutrition
- Serving Size: 24 balls
- Calories: 120 kcal
- Fat: 7g
- Protein: 2g