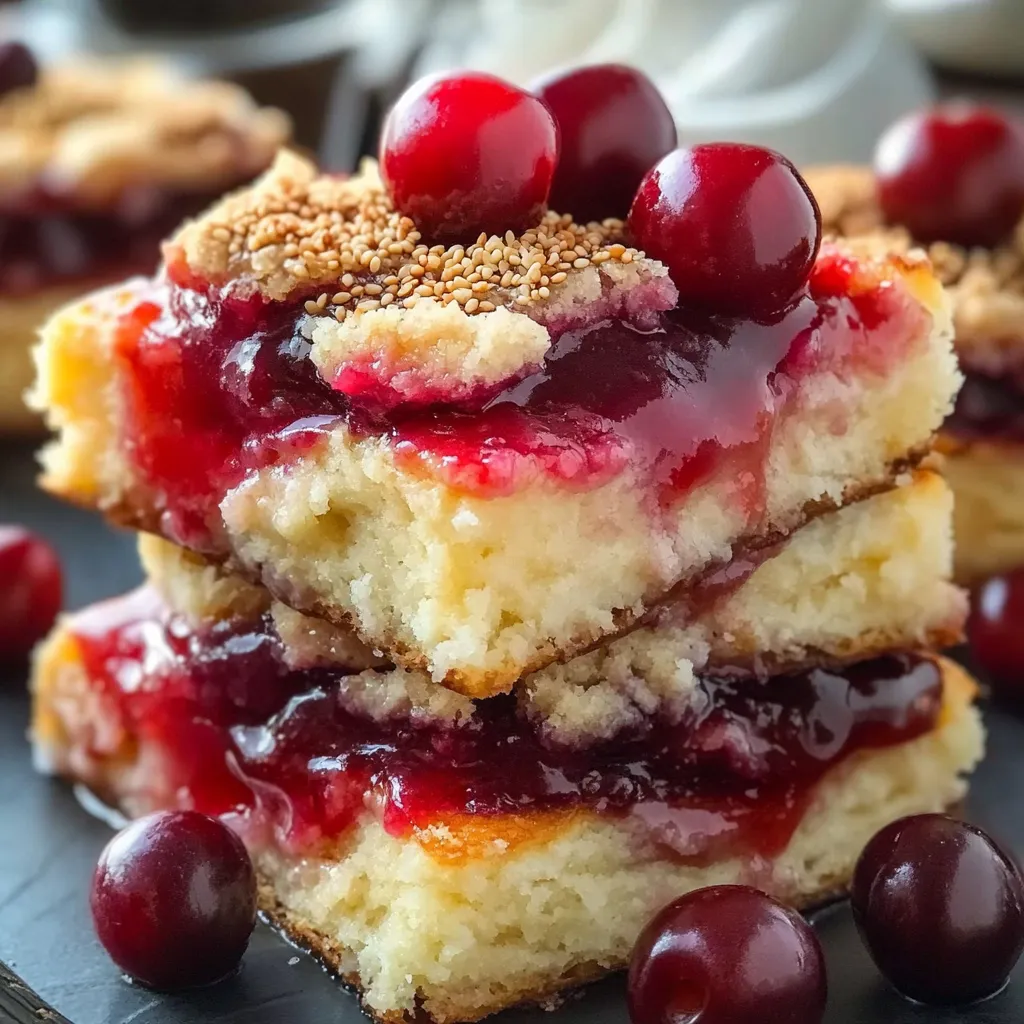
These Cherry Bars are what I call the “comfort sweater” of desserts. Nothing flashy. Nothing complicated. Just a soft, buttery vanilla base layered with sweet cherry filling and finished with a simple drizzle of icing. They’re a little nostalgic (think church bake sale or grandma’s kitchen), but they’re also totally versatile and perfect for just about any occasion.
You can use canned cherry pie filling for convenience (which works great!), or make your own quick cherry compote if you’ve got fresh or frozen cherries on hand. Either way, they slice up beautifully, hold together well, and taste even better the next day.
This is one of those desserts that’s low-effort, high reward. You mix the dough in one bowl, spread most of it in the pan, dollop cherry filling over the top, and bake. That’s it. Perfect for holiday trays, picnics, and whenever you need a fast dessert that everyone will love.
Why You’ll Love These Cherry Bars
- Soft and buttery – Almost like a sugar cookie meets pound cake.
- Packed with sweet cherry flavor – Tart and jammy in the best way.
- Easy to make – One-bowl dough, minimal fuss.
- Feeds a crowd – Makes 18–24 bars in a single pan.
- Halal-friendly – No alcohol, no gelatin, and easy to adjust for dietary needs.
- Freezer-friendly – Bake, slice, and freeze for later.
Prep Time & Servings
- Prep Time: 15 minutes
- Cook Time: 35–40 minutes
- Total Time: 55 minutes
- Servings: 18–24 bars
Calories per bar: ~220 (depending on size and glaze)
Protein: 2g | Carbs: 28g | Fat: 11g
Ingredients
For the Bars:
- 1 cup unsalted butter, softened
- 1¾ cups granulated sugar
- 4 large eggs
- 1 tsp halal vanilla extract
- ½ tsp almond extract (optional, but highly recommended)
- 2¾ cups all-purpose flour
- 1½ tsp baking powder
- ½ tsp salt
- 1 (21 oz) can cherry pie filling (or about 1½ cups homemade cherry filling)
For the Glaze (optional):
- 1 cup powdered sugar
- 1–2 tbsp milk
- ½ tsp vanilla extract
Step-by-Step Instructions
Step 1: Preheat and Prep
- Preheat your oven to 350°F (175°C).
- Lightly grease a 9×13-inch baking pan or line it with parchment for easy lifting.
Step 2: Make the Dough
- In a large mixing bowl, cream the butter and sugar together until light and fluffy (about 2–3 minutes).
- Add eggs, one at a time, mixing well after each.
- Stir in the vanilla and almond extract.
- In a separate bowl, whisk together flour, baking powder, and salt.
- Gradually add the dry ingredients to the wet mixture and mix until combined. The dough will be thick, almost like cake batter
Step 3: Assemble the Bars
- Spread about 2/3 of the batter into the bottom of the prepared pan. Use a spatula or clean hands to press evenly—it doesn’t have to be perfect.
- Spoon the cherry pie filling over the top, spreading it out gently.
- Drop spoonfuls of the remaining batter over the cherries. It won’t cover the entire surface, and that’s okay! You want some cherry peeking through.
Step 4: Bake
- Bake for 35–40 minutes, or until the top is golden and a toothpick inserted in the cake part comes out clean.
- Let cool in the pan for at least 30 minutes before glazing or slicing.
Step 5: Glaze (Optional but Recommended)
- In a small bowl, whisk together powdered sugar, milk, and vanilla until smooth.
- Drizzle over the cooled bars using a spoon or fork.
- Let glaze set before cutting into squares or bars.
How to Serve
These bars are perfect for:
- Holiday dessert trays
- Picnics or potlucks
- Coffee and tea breaks
- Make-ahead party treats
- Gifting – wrap individually in parchment and twine
Serve at room temperature, slightly chilled, or even warmed up with a scoop of vanilla ice cream.
Tips for Success
- Use room temp ingredients – Especially butter and eggs, for smooth mixing.
- Don’t overbake – The edges should be golden but the center soft and moist.
- Let them cool fully before glazing or slicing. They hold together better once set.
- Customize the topping – Sprinkle with slivered almonds or coarse sugar before baking for texture.
- Use parchment – Makes it easier to lift and slice neatly.
Recipe Variations
- Fresh or frozen cherries – Cook down with sugar and cornstarch to make your own filling.
- Blueberry or raspberry bars – Swap in your favorite pie filling.
- Gluten-free version – Use a 1:1 gluten-free flour blend.
- Crumble topping – Save a bit of dough and mix with oats for a streusel topping.
- Vegan version – Use plant-based butter and egg replacers (like flax eggs).
Storage & Freezing
To Store:
Keep bars in an airtight container at room temp for 2 days or in the fridge for up to 5 days.
To Freeze:
Freeze sliced bars between layers of parchment in a freezer-safe container. Thaw overnight in the fridge or at room temp before serving.
Special Equipment
- 9×13 baking pan
- Hand or stand mixer
- Spatula or offset knife
- Whisk for glaze
- Parchment paper (optional for easy lift and clean slicing)
Frequently Asked Questions
Can I use homemade cherry filling?
Absolutely! Just make sure it’s thick enough—not too watery—or the bars will be soggy.
Do I need to use almond extract?
It’s optional but gives that classic bakery-style flavor. You can skip it or use more vanilla instead.
Can I double the recipe?
Yes! Use a sheet pan (12×17″) and adjust baking time as needed (check around 30–35 minutes).
Can I skip the glaze?
Definitely. They’re sweet enough on their own, but the glaze adds a pretty finish.
Final Thoughts
These Cherry Bars are a cozy, crowd-pleasing classic for a reason. They’re soft, buttery, packed with cherry flavor, and topped with the simplest glaze that ties it all together. Easy to make, easy to love, and perfect for just about any gathering or afternoon craving.
Whether you’re baking them for a special event or just because it’s Tuesday and you deserve a treat—you’re going to want to save this one.
If you make them, don’t forget to share your twist! Add a crumble, try a new fruit filling, or drizzle on chocolate instead of glaze. I can’t wait to see your version!
Print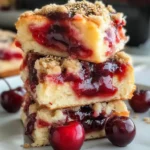
Cherry Bars
- Total Time: 55 min
Description
These easy-to-make dessert bars feature a soft, cake-like crust, a luscious layer of cherry pie filling, and a sweet vanilla glaze on top. A crowd-pleasing treat that’s as pretty as it is tasty!
Ingredients
For the base and topping:
-
1 cup unsalted butter, softened
-
1 ¾ cups sugar
-
4 large eggs
-
1 tsp vanilla extract
-
3 cups all-purpose flour
-
½ tsp salt
-
1 (21 oz) can cherry pie filling
For the glaze:
-
1 cup powdered sugar
-
2 tbsp milk
-
½ tsp vanilla extract
Instructions
1️⃣ Preheat oven: Set to 350°F (175°C). Grease a 9×13-inch baking pan or line with parchment paper.
2️⃣ Make the batter: In a large bowl, cream butter and sugar until light and fluffy. Beat in eggs, one at a time, then add vanilla. Mix in flour and salt until well combined.
3️⃣ Assemble layers: Spread about ⅔ of the batter into the prepared pan. Spoon cherry pie filling evenly over the batter. Drop remaining batter by spoonfuls over the top.
4️⃣ Bake: Bake for 35–40 minutes, or until golden and set. Let cool completely in the pan.
5️⃣ Make the glaze: Whisk powdered sugar, milk, and vanilla until smooth. Drizzle over cooled bars.
6️⃣ Serve: Slice into squares and enjoy!
Notes
-
Try it with blueberry or apple pie filling for variation.
-
Bars can be made a day in advance—flavors deepen overnight.
- Prep Time: 15 min
- Cook Time: 40 min