Cherry Vanilla Ice Cream is an amazing summer treat that combines the tangy sweetness of cherries with the creamy richness of vanilla. This delightful frozen dessert not only cools you down but tantalizes your taste buds with each bite. The contrast of flavors is perfectly balanced, creating a flavor profile that warms your heart even on the hottest days. If you’re looking for that ultimate scoop of happiness, look no further than this recipe!
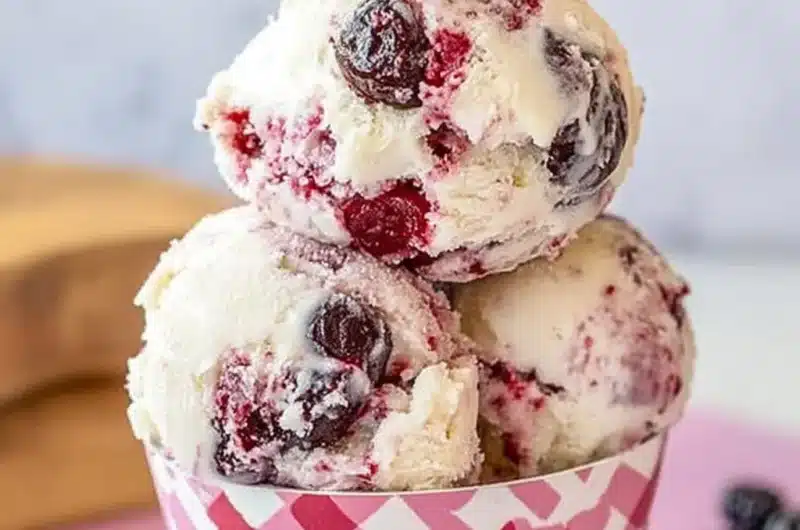
Imagine warm summer days, picnics, and family gatherings where Cherry Vanilla Ice Cream takes center stage. The bright red cherry swirls against a creamy vanilla base create a visually stunning dessert. This irresistible treat is not just your ordinary ice cream; it’s a celebration of flavors, ideal for serving when entertaining guests or simply enjoying a well-deserved treat after a long day.
In this guide, we will explore why you’ll love this recipe, how long it takes to prepare, the list of ingredients you’ll need, step-by-step instructions, and, finally, how to serve this incredible Cherry Vanilla Ice Cream. Whether you’re an ice cream lover or a first-time maker, this recipe will undoubtedly become a staple in your summer dessert repertoire.
Why You’ll Love This Recipe
Cherry Vanilla Ice Cream is a beloved treat for many good reasons. The fusion of cherry and vanilla creates a delightful flavor profile that enchants everyone who tries it. Here are just a few reasons why you’ll fall head over heels for this recipe:
1. Simple Ingredients: Most ingredients are easy to find and often already in your pantry.
2. Delightful Texture: The velvety smoothness of the ice cream paired with juicy cherry chunks offers an amazing mouthfeel.
3. Versatile Recipe: You can make it dairy-free or adjust sweetness by experimenting with different sweeteners.
4. Perfect for Any Occasion: Ideal for summer barbecues, birthday parties, or just a treat to cool off on a hot day.
5. Impressive Presentation: The vibrant color and aesthetic appeal make it a show-stopper dessert.
6. Easy to Follow Instructions: Even if you’re not a baking expert, the clear steps will ensure your success.
With all these factors combined, you’ll understand why Cherry Vanilla Ice Cream is a favorite among dessert lovers. Each scoop reveals layers of flavor and creamy goodness that create a wonderful experience!
Preparation and Cooking Time
Making Cherry Vanilla Ice Cream at home requires some time and patience, but the outcome is worth every minute. Here’s an overview of the total time you’ll need:
– Preparation Time: 20 minutes
– Chilling Time: 2 hours (minimum)
– Churning Time: 30 minutes
– Freezing Time: 4 hours (to firm up)
Total, you can expect the entire process to take approximately 6 hours and 50 minutes from start to finish, but don’t worry—most of that time is just chilling and freezing.
Ingredients
– 2 cups fresh cherries, pitted and halved
– 1 cup granulated sugar
– 1 tablespoon lemon juice
– 2 cups heavy cream
– 1 cup whole milk
– 1 teaspoon vanilla extract
– Pinch of salt
Step-by-Step Instructions
Creating this incredible Cherry Vanilla Ice Cream is straightforward if you follow these easy steps:
1. Prepare the Cherries: In a medium bowl, combine the pitted and halved cherries with 1/4 cup of sugar and lemon juice. Let it sit for about 10 minutes to allow the cherries to release their juices.
2. Make the Base: In a separate large bowl, whisk together the remaining 3/4 cup of sugar, heavy cream, whole milk, vanilla extract, and salt until the sugar is fully dissolved.
3. Blend Cherries: Using a blender or food processor, blend the cherry mixture until it reaches your desired consistency. You can either fully puree it or leave some chunks for texture.
4. Combine Mixtures: Fold the cherry mixture into the cream base. Mix well to ensure the flavors are thoroughly combined.
5. Chill the Mix: Cover the mixture and refrigerate for at least 2 hours, allowing the flavors to meld and the base to chill.
6. Churn the Ice Cream: After chilling, pour the mixture into an ice cream maker. Follow the manufacturer’s instructions to churn the ice cream until it thickens and reaches a soft-serve consistency—about 20-30 minutes.
7. Freeze the Ice Cream: Transfer the churned ice cream to an airtight container. Freeze it for at least 4 hours, or until it is firm.
8. Serve: Before serving, let the ice cream sit at room temperature for about 5-10 minutes to soften slightly. Scoop into bowls or cones.
How to Serve
To make your Cherry Vanilla Ice Cream experience even more special, consider these serving suggestions:
1. Presentation: Serve in decorative bowls or waffle cones. A sprinkle of chopped nuts or a cherry on top adds a delightful touch.
2. Add Toppings: Enhance the flavor by drizzling chocolate or caramel sauce over the top. Fresh mint leaves can add a pop of color and fresh aroma.
3. Pair with Desserts: This ice cream goes wonderfully alongside warm desserts like brownies, pie, or even flourless chocolate cake.
4. A “Sundae” Twist: Create an ice cream sundae by layering Cherry Vanilla Ice Cream with whipped cream, crushed cookies, and your favorite syrups.
5. Beverages: Pair with a refreshing lemonade or iced tea, or even a rich coffee to contrast the sweetness.
With these ideas, you’ll be sure to impress your guests and make every scoop a delightful experience! Enjoy making and savoring your Cherry Vanilla Ice Cream, the incredible treat of the season!
Additional Tips
– Use Fresh Ingredients: Fresh cherries will enhance the flavor of your Cherry Vanilla Ice Cream. Frozen cherries can also work, but ensure they’re high-quality.
– Experiment with Sweeteners: If you’re looking for a healthier option, try using honey or agave syrup as a sweetener alternative.
– Try Alcohol Variants: For adults, adding a splash of cherry liqueur or bourbon can intensify the flavor and create a fun twist.
– Customize Your Base: For a more indulgent treat, substitute half the heavy cream with condensed milk for an incredibly rich ice cream.
Recipe Variation
Feel free to switch up your Cherry Vanilla Ice Cream with these variations:
1. Chocolate Cherry Swirl: Add a chocolate ganache swirl into the ice cream for a rich chocolatey flavor.
2. Almond Cherry Vanilla: Incorporate almond extract instead of vanilla extract for a nutty flavor that complements the cherries perfectly.
3. Cherry Vanilla Sorbet: For a lighter option, use the same cherry base with coconut milk for a delectable sorbet version.
4. Chunky Cherry Version: Fold in chocolate chips or chopped nuts to the base for extra texture.
Freezing and Storage
– Storage: Seal your Cherry Vanilla Ice Cream in an airtight container to minimize air exposure. It can last for up to two weeks in the freezer.
– Freezing: Make sure to let the ice cream freeze for at least 4 hours before serving to achieve the desired firmness. If it feels too soft, let it freeze longer.
Special Equipment
To make the perfect Cherry Vanilla Ice Cream, gather the following tools:
– Ice cream maker for churning
– Mixing bowls for combining ingredients
– Blender or food processor for cherry blending
– Airtight container for freezing and storage
– Whisk for mixing ingredients smoothly
Frequently Asked Questions
How can I tell if my ice cream is ready?
You’ll know your Cherry Vanilla Ice Cream is ready when it thickens to a soft-serve consistency in the ice cream maker.
Can I make this without an ice cream maker?
Yes! Pour the mixture into a shallow dish and stir it every 30 minutes for about 4 hours until it’s frozen.
What can I do if my ice cream is too hard?
If your ice cream is too solid, let it sit at room temperature for about 10 minutes before scooping. This will soften it slightly for easier serving.
Is there a vegan alternative for this recipe?
Absolutely! Substitute heavy cream with coconut cream and use almond milk instead of whole milk for a dairy-free version.
How many servings does this recipe yield?
This Cherry Vanilla Ice Cream recipe typically yields about 6 to 8 servings, depending on portion sizes.
Conclusion
Cherry Vanilla Ice Cream is an unforgettable summer delight that brings joy to any occasion. The balance of creamy vanilla and tart cherries creates a memorable experience that everyone can enjoy. Ideal for family gatherings, picnics, or simply treating yourself, this homemade ice cream will quickly become your go-to dessert. With imaginative variations and serving ideas, your Cherry Vanilla Ice Cream will impress your guests and satisfy your sweet cravings. Enjoy every creamy scoop and embrace the summer bliss!

Cherry Vanilla Ice Cream: The Incredible Ultimate Recipe for Summer Delight
- Total Time: 20 minutes
Ingredients
– 2 cups fresh cherries, pitted and halved
– 1 cup granulated sugar
– 1 tablespoon lemon juice
– 2 cups heavy cream
– 1 cup whole milk
– 1 teaspoon vanilla extract
– Pinch of salt
Instructions
Creating this incredible Cherry Vanilla Ice Cream is straightforward if you follow these easy steps:
1. Prepare the Cherries: In a medium bowl, combine the pitted and halved cherries with 1/4 cup of sugar and lemon juice. Let it sit for about 10 minutes to allow the cherries to release their juices.
2. Make the Base: In a separate large bowl, whisk together the remaining 3/4 cup of sugar, heavy cream, whole milk, vanilla extract, and salt until the sugar is fully dissolved.
3. Blend Cherries: Using a blender or food processor, blend the cherry mixture until it reaches your desired consistency. You can either fully puree it or leave some chunks for texture.
4. Combine Mixtures: Fold the cherry mixture into the cream base. Mix well to ensure the flavors are thoroughly combined.
5. Chill the Mix: Cover the mixture and refrigerate for at least 2 hours, allowing the flavors to meld and the base to chill.
6. Churn the Ice Cream: After chilling, pour the mixture into an ice cream maker. Follow the manufacturer’s instructions to churn the ice cream until it thickens and reaches a soft-serve consistency—about 20-30 minutes.
7. Freeze the Ice Cream: Transfer the churned ice cream to an airtight container. Freeze it for at least 4 hours, or until it is firm.
8. Serve: Before serving, let the ice cream sit at room temperature for about 5-10 minutes to soften slightly. Scoop into bowls or cones.
- Prep Time: 20 minutes
- Cook Time: 0 minutes
Nutrition
- Serving Size: 6-8 servings
- Calories: 340 kcal
- Fat: 22g
- Protein: 3g