Are you ready to unlock the secrets to creating the most delicious and addictive chex mix recipe oven? This isn’t just any snack mix; it’s a crunchy, savory, and endlessly customizable treat perfect for parties, holidays, or a cozy night in. In this comprehensive guide, you’ll learn every step of the way, from gathering the right ingredients to mastering the baking process. We’ll explore variations, storage tips, and even how to avoid the dreaded soggy mix. So, let’s get started and become experts in crafting the perfect oven baked chex mix!
1. Gathering Your Ingredients for an Amazing Chex Mix
Core Cereal Components: The Base of Your Mix
The foundation of any good chex mix lies in its cereal base. Typically, you’ll find Rice Chex, Corn Chex, and Wheat Chex taking center stage. These cereals offer a wonderful balance of crunch and lightness, providing the perfect canvas for the other ingredients to shine. Think of them as the unsung heroes, providing both the bulk and the delightful airiness we all crave. While these three are classic choices, don’t hesitate to experiment! Perhaps you’re not the biggest fan of Wheat Chex? No problem! You can try using Chex Rice Crisps or other similar cereals. Some people even prefer using other grain cereals for a unique twist. The key is to maintain that balance of crunch and airiness, so choose accordingly.
Savory Additions: Crunch & Flavor
Beyond the cereals, it’s the savory additions that elevate this snack mix from good to great. Salted pretzels, bagel chips, and mixed nuts are quintessential elements, adding layers of texture and flavor. The pretzels bring a satisfying snap, the bagel chips offer a hearty crunch, and the mixed nuts introduce richness and variety. Don’t feel restricted though. If you’re allergic to nuts, or if they aren’t your cup of tea, try alternatives like roasted sunflower seeds or even seasoned chickpeas for that extra crunch. The real magic happens when you start thinking about how these components play together, creating a symphony of taste and sensation. These elements provide a great contrast in texture to the otherwise soft cereal, and they definitely enhance the savory flavor profile.
The Essential Flavor Boost: Seasoning Essentials
Now, let’s talk about the flavor powerhouse of the oven chex mix: the seasoning. The liquid binder and key flavor carrier is melted butter. Melted butter is not only a wonderful flavor carrier but also a binding agent, allowing those delicious seasonings to coat the cereal mix evenly. Then we have the Worcestershire sauce which is essential for that characteristic umami flavor that makes chex mix so irresistible. The tangy, savory notes of Worcestershire sauce are what many would consider the heart and soul of the recipe. Don’t skimp on this one! Finally, we arrive at the spices, and garlic powder, onion powder, and salt are the classics. However, this is where you can truly get creative! A dash of paprika, a pinch of cayenne for a kick, or maybe even some dried herbs like thyme and rosemary for a more sophisticated flavor profile. Remember, the spices are the personality of your homemade snack mix, so choose flavors you enjoy.
2. Prepping for Success: The Foundation to a Great Baked Chex Mix

Choosing the Right Baking Sheet: Size and Material Matters
When it comes to baking chex mix, the baking sheet you choose makes a significant difference. You need a large baking sheet, preferably one that’s 18×13 inches, to avoid overcrowding the cereal mix. Overcrowding causes uneven baking and might lead to some pieces being undercooked while others burn. Look for a sturdy baking sheet with low or no sides for maximum airflow. A good quality baking sheet ensures even heat distribution. This even distribution will make sure each piece in the mix bakes properly. A light-colored baking sheet will reflect heat more effectively than a dark one and is less likely to cause burnt spots.
Measuring and Combining: Even Distribution is Key
Now, let’s get to mixing. First, measure out your cereals, pretzels, bagel chips, and nuts according to your chex mix recipe oven. Combine all these dry ingredients into a large bowl, so they are ready to receive the wet mixture. In a separate, smaller bowl, melt the butter and stir in the Worcestershire sauce, garlic powder, onion powder, salt, and any other spices you’ve decided to include. This mixture ensures an even distribution of flavor once poured over your dry ingredients. Now, be prepared, we are about to coat the dry mix evenly.
Achieving the Perfect Coat: The Key to Flavorful Pieces
This step is crucial for a truly flavorful oven baked chex mix. Drizzle the melted butter and seasoning mixture evenly over the dry ingredients. After drizzling, carefully start to stir with a large spoon or spatula. The goal here is to make sure every piece gets its fair share of the seasoning. Avoid over-mixing as this might cause the pieces to break. Instead, you should be tossing and gently turning the mixture until it is thoroughly coated. The even coating ensures a delightful burst of flavor in each bite and the best texture.
3. Baking Your Chex Mix to Crispy Perfection in the Oven
Setting the Right Oven Temperature: Avoiding Burnt Spots
Preheat your oven to 250 degrees Fahrenheit. This temperature might seem low, but it is the key to evenly baking your chex mix without burning it. High temperatures will quickly char the edges, leaving the interior of your mix still soft. A lower temperature allows the mix to crisp up gradually, resulting in a more uniformly textured snack. So, remember to be patient and stick to the suggested oven temperature to get the best results for your homemade snack mix.
Determining Baking Time: The Golden Brown Rule
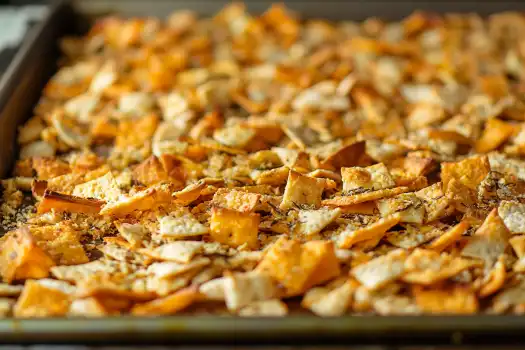
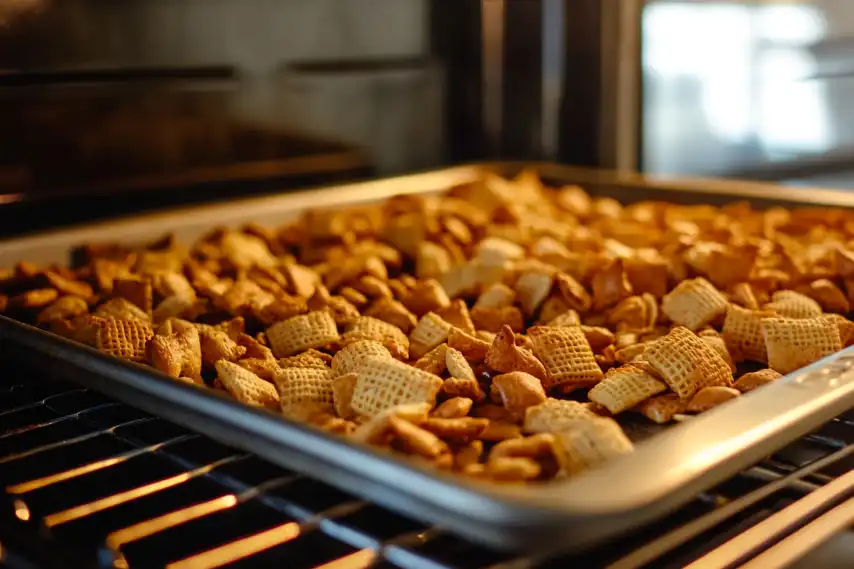
Bake your chex mix for approximately one hour, but this could vary depending on your oven. The goal is for the mix to turn a nice golden brown color. This golden-brown hue is a great sign that your snack mix has reached the perfect level of crispiness. It means that each piece will have that satisfying crunch we all crave. Make sure to bake your chex mix until it reaches the golden perfection and the texture you are looking for.
The All-Important Stirring Technique: For Uniform Baking
During the baking process, it’s very important to stir the chex mix every 15 to 20 minutes. This ensures that all sides of the cereal mix get evenly exposed to the heat. This action helps in preventing some pieces from becoming overcooked while others remain soft. It is this technique that prevents burnt edges and creates a more uniform texture overall. So, remember, stirring is your best friend when making chex mix in the oven.
4. Flavor Variations: Elevate Your Oven Baked Chex Mix
Adding Sweet Elements: A Twist on the Classic
Want to give your chex mix a sweet twist? Consider adding a dusting of cinnamon sugar just before baking. You can also drizzle honey or maple syrup after it has cooled for extra sweetness. For a deeper flavor, consider adding some dried fruit like cranberries or raisins after the baking process. This adds a surprising element that elevates your chex mix from a simple snack to a delicious treat. The sweetness makes the oven baked chex mix more versatile and enjoyable for many people.
Spicy Kicks: Heat Things Up
If you’re a fan of some heat, it’s time to spice things up. Try adding a pinch of cayenne pepper or red pepper flakes to your seasoning blend before you start baking. If you want to go all out on the spiciness, try adding a few dashes of your favorite hot sauce to the butter mixture. Remember that a little bit of spice goes a long way, so start small and add more to your liking. These spicy kicks can transform your chex mix into an exciting and addictive snack.
Using Different Spices and Herbs for a Unique Mix
Feel like trying a more unique flavor profile? Experiment with different spices and herbs. For an Italian flavor, try adding Italian seasoning, or some dried oregano, basil, or thyme. Smoked paprika adds a lovely smokiness. A curry blend can give you a delicious exotic twist. Don’t be afraid to mix and match different spices and herbs to create your own signature flavor.
5. Cooling and Storing Your Crispy Chex Mix
Proper Cooling: Retaining Crispness
Once you take the chex mix out of the oven, don’t rush to pack it up. It’s absolutely crucial to allow it to cool completely on the baking sheet. This process is vital for the mix to fully crisp up and to prevent it from becoming soggy due to condensation. The cooling stage allows the moisture to evaporate, leaving you with that perfect crunch you’re looking for. So, have patience and remember that cooling is the last crucial step for creating the best possible oven chex mix.
Ideal Storage Solutions: Keeping It Fresh
Once your chex mix has cooled completely, it’s time to find the right storage. Transfer it to an airtight container to keep it fresh for as long as possible. A container with a tight lid will prevent air and moisture from getting in, keeping your mix crispy. If you’re planning on storing it for an extended period, consider adding a food-safe desiccant pack to absorb any moisture that might sneak in. When stored properly, your snack mix should last for up to a few weeks, maintaining its texture.
6. Tips and Tricks for the Perfect Oven Chex Mix

Batch Baking: Making Enough for Everyone
Planning a party or a big family gathering? Then batch baking will be your best friend. Instead of making one small batch of chex mix, increase the ingredients proportionally to make as much as you need. Remember to use a bigger container for mixing and you might have to use more than one baking sheet. The key to batch baking is to make sure every batch gets equal attention to ensure even baking and consistent texture. This way, you’ll have enough chex mix to go around.
Avoiding Soggy Mix: Key Mistakes and How to Prevent Them
A soggy chex mix is a big no-no. One of the main reasons for a soggy mix is not baking it long enough or at the right temperature. Make sure your oven temperature is accurate and bake it for the recommended time or until it is fully golden brown. Another common mistake is not allowing the mix to cool completely on the baking sheet. If you pack it up warm, the moisture will get trapped, leading to a soggy snack. Always follow the recipe steps accurately and you’ll avoid a soggy mess.
Customizing for Dietary Needs: Gluten Free, Nut Free Options
Do you have dietary restrictions? You can easily adapt the recipe! To make a gluten-free version, use gluten-free pretzels and make sure the cereal mix doesn’t contain gluten too. For a nut-free version, use seeds, such as sunflower or pumpkin seeds, or other nut-free crunchy snacks like seasoned chickpeas, instead of the mixed nuts. Always make sure all your ingredients are certified gluten-free or nut-free to avoid any issues. It is always a good idea to check product labels and ingredients.
7. Serving Suggestions: Perfect for Any Occasion
Party Snacking: A Crowd Pleaser
Chex mix is the perfect party snack because it’s easy to make in large batches and everyone loves it! You can set out bowls of it around the party area so everyone can grab a handful at their leisure. If you want to elevate the experience, you can serve the mix in individual cups or decorative bowls. This makes serving easy and prevents your guests from grabbing too much at once. Feel free to pair the mix with other snacks like cheese, fruits, or vegetables to offer a nice variety to your guests.
Holiday Treats: A Festive Favorite
This homemade snack mix is a great addition to your holiday celebrations. Whether you are planning a family gathering, a New Year’s party, or some other festivities, chex mix is a great option to have. Consider packaging it in cute bags or festive containers as a quick and easy gift for your loved ones. It adds a personal touch and it is a treat that everyone will enjoy.
Everyday Snacking: A Go-To for Any Time
Chex mix is not just for parties or special occasions. It’s a great homemade snack mix for those moments when you just need something quick and tasty. Grab a handful while you’re watching a movie, during a study session, or even while you’re just relaxing at home. It’s so easy and convenient, it is the perfect go-to for whenever you need something crunchy and delicious. So, go ahead and enjoy it any time of the day.
Discover a wide variety of delicious cakes at www.sublimecake.com and www.thekitchn.com
FAQs About Chex Mix Recipe Oven
What is the best way to store oven chex mix to keep it crunchy?
The best way to store your oven chex mix and maintain its crispness is to use an airtight container. Make sure the mix has cooled completely before transferring it to the container. You might also consider adding a food-safe desiccant pack to absorb any excess moisture that could ruin the crunchy texture.
Can I use other types of cereal in my baked chex mix?
Absolutely! While the classic recipe calls for Rice Chex, Corn Chex, and Wheat Chex, feel free to experiment with other cereals that you like. Look for cereals with similar textures and make sure they are not overly sweet or flavored.
How long does homemade chex mix oven stay fresh?
When stored properly in an airtight container, your homemade chex mix oven can stay fresh for up to two to three weeks. However, it is always best enjoyed within the first week for maximum crispness.
What can I substitute for Worcestershire sauce in this recipe?
If you need to substitute Worcestershire sauce, you can try a mixture of soy sauce and a bit of tamarind paste. A little balsamic vinegar can also work as a good substitute. However, keep in mind that the flavor might be slightly different from the original.
How can I make my chex mix oven spicier?
To add spice to your chex mix, include cayenne pepper, red pepper flakes, or hot sauce in your butter and seasoning mixture. Start small and taste, before adding too much spice to your liking.
What is the ideal oven temperature for baking chex mix?
The ideal oven temperature for baking chex mix is 250 degrees Fahrenheit (120 degrees Celsius). This low temperature ensures that the mix crisps up gradually without burning.
Can I make a vegan version of chex snack mix oven?
Yes, you can easily make a vegan version. Use vegan butter instead of regular butter and make sure your Worcestershire sauce is vegan. Check all the ingredient labels to ensure your mix is 100% vegan friendly.
Can I prepare oven chex party mix ahead of time?
Yes, you can certainly prepare oven chex party mix a day or two in advance. Store it in an airtight container and it will stay perfectly crisp for your party.
Is it possible to make a low carb version of chex mix recipe oven?
While it is difficult to make a truly low-carb version because of the cereals, you can reduce the carbs by using more nuts and seeds, and fewer cereals. Look for low-carb or keto-friendly versions of nuts and seeds. You can also use cauliflower or broccoli florets for a low-carb alternative to cereal.
What kind of nuts work best in homemade chex mix?
The best nuts to include in homemade chex mix are those that have a good crunch and don’t get soggy easily. Think almonds, pecans, walnuts, and cashews. You can use a mix of these, or just use your favorite ones.
Conclusion
There you have it – a complete guide to crafting the perfect chex mix recipe oven. From selecting the right ingredients and mastering the baking process to customizing flavors and storing your crunchy creation, you’re now well-equipped to impress your friends, family, and yourself with this classic snack. Remember, the key is to have fun experimenting with flavors and textures to create your signature homemade snack mix. Whether it’s for a party, a holiday gathering, or just a casual snack, this oven baked chex mix will surely be a crowd-pleaser. So, gather your ingredients and get baking!


