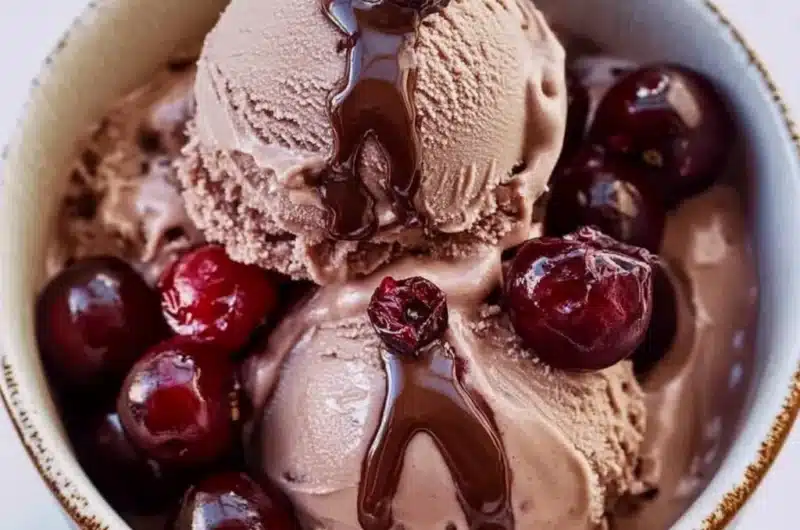
Chocolate Cherry Ice Cream is a delectable treat that will take your taste buds on a magical journey. With its rich chocolate flavor combined with the tart sweetness of cherries, this ice cream is truly an indulgence. Imagine creamy chocolate mingling with juicy cherry swirls, creating a delightful contrast of flavors. Whether you’re enjoying it on a warm summer day or during a cozy winter evening, this amazing ice cream will surely add a touch of joy to your dessert routine.
If you’re a fan of the harmonious blend of chocolate and cherries, you’ll fall head over heels for this recipe. It captures the essence of sweet and savory, making every spoonful feel like a special occasion. The process might seem daunting at first, but once you dive in, you’ll discover that making Chocolate Cherry Ice Cream is both simple and rewarding. This delightful dessert is not just a simple pleasure; it embodies creativity and passion that can be shared with family and friends.
In this ultimate guide, you’ll learn why this recipe is a must-try, the preparation and cooking times, the ingredients you’ll need, a step-by-step breakdown of the process, and the best ways to serve this incredible ice cream. Whether you’re entertaining guests or just treating yourself, this amazing Chocolate Cherry Ice Cream recipe is sure to impress.
Why You’ll Love This Recipe
Chocolate Cherry Ice Cream is more than just a delicious dessert; it’s a celebration of flavors that will leave you craving more. Here are some compelling reasons why you’ll fall in love with this recipe:
1. Rich Flavor Combination – The blend of chocolate and cherries creates a taste sensation that is both rich and refreshing.
2. Homemade Goodness – There’s something special about homemade ice cream, and this recipe allows you to control the ingredients.
3. Simple Instructions – The step-by-step guide ensures that even beginner cooks can succeed in making this delightful treat.
4. Versatile Enjoyment – Enjoy it alone, top it on a pie, or as a filling for sundaes; the possibilities are endless.
5. Customizable Options – You can easily adapt the recipe by using different types of chocolate or fruit.
6. Perfect for All Seasons – Ice cream is a classic favorite that goes well in any season, making it a fantastic treat year-round.
These reasons reflect why Chocolate Cherry Ice Cream is a beloved recipe for many. Every bite promises to evoke feelings of nostalgia and happiness!
Preparation and Cooking Time
Creating Chocolate Cherry Ice Cream is a labor of love, but the results are well worth the time invested. Here’s how long you can expect the process to take:
– Preparation Time: 20 minutes
– Chilling Time: 4–6 hours (or overnight for best results)
– Churning Time: 25–30 minutes
This total time includes blending the ingredients and allowing the mixture to chill before churning. Planning your time accordingly will make the process smoother.
Ingredients
– 2 cups heavy cream
– 1 cup whole milk
– 1 cup granulated sugar
– 1/2 cup unsweetened cocoa powder
– 1 tablespoon vanilla extract
– 1/4 teaspoon salt
– 1 cup fresh or frozen cherries, pitted and chopped
– 1/2 cup semi-sweet chocolate chips (optional)
Step-by-Step Instructions
Making your own Chocolate Cherry Ice Cream is straightforward if you follow these simple steps:
1. Mix Dairy Ingredients: In a large bowl, combine the heavy cream, whole milk, granulated sugar, and unsweetened cocoa powder. Whisk until all ingredients are well blended.
2. Add Flavorings: Stir in the vanilla extract and salt until fully incorporated.
3. Chill the Mixture: Cover the bowl and refrigerate the mixture for at least 4 hours or overnight. This allows the flavors to meld beautifully.
4. Prepare Cherries: If using fresh cherries, wash, pit, and chop them into small pieces. If using frozen, allow them to thaw slightly.
5. Churn the Ice Cream: Once chilled, pour the mixture into an ice cream maker. Churn according to the manufacturer’s instructions until it reaches a soft-serve consistency (about 25-30 minutes).
6. Add Cherries: In the last 5 minutes of churning, slowly add the chopped cherries and chocolate chips, allowing them to integrate fully into the ice cream.
7. Transfer to Container: Spoon the churned ice cream into an airtight container. Smooth the top with a spatula.
8. Freeze: Place the container in the freezer and allow it to firm up for at least 2 hours.
9. Serve: Once the ice cream has set, it’s ready to enjoy!
These steps will guide you in creating a batch of delicious Chocolate Cherry Ice Cream that’s perfect for sharing.
How to Serve
When serving Chocolate Cherry Ice Cream, consider the following tips to enhance the experience:
1. Presentation: Place a generous scoop in a stylish bowl or cone. Consider garnishing with a fresh cherry on top for added flair.
2. Accompaniments: Top with whipped cream, chocolate sauce, or crushed nuts for an elevated dessert experience.
3. Pair with Desserts: Serve alongside a warm brownie or slice of chocolate cake for a decadent treat.
4. Combine Flavors: For an exciting twist, create a sundae with your favorite toppings—think sprinkles, marshmallows, or chocolate shavings.
By thoughtfully considering how you serve this incredible ice cream, you can create memorable moments and satisfaction for you and your guests!
So get into your kitchen and start creating this amazing Chocolate Cherry Ice Cream today!
Additional Tips
– Use Fresh Cherries: For the best flavor, opt for fresh cherries if they are in season. They enhance the overall taste of Chocolate Cherry Ice Cream.
– Experiment with Chocolate: Try using different types of chocolate like dark, milk, or even white chocolate for unique flavor profiles. Each variety will impart its own distinct taste.
– Chill Your Equipment: Before churning, chill the ice cream maker’s bowl in the freezer for a few hours. This step will help the ice cream freeze more efficiently.
– Add a Splash of Liqueur: For an adult version, consider adding a splash of cherry or chocolate liqueur to the mixture before churning. This adds an extra layer of flavor.
– Create a Swirl Effect: During the last few minutes of churning, gently fold in cherry puree (made from blended cherries) to create a delightful swirl of cherry flavor.
Recipe Variation
Mix things up with these Chocolate Cherry Ice Cream variations:
1. Chocolate Cherry Chip: Add additional chocolate chips for an intense chocolate experience. Use a mix of semi-sweet and white chocolate chips for contrast.
2. Nutty Chocolate Cherry: Fold in chopped nuts like almonds or pistachios after churning to give your ice cream a delightful crunch.
3. Cherry Vanilla Swirl: Replace some of the cocoa powder with vanilla extract and create a vanilla base with cherry swirls for a different take on the classic flavor.
Freezing and Storage
– Storage: Store your Chocolate Cherry Ice Cream in an airtight container to prevent ice crystals from forming. It’s best enjoyed within two weeks for optimal flavor and texture.
– Freezing: If frozen solid, let the ice cream sit at room temperature for 5–10 minutes before scooping. This will make it easier to serve without losing the beautiful texture you’ve created.
Special Equipment
To make your Chocolate Cherry Ice Cream, you will need a few essential equipment pieces:
– Ice cream maker
– Mixing bowls
– Whisk or electric mixer
– Airtight container for storage
– Measuring cups and spoons
Frequently Asked Questions
Can I make this ice cream without an ice cream maker?
Yes! If you don’t have an ice cream maker, pour the mixture into a shallow dish and freeze. Stir every 30 minutes for 2–3 hours until it reaches a creamy consistency.
What can I use if I can’t find fresh cherries?
Frozen cherries work perfectly too. Just make sure to thaw them slightly and chop them before adding them to the mixture.
Is there a dairy-free option for this recipe?
You can substitute the heavy cream, milk, and chocolate with coconut cream, almond milk, and dairy-free chocolate for a delicious vegan version of Chocolate Cherry Ice Cream.
How can I make this chocolate cherry ice cream healthier?
Consider using a natural sweetener like honey or maple syrup instead of granulated sugar. You may also reduce the amount of chocolate or use a cocoa powder with lower sugar content.
Can I add other fruits to the ice cream?
Absolutely! Feel free to incorporate other berries like raspberries or strawberries. They add even more fruity flavor and pair well with chocolate.
Conclusion
Chocolate Cherry Ice Cream stands as a dessert that transcends the ordinary, turning any occasion into something special. Its rich chocolate and tart cherry flavor combination makes it a crowd-pleaser. Whether you’re sharing it with friends and family or savoring it on your own, this ice cream will remind you of the simple joys of homemade treats. So grab your ingredients and start creating this heavenly dessert!

Chocolate Cherry Ice Cream: The Incredible Ultimate Recipe
- Total Time: 49 minute
Ingredients
– 2 cups heavy cream
– 1 cup whole milk
– 1 cup granulated sugar
– 1/2 cup unsweetened cocoa powder
– 1 tablespoon vanilla extract
– 1/4 teaspoon salt
– 1 cup fresh or frozen cherries, pitted and chopped
– 1/2 cup semi-sweet chocolate chips (optional)
Instructions
Making your own Chocolate Cherry Ice Cream is straightforward if you follow these simple steps:
1. Mix Dairy Ingredients: In a large bowl, combine the heavy cream, whole milk, granulated sugar, and unsweetened cocoa powder. Whisk until all ingredients are well blended.
2. Add Flavorings: Stir in the vanilla extract and salt until fully incorporated.
3. Chill the Mixture: Cover the bowl and refrigerate the mixture for at least 4 hours or overnight. This allows the flavors to meld beautifully.
4. Prepare Cherries: If using fresh cherries, wash, pit, and chop them into small pieces. If using frozen, allow them to thaw slightly.
5. Churn the Ice Cream: Once chilled, pour the mixture into an ice cream maker. Churn according to the manufacturer’s instructions until it reaches a soft-serve consistency (about 25-30 minutes).
6. Add Cherries: In the last 5 minutes of churning, slowly add the chopped cherries and chocolate chips, allowing them to integrate fully into the ice cream.
7. Transfer to Container: Spoon the churned ice cream into an airtight container. Smooth the top with a spatula.
8. Freeze: Place the container in the freezer and allow it to firm up for at least 2 hours.
9. Serve: Once the ice cream has set, it’s ready to enjoy!
These steps will guide you in creating a batch of delicious Chocolate Cherry Ice Cream that’s perfect for sharing.
- Prep Time: 15 minutes
- Cook Time: 25-30 minutes
Nutrition
- Serving Size: 4-6 servings
- Calories: 320 kcal
- Fat: 21g
- Protein: 3g