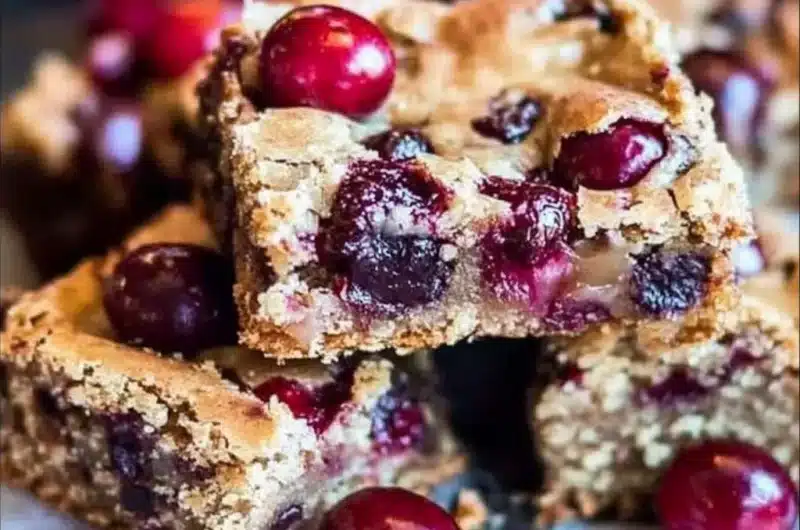
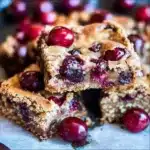
Chocolate Chip Cherry Bars are the perfect blend of sweet and tart, offering a delightful treat for any occasion. These bars combine rich chocolate with juicy cherries, creating a dish that is as visually appealing as it is delicious. The balance of flavors is simply wonderful. If you’ve ever enjoyed the satisfaction of biting into a soft, chewy dessert filled with chocolate and fruit, this recipe will take you to the next level. Not only are these bars easy to prepare, but they also promise to evoke fond memories of cherished gatherings with family and friends.
The first bite of a Chocolate Chip Cherry Bar reveals a decadent texture that melts in your mouth. The juiciness of the cherries mixed with the richness of chocolate chips creates a delightful experience that feels like a treat from a gourmet bakery. These bars are a true testament to the magic that happens when simple ingredients come together to form something extraordinary.
Imagine biting into a warm chocolate chip cherry bar with gooey chocolate melting between your fingers, releasing an aroma that fills the air with sweetness. Whether you’re baking them for a family gathering, a potluck, or simply to indulge yourself, these bars will surely impress everyone who gets a taste. Let’s dive into why this recipe is so beloved, how to prepare it, and tips for serving these amazing chocolate chip cherry bars!
Why You’ll Love This Recipe
Chocolate Chip Cherry Bars are beloved for many reasons. Here are some key aspects that will make you fall in love with this incredible dessert:
1. Simple Ingredients – The recipe uses straightforward components that are easy to find and often already in your pantry.
2. Versatile Flavor – You can customize the recipe by adding nuts or using different types of chocolate chips based on personal preference.
3. Ideal for All Occasions – Whether you’re celebrating a birthday, enjoying a picnic, or having a cozy movie night, these bars are a perfect choice.
4. Impressive Presentation – The marbling between chocolate and cherries makes these bars visually stunning, sure to wow your guests.
5. Unique Taste Combination – The amazing combination of chocolate and cherry creates a flavor profile unlike any traditional dessert.
6. Easy to Make – The clear, concise instructions allow even novice bakers to succeed in making these delectable bars.
7. Great for Meal Prep – These bars store well, making them an excellent option for meal prepping sweet snacks for the week ahead.
With these factors in mind, it’s no surprise that Chocolate Chip Cherry Bars are a favorite among both bakers and dessert lovers. Each bite delivers a satisfying combination of flavors and textures that leave you craving more!
Preparation and Cooking Time
Making Chocolate Chip Cherry Bars is not only enjoyable, but it’s also efficient. Here’s a breakdown of the estimated preparation and cooking time:
– Preparation Time: 15 minutes
– Cooking Time: 30-35 minutes
– Cooling Time: 15-20 minutes
In total, you can expect to spend about 1 hour and 10 minutes from start to finish. This quick timeframe allows you to whip these bars up even on a busy day!
Ingredients
– 1 cup unsalted butter, softened
– 1 cup brown sugar, packed
– 1 cup granulated sugar
– 2 large eggs
– 1 teaspoon vanilla extract
– 2½ cups all-purpose flour
– 1 teaspoon baking soda
– ¼ teaspoon salt
– 1 cup semi-sweet chocolate chips
– 1 cup fresh or frozen cherries, pitted and halved
Step-by-Step Instructions
Creating delicious Chocolate Chip Cherry Bars is straightforward when you follow these clear steps:
1. Preheat Oven: Begin by preheating your oven to 350°F (175°C). Line a 9×13-inch baking dish with parchment paper for easy removal later.
2. Cream Butter and Sugars: In a large mixing bowl, cream together the softened butter, brown sugar, and granulated sugar until the mixture is light and fluffy.
3. Add Eggs and Vanilla: Beat in the eggs, one at a time, mixing well after each addition. Add the vanilla extract and blend until combined.
4. Mix Dry Ingredients: In a separate bowl, whisk together the flour, baking soda, and salt.
5. Combine Mixtures: Gradually add the dry mixture to the wet ingredients, mixing just until combined. Be careful not to overmix, as this can make the bars tough.
6. Fold in Chocolate and Cherries: Gently fold in the chocolate chips and cherry halves, ensuring they’re evenly distributed throughout the batter.
7. Transfer to Baking Dish: Pour the batter into the prepared baking dish, smoothing it out to create an even surface.
8. Bake: Place the dish in the preheated oven and bake for 30-35 minutes, or until a toothpick inserted in the center comes out clean or with just a few moist crumbs.
9. Cool: Once baked, remove the dish from the oven and allow the bars to cool in the pan for about 15-20 minutes before transferring to a wire rack to cool completely.
10. Slice and Serve: Once cooled, use a sharp knife to slice the bars into squares or rectangles according to your preference.
Following these steps will lead you to create amazing Chocolate Chip Cherry Bars that are bound to impress!
How to Serve
When it comes to serving your Chocolate Chip Cherry Bars, presentation and pairings can enhance the experience. Here are some ideas:
1. Elegant Display: Arrange the bars on a decorative platter or tiered serving stand for a visually appealing presentation.
2. Accompaniments: Consider pairing the bars with a scoop of vanilla ice cream or a dollop of whipped cream for added indulgence.
3. Garnish: Dust the bars with a bit of powdered sugar to provide an elegant touch that makes them look even more tempting.
4. Beverage Pairing: Serve with a glass of cold milk or a warm cup of coffee, which perfectly complements the flavors of the bars.
5. Storage Tip: If you have leftovers, store them in an airtight container at room temperature for up to a week. For longer freshness, freeze them for up to three months.
By putting thought into how you serve these delicious bars, you’ll create a memorable experience that both you and your guests will cherish!
Additional Tips
– Use Fresh Cherries: Whenever possible, opt for fresh cherries. They add a vibrant flavor and better texture compared to canned or frozen options.
– Adjust Sweetness: Depending on your taste preference, consider adjusting the amount of sugar used in the recipe. Taste the batter before baking to ensure it’s to your liking.
– Don’t Overmix: When combining your wet and dry ingredients, mix until just combined to prevent the bars from becoming dense.
– Check for Doneness Early: Ovens can vary, so start checking for doneness a few minutes before the minimum baking time to avoid overcooking.
Recipe Variation
Get creative with your Chocolate Chip Cherry Bars! Here are some fun variations:
1. Nutty Delight: Add a cup of chopped walnuts or pecans for added crunch and flavor.
2. Double Chocolate: Substitute half of the all-purpose flour with cocoa powder to create a rich chocolate base.
3. Cherry Almond Bars: Incorporate almond extract alongside the vanilla for a unique flavor twist.
4. Swirled Cream Cheese: Add a cream cheese layer by mixing 8 oz of softened cream cheese with ½ cup powdered sugar and swirl it into the batter before baking.
Freezing and Storage
– Storage: After they cool completely, store the Chocolate Chip Cherry Bars in an airtight container at room temperature for up to a week.
– Freezing: For longer storage, these bars freeze well. Wrap them tightly in plastic wrap or aluminum foil and place them in a freezer-safe bag. They can last up to three months in the freezer.
Special Equipment
To make your baking experience as smooth as possible, have these tools ready:
– Mixing Bowls: Use several sizes for mixing wet and dry ingredients.
– Electric Mixer: This helps in achieving a fluffy mixture for your batter effortlessly.
– 9×13-inch Baking Pan: This is the ideal size for the recipe, ensuring even baking.
– Parchment Paper: Lining the baking pan with parchment helps in easy removal of the bars.
– Cooling Rack: This allows air to circulate around the bars, helping them to cool evenly.
Frequently Asked Questions
Can I use frozen cherries?
Yes! Just ensure they are pitted and halved before adding them to the batter. Thawing them a little will also help in even distribution.
What can I substitute for butter?
If you’re looking for a healthier option, you can substitute melted coconut oil or applesauce for butter, but this may change the texture slightly.
Can I make these bars gluten-free?
Absolutely! Replace the all-purpose flour with a gluten-free flour blend, and they should turn out just as delicious.
How long should I let the bars cool before cutting?
Allow the bars to cool completely in the pan; this usually takes about 20-30 minutes to achieve the best cuts.
What if I want to add more fruits?
Feel free to mix in additional fruits like blueberries or raspberries. Just make sure the total fruit amount remains around 2 cups.
Conclusion
These Chocolate Chip Cherry Bars are the epitome of decadent dessert perfection. Whether you’re baking for a festive occasion or indulging in a personal treat, these bars offer a unique blend of flavors and textures that are bound to delight everyone. The juiciness of the cherries melds harmoniously with the richness of chocolate, making it a must-try recipe for any dessert lover. With simple ingredients and easy-to-follow instructions, you’ll find these bars becoming a staple in your baking rotation!
Chocolate Chip Cherry Bars: An Incredible Ultimate Recipe with 7 Layers of Flavor
- Total Time: 56 minute
Ingredients
– 1 cup unsalted butter, softened
– 1 cup brown sugar, packed
– 1 cup granulated sugar
– 2 large eggs
– 1 teaspoon vanilla extract
– 2½ cups all-purpose flour
– 1 teaspoon baking soda
– ¼ teaspoon salt
– 1 cup semi-sweet chocolate chips
– 1 cup fresh or frozen cherries, pitted and halved
Instructions
Creating delicious Chocolate Chip Cherry Bars is straightforward when you follow these clear steps:
1. Preheat Oven: Begin by preheating your oven to 350°F (175°C). Line a 9×13-inch baking dish with parchment paper for easy removal later.
2. Cream Butter and Sugars: In a large mixing bowl, cream together the softened butter, brown sugar, and granulated sugar until the mixture is light and fluffy.
3. Add Eggs and Vanilla: Beat in the eggs, one at a time, mixing well after each addition. Add the vanilla extract and blend until combined.
4. Mix Dry Ingredients: In a separate bowl, whisk together the flour, baking soda, and salt.
5. Combine Mixtures: Gradually add the dry mixture to the wet ingredients, mixing just until combined. Be careful not to overmix, as this can make the bars tough.
6. Fold in Chocolate and Cherries: Gently fold in the chocolate chips and cherry halves, ensuring they’re evenly distributed throughout the batter.
7. Transfer to Baking Dish: Pour the batter into the prepared baking dish, smoothing it out to create an even surface.
8. Bake: Place the dish in the preheated oven and bake for 30-35 minutes, or until a toothpick inserted in the center comes out clean or with just a few moist crumbs.
9. Cool: Once baked, remove the dish from the oven and allow the bars to cool in the pan for about 15-20 minutes before transferring to a wire rack to cool completely.
10. Slice and Serve: Once cooled, use a sharp knife to slice the bars into squares or rectangles according to your preference.
Following these steps will lead you to create amazing Chocolate Chip Cherry Bars that are bound to impress!
- Prep Time: 15 minutes
- Cook Time: 30-35 minutes
Nutrition
- Serving Size: 12
- Calories: 250 kcal
- Fat: 12g
- Protein: 3g