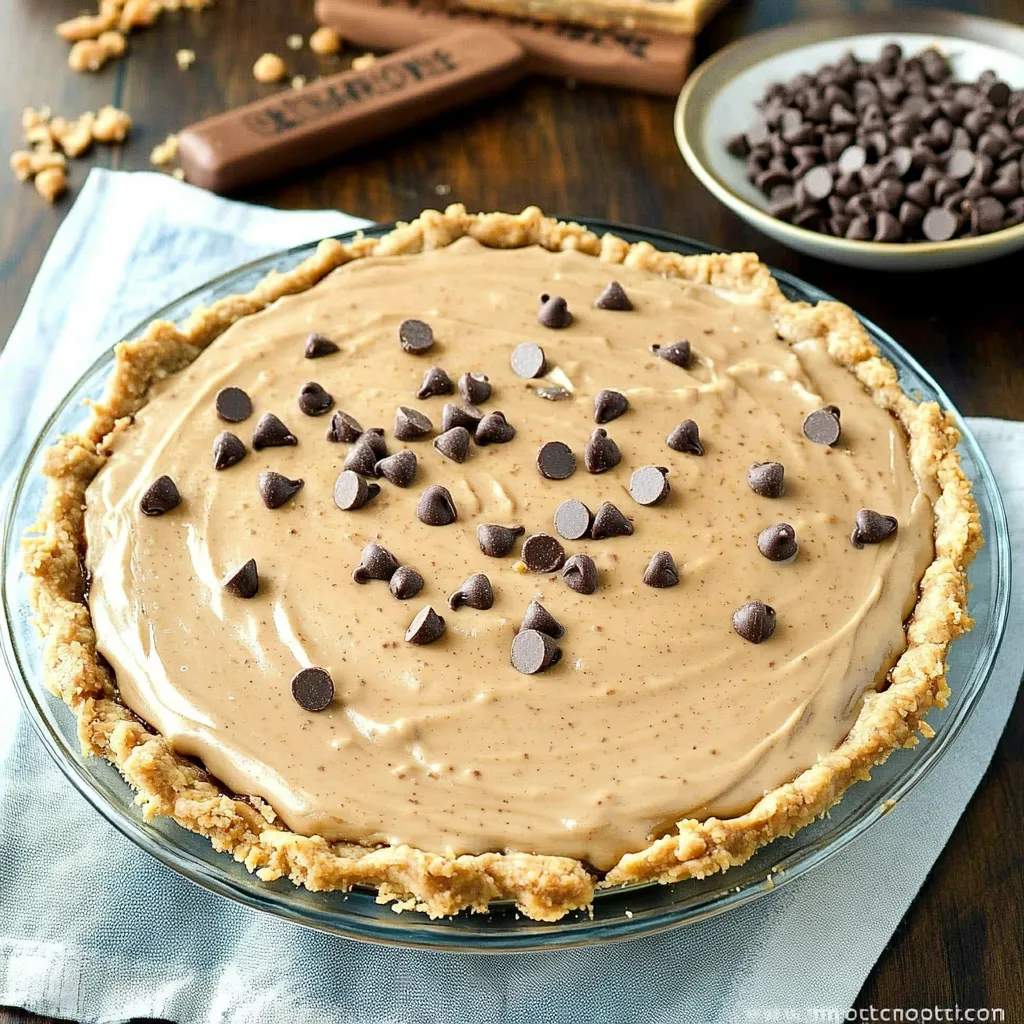
This Chocolate Chip Peanut Butter Pie is one of those desserts that feels fancy but is ridiculously easy to pull off. It’s like a Reese’s cup in pie form—but softer, creamier, and with a cookie crust that gives you the perfect crunch with every slice.
I made this for a birthday party once, and there were actual arguments over the last slice. True story. It’s that good. Great for holidays, potlucks, summer parties—or just when you want to celebrate peanut butter in all its creamy, chocolatey glory.
Why You’ll Love This Pie
- No baking required! Just mix, chill, and eat.
- Only 8 ingredients. Super simple, but big flavor.
- Perfect make-ahead dessert. Chill it overnight or freeze for later.
- Creamy, crunchy, sweet, and salty. All the best textures.
- Customizable. Add ganache, whipped cream, or even chopped candy bars on top.
Prep Time and Servings
- Prep Time: 20 minutes
- Chill Time: 4–6 hours (or overnight)
- Total Time: ~6 hours with chilling
- Servings: 10–12
- Calories per slice: ~420
Ingredients
For the Chocolate Chip Cookie Crust:
- 1 ½ cups chocolate chip cookie crumbs (about 15 cookies, crushed)
- 5 tablespoons unsalted butter, melted
Use homemade cookies, store-bought, or sub in chocolate graham crackers or Oreos if you prefer.
For the Peanut Butter Filling:
- 8 oz cream cheese, softened
- 1 cup creamy peanut butter (natural or regular both work)
- 3/4 cup powdered sugar
- 1 teaspoon vanilla extract
- 1 cup heavy whipping cream, cold (or 1 8-oz tub whipped topping)
- 1/2 cup mini chocolate chips (plus more for topping!)
Optional Toppings:
- Whipped cream
- Chocolate ganache drizzle
- Peanut butter drizzle
- Extra cookie crumbs or chopped Reese’s
How to Make Chocolate Chip Peanut Butter Pie
1. Make the Crust
- Crush chocolate chip cookies into fine crumbs (food processor or zip-top bag + rolling pin).
- Mix with melted butter until it resembles wet sand.
- Press into a 9-inch pie dish, pressing evenly across the bottom and up the sides.
- Chill in the fridge while you make the filling.
Want a crispier crust? Bake at 350°F for 8 minutes, then cool completely.
2. Make the Filling
- In a large bowl, beat cream cheese and peanut butter until smooth and fluffy.
- Add powdered sugar and vanilla, beat again until combined.
- In a separate bowl, whip heavy cream until stiff peaks form.
- Gently fold whipped cream into the peanut butter mixture until smooth.
- Stir in mini chocolate chips.
3. Assemble the Pie
- Pour the filling into the chilled crust.
- Smooth the top with a spatula.
- Sprinkle with extra mini chocolate chips or a few cookie crumbs for crunch.
- Cover and refrigerate for at least 4–6 hours, or overnight for best texture.
4. Serve & Garnish
- Slice and serve cold.
- Add whipped cream, a drizzle of melted chocolate or peanut butter, or top with chopped candies if you’re feeling extra (highly recommend).
Serving Ideas
- Drizzle with ganache for a chocolate-lover’s dream.
- Serve with coffee or cold brew—the rich peanut butter pairs perfectly.
- Make minis: Use a muffin tin and paper liners for individual servings.
- Freeze it! Serve frozen for a firmer, ice-cream–pie texture.
Tips for Success
- Use softened cream cheese for the smoothest filling.
- Whip the cream cold. It gives the filling that dreamy, fluffy texture.
- Chill thoroughly. Let the pie set at least 4 hours so it slices cleanly.
- Don’t overmix. Fold whipped cream gently to keep the filling light.
- Customize the crust. Graham crackers, Oreos, or chocolate wafers all work.
Variations
- Vegan version: Use vegan cream cheese, coconut whipped topping, and a dairy-free crust.
- Nut-free: Try sunflower seed butter and nut-free cookie crumbs.
- Swirl it: Swirl in strawberry or raspberry jam before chilling for a PB&J vibe.
- Crunchy version: Add chopped peanuts or crushed pretzels on top!
Storage
- Fridge: Store covered in the fridge for up to 5 days.
- Freezer: Freeze whole or in slices for up to 2 months. Thaw 20 minutes before serving for best texture.
- Make-ahead tip: Make it the night before your event—it holds up beautifully!
FAQ
Can I use Cool Whip instead of whipped cream?
Yes! Use 1 tub (8 oz) and fold it in just like whipped cream—super easy.
Can I use crunchy peanut butter?
Absolutely—it adds texture and a little extra crunch.
What kind of chocolate chips should I use?
Mini chocolate chips work best for even distribution, but chopped chocolate or regular chips work too!
Do I have to bake the crust?
Nope! But a quick bake gives it a firmer base if you want a more cookie-like crunch.
Final Thoughts
This Chocolate Chip Peanut Butter Pie is the no-bake dessert you’ll come back to again and again. It’s sweet, salty, creamy, crunchy—and 100% crowd-pleasing. Whether you’re making it for a birthday, summer gathering, or just a late-night craving, this pie delivers every time.
Print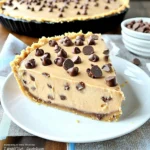
Chocolate Chip Peanut Butter Pie
- Total Time: 4 hrs 10 min
Description
This creamy, no-bake Chocolate Chip Peanut Butter Pie is rich, smooth, and packed with irresistible peanut butter flavor and mini chocolate chips—all nestled in a chocolate cookie crust. A chilled dessert dream come true!
Ingredients
-
1 (8 oz) block cream cheese, softened
-
1 cup creamy peanut butter
-
½ cup powdered sugar
-
1 (8 oz) tub whipped topping (like Cool Whip), thawed
-
½ cup mini chocolate chips (plus more for topping)
-
1 chocolate cookie pie crust (store-bought or homemade)
Instructions
1️⃣ Make the filling: In a large bowl, beat cream cheese, peanut butter, and powdered sugar until smooth and fluffy.
2️⃣ Fold in Cool Whip: Gently fold in the whipped topping until fully incorporated and creamy.
3️⃣ Add chocolate chips: Stir in mini chocolate chips.
4️⃣ Fill the crust: Spoon the mixture into the chocolate crust and smooth the top with a spatula.
5️⃣ Chill: Refrigerate for at least 4 hours, or until firm. Overnight is best for easy slicing.
6️⃣ Serve: Top with extra chocolate chips or drizzle with chocolate syrup before serving.
Notes
-
For a crunchier bite, add crushed peanuts or chopped Reese’s to the filling.
-
Use a graham cracker crust if you prefer a milder base.
-
Keeps well in the fridge for up to 5 days—or freeze for a cool, sliceable treat.
- Prep Time: 10 min