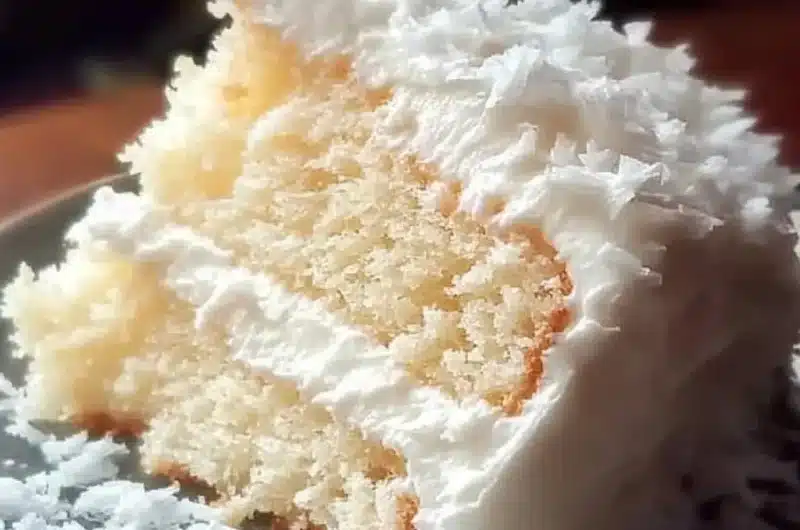
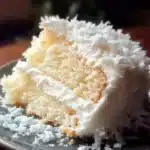
Christmas Coconut Snow Cake is a festive masterpiece that brings joy and sweetness to your holiday celebrations. Picture a cake that captures the spirit of winter, adorned with fluffy white coconut and layers of rich flavors. This cake is not just a dessert; it’s an experience, transforming any gathering into a magical event. With its light, airy texture and deliciously creamy coconut frosting, this cake will surely impress your guests and leave them craving more.
The first bite of Christmas Coconut Snow Cake is like a snowflake melting on your tongue. The combination of coconut and moist cake layers creates a delightful contrast that’s simply irresistible. As you slice into this heavenly creation, you’ll see the fluffy white layers that resemble a winter wonderland. Whether it’s a holiday party, a family gathering, or a cozy night in, this cake will make every occasion feel extraordinary. In this guide, you’ll learn why this recipe stands out, how to prepare it, and tips for serving it beautifully.
As we dive deeper into the world of Christmas Coconut Snow Cake, you’ll discover that it’s more than just a sweet treat; it’s a celebration of flavors, textures, and holiday cheer. With its stunning presentation and delightful taste, this incredible cake will quickly become a favorite in your holiday baking repertoire. Let’s explore the reasons you’ll love this recipe and get started on making your own Christmas Coconut Snow Cake!
Why You’ll Love This Recipe
Christmas Coconut Snow Cake is adored for several reasons that make it a must-try during the festive season. Here are just a few:
1. Layered Elegance: The seven layers create a visually stunning cake that’s perfect for holiday tables.
2. Coconut Delight: Coconut lovers will appreciate the generous use of shredded coconut and coconut milk, enhancing the flavor profile.
3. Moist and Fluffy: The cake remains incredibly moist, thanks to the combination of ingredients that keep it light and fluffy.
4. Versatile Flavor: While coconut is the star, you can easily add flavors like vanilla or almond for extra depth.
5. Perfect for Celebration: This cake is ideal for birthdays, Christmas parties, or any festive occasion.
6. Easy to Follow: The step-by-step instructions ensure that even novice bakers can succeed with this recipe.
7. Impressive Presentation: The snowy white layers and coconut topping make it a showstopper for any gathering.
With all these appealing qualities, you can see why Christmas Coconut Snow Cake is more than just a dessert; it’s a centerpiece that brings people together!
Preparation and Cooking Time
Creating your Christmas Coconut Snow Cake will take a bit of time but is well worth the effort. Here’s a breakdown of the time you’ll need:
– Preparation Time: 30 minutes
– Cooking Time: 25-30 minutes
– Cooling Time: 1 hour
– Assembling and Frosting Time: 30 minutes
In total, expect to spend about 2 hours on this delightful cake. The times may vary slightly depending on your baking experience and kitchen equipment.
Ingredients
– 2 ¾ cups all-purpose flour
– 2 ½ teaspoons baking powder
– ½ teaspoon salt
– 1 cup unsalted butter, softened
– 2 cups granulated sugar
– 4 large eggs
– 1 teaspoon vanilla extract
– 1 cup coconut milk
– 1 ½ cups shredded sweetened coconut
– 4 cups powdered sugar (for frosting)
– 1 cup unsweetened coconut cream
– 1 cup shredded coconut (for decoration)
– Optional: Extra coconut for garnish
Step-by-Step Instructions
Creating the Christmas Coconut Snow Cake is a straightforward process if you follow these simple steps:
1. Preheat Oven: Preheat your oven to 350°F (175°C). Grease and flour seven 8-inch round cake pans.
2. Mix Dry Ingredients: In a medium bowl, sift together the flour, baking powder, and salt.
3. Cream Butter and Sugar: In a large mixing bowl, cream the softened butter and granulated sugar together until light and fluffy.
4. Add Eggs and Vanilla: Beat in the eggs one at a time, then add the vanilla extract and mix well.
5. Combine Mixtures: Gradually add the dry ingredients to the butter mixture, alternating with coconut milk, starting and ending with the flour mixture. Mix until just combined.
6. Fold in Coconut: Gently fold in the shredded sweetened coconut until evenly distributed.
7. Divide the Batter: Evenly divide the batter among the seven prepared cake pans.
8. Bake: Bake in the preheated oven for 25-30 minutes or until a toothpick inserted in the center comes out clean.
9. Cool the Cakes: Remove the cakes from the oven and let them cool in the pans for 10 minutes. Then transfer them to wire racks to cool completely.
10. Prepare the Frosting: In a mixing bowl, combine powdered sugar and coconut cream, beating until fluffy and smooth.
11. Assemble the Cake: Place one layer of the cake on a serving platter. Spread a layer of frosting on top, then add the next layer. Repeat until all layers are stacked.
12. Frost the Sides: Use the remaining frosting to cover the sides and top of the cake.
13. Decorate: Generously sprinkle shredded coconut over the top and sides of the cake for a snowy effect.
Following these steps will result in a stunning Christmas Coconut Snow Cake that is sure to be the highlight of your holiday festivities!
How to Serve
When it comes to serving Christmas Coconut Snow Cake, presentation and pairing are key:
1. Slice Generously: Cut generous slices, ensuring everyone can enjoy the beautiful layers.
2. Garnish: Consider adding a few extra coconut flakes on top for added texture and decoration.
3. Accompaniment Options: Serve alongside fresh fruit, such as berries, or with a dollop of whipped cream for an added touch of sweetness.
4. Beverage Pairing: This cake pairs wonderfully with hot cocoa, coffee, or a festive holiday punch to enhance the flavors.
5. Presentation: Use a decorative cake stand to elevate the look of your cake, making it a centerpiece on your dessert table.
With these serving suggestions, your Christmas Coconut Snow Cake will not only taste incredible but also look stunning, delighting your guests during the holiday season!
Additional Tips
– Use Fresh Ingredients: Ensure all your ingredients, especially the coconut milk and butter, are fresh for optimal flavor.
– Cool Completely: Allow the cake layers to cool completely before frosting. This helps prevent the frosting from melting.
– Experiment with Flavors: Feel free to add different extracts like almond or coconut to enhance the flavor.
– Layering Technique: For a more artistic look, alternate the direction of the coconut flakes when decorating the cake.
– Make it Ahead: This cake can be made a day in advance. It tastes even better as the flavors meld overnight.
Recipe Variation
There are many exciting ways to customize your Christmas Coconut Snow Cake:
1. Chocolate Coconut Snow Cake: Add cocoa powder to the batter for a chocolate twist.
2. Tropical Delight: Incorporate crushed pineapple between the layers for a tropical flavor.
3. Nutty Addition: Add chopped nuts like macadamia or pecans for a crunchy texture.
4. Vegan Option: Substitute eggs with flaxseed meal and use plant-based butter and milk for a vegan-friendly version.
5. Layering with Jam: Spread a layer of raspberry or mango jam between the cake layers for a fruity surprise.
Freezing and Storage
– Storage: Keep your Christmas Coconut Snow Cake in an airtight container in the refrigerator for up to 5-7 days.
– Freezing: The cake can be frozen for up to three months. Wrap it tightly in plastic wrap and then in aluminum foil before freezing. Thaw it overnight in the refrigerator before serving.
Special Equipment
To make your Christmas Coconut Snow Cake, you’ll need:
– Seven 8-inch round cake pans
– Mixing bowls
– Electric mixer for creaming butter and sugar
– Rubber spatula for folding ingredients
– Toothpick for testing cake doneness
– Cake stand or platter for presentation
Frequently Asked Questions
How do I know when the cake is done baking?
Insert a toothpick into the center of the cake. If it comes out clean or with a few crumbs, it’s done.
Can I make this cake ahead of time?
Yes, you can make it a day in advance. In fact, it often tastes better the next day as the flavors meld.
Is this cake suitable for dietary restrictions?
You can easily adapt the recipe for gluten-free diets by using gluten-free flour.
Can I eliminate the coconut?
Yes, if you prefer, you can omit the coconut in the frosting and cake for a simpler flavor.
What should I do if my frosting is too thick?
If your frosting is too thick, add a splash of milk or coconut cream to reach your desired consistency.
Conclusion
The Christmas Coconut Snow Cake is a stunning dessert that will elevate any holiday gathering. Its seven layers of moist cake and luscious coconut frosting create a delightful treat that’s sure to impress. Not only does it look beautiful, but it also offers a delightful mix of flavors and textures that will have everyone coming back for seconds. Whether you’re celebrating with family or hosting friends, this cake will be the highlight of your festivities.
Christmas Coconut Snow Cake: An Incredible 7-Layered Delight
- Total Time: 44 minute
Ingredients
– 2 ¾ cups all-purpose flour
– 2 ½ teaspoons baking powder
– ½ teaspoon salt
– 1 cup unsalted butter, softened
– 2 cups granulated sugar
– 4 large eggs
– 1 teaspoon vanilla extract
– 1 cup coconut milk
– 1 ½ cups shredded sweetened coconut
– 4 cups powdered sugar (for frosting)
– 1 cup unsweetened coconut cream
– 1 cup shredded coconut (for decoration)
– Optional: Extra coconut for garnish
Instructions
Creating the Christmas Coconut Snow Cake is a straightforward process if you follow these simple steps:
1. Preheat Oven: Preheat your oven to 350°F (175°C). Grease and flour seven 8-inch round cake pans.
2. Mix Dry Ingredients: In a medium bowl, sift together the flour, baking powder, and salt.
3. Cream Butter and Sugar: In a large mixing bowl, cream the softened butter and granulated sugar together until light and fluffy.
4. Add Eggs and Vanilla: Beat in the eggs one at a time, then add the vanilla extract and mix well.
5. Combine Mixtures: Gradually add the dry ingredients to the butter mixture, alternating with coconut milk, starting and ending with the flour mixture. Mix until just combined.
6. Fold in Coconut: Gently fold in the shredded sweetened coconut until evenly distributed.
7. Divide the Batter: Evenly divide the batter among the seven prepared cake pans.
8. Bake: Bake in the preheated oven for 25-30 minutes or until a toothpick inserted in the center comes out clean.
9. Cool the Cakes: Remove the cakes from the oven and let them cool in the pans for 10 minutes. Then transfer them to wire racks to cool completely.
10. Prepare the Frosting: In a mixing bowl, combine powdered sugar and coconut cream, beating until fluffy and smooth.
11. Assemble the Cake: Place one layer of the cake on a serving platter. Spread a layer of frosting on top, then add the next layer. Repeat until all layers are stacked.
12. Frost the Sides: Use the remaining frosting to cover the sides and top of the cake.
13. Decorate: Generously sprinkle shredded coconut over the top and sides of the cake for a snowy effect.
Following these steps will result in a stunning Christmas Coconut Snow Cake that is sure to be the highlight of your holiday festivities!
- Prep Time: 30 minutes
- Cook Time: 25-30 minutes
Nutrition
- Serving Size: 12
- Calories: 450 kcal
- Fat: 24g
- Protein: 4g