Homemade Rainbow Sherbet Recipe is not just an average frozen treat; it’s an amazing dessert that bursts with flavor and color! This delightful dessert combines fruity flavors with a creamy base, making it the perfect indulgence for hot summer days or any special celebration. Imagine a swirl of vibrant colors on your plate, inviting you and your guests to enjoy it. This Rainbow Sherbet captures the essence of summer and has the power to make any day feel festive.
If you’ve ever savored a scoop of store-bought rainbow sherbet, you’ll know the tantalizing combination of sweet, tangy, and refreshing flavors. However, nothing compares to the joy of making this scrumptious treat from scratch! This Homemade Rainbow Sherbet Recipe is easy to prepare and is guaranteed to impress anyone who takes a bite. Whether you’re hosting a party or just treating yourself, this sherbet is sure to be the highlight of your dessert table.
Not only does this recipe allow for customization in flavor and colors, but it also ensures that you can control the sweetness and ingredients used. The contrasting layers of vibrant colors create a visual feast that’s as delightful to look at as it is to taste. Let’s embark on a journey to discover the magic of making Homemade Rainbow Sherbet right in your kitchen!
Why You’ll Love This Recipe
There are plenty of reasons why you will fall head over heels for this Homemade Rainbow Sherbet Recipe. Here are some highlights:
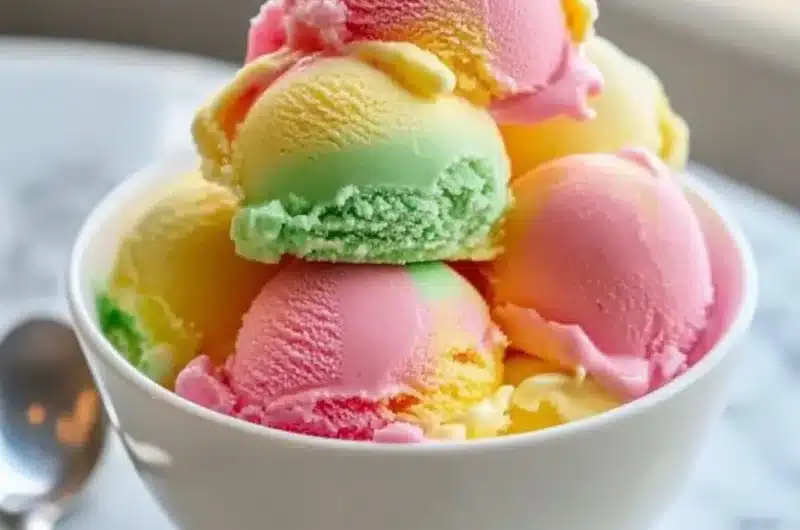
1. Colorful Presentation: The vibrant layers create a stunning visual effect, making it ideal for parties or gatherings.
2. Customizable Flavors: You can easily adjust the flavors according to your preference, such as adding more citrus or berries.
3. Kid-Friendly Treat: Kids love the colorful appeal and fun flavors, making it a perfect treat for summer days.
4. No Ice Cream Maker Required: This recipe can be made without any fancy equipment, using just a blender and a freezer.
5. Easy to Make: The straightforward process ensures that even novice cooks can whip it up successfully.
6. Healthy Alternatives Available: You can opt for fresh fruit juices and natural sweeteners, making it a guilt-free indulgence.
With such fabulous advantages, it’s no wonder this Homemade Rainbow Sherbet is a favorite among families! Each scoop offers a delightful combination of flavors that transports you to sunny days and carefree moments.
Preparation and Cooking Time
Making this scrumptious Homemade Rainbow Sherbet requires minimal time and effort. Here’s a quick breakdown:
– Preparation Time: 20 minutes
– Churning Time: 10-15 minutes (if using an ice cream maker)
– Freezing Time: 4-6 hours (or overnight)
The process is simple, and the wait is well worth it when you savor the vibrant, creamy sherbet!
Ingredients
– 4 cups fruit juice (e.g., orange, raspberry, lemon, lime)
– 2 cups heavy cream
– 1 cup sweetened condensed milk
– 1 cup granulated sugar
– 1 teaspoon vanilla extract
– Food coloring (optional, for richer colors)
– Fresh fruit for garnishing (optional)
Step-by-Step Instructions
Creating your Homemade Rainbow Sherbet is a fun and straightforward adventure! Just follow these easy steps:
1. Prepare the Juices: In a blender, combine the fruit juices of your choice with half of the sugar. Blend until well mixed.
2. Mix the Cream: In a separate bowl, whisk together the heavy cream, sweetened condensed milk, and vanilla extract until smooth.
3. Combine for Flavor: Gradually add the juice mixture into the cream mixture. Stir until completely blended.
4. Separate Mixtures: Divide the mixture equally into separate bowls according to the number of colors you would like to create.
5. Add Colors: Add food coloring to each bowl to achieve desired vibrant shades. Stir until colors are evenly distributed.
6. Layer the Mixtures: In a freezer-safe container, carefully layer the colors, starting with one color and adding the next gently to avoid mixing.
7. Freeze: Cover the container with a lid or plastic wrap and place it in the freezer for at least 4 hours or until firm.
8. Scoop and Serve: Once the sherbet is frozen solid, let it sit at room temperature for a few minutes before scooping. Use an ice cream scoop to serve.
9. Garnish: Optionally, top with fresh fruit to enhance the presentation and flavor.
These simple yet effective steps will ensure that your Homemade Rainbow Sherbet turns out incredible, filled with layers of fruity goodness!
How to Serve
Serving Homemade Rainbow Sherbet is all about showcasing its colorful and creamy appeal. Here are some delightful serving suggestions:
1. Use Elegant Bowls: Serve in clear glass bowls to highlight those beautiful layers.
2. Garnish with Fresh Fruit: Add sliced fruits on top, such as strawberries, blueberries, or fresh mint leaves for a pop of color and freshness.
3. Pair with Wafer Cones: Offer crispy wafer cones alongside for an easy and delightful scoop experience.
4. Create a Sherbet Sundae: Decorate with chocolate syrup, sprinkles, or whipped cream for a fun sundae twist.
5. Presentation Matters: Consider using colorful sprinkles or edible glitter to elevate the visual appeal, especially for special occasions.
By focusing on the presentation and thoughtful accompaniments, your Homemade Rainbow Sherbet becomes not just a dessert, but a memorable experience for your guests! Enjoy every bite of this colorful delight that captures the essence of joy and celebration.
Additional Tips
– Experiment with Fruit Juices: Use a mix of your favorite fruit juices for a personalized flavor. Tropical juices like pineapple or mango can add a unique twist.
– Homemade Cream Alternatives: For a lighter option, substitute heavy cream with coconut cream or almond milk. This makes the sherbet dairy-free and vegan-friendly.
– Use Whole Fruits: Instead of just juice, you can blend whole fruits into the mix for added texture and fiber.
– Serve Immediately: If you’re looking for a softer texture, serve the sherbet right after freezing it for a few hours instead of waiting until it’s rock-solid.
– Experiment with Layers: Try creating more than three layers using different colors and flavors for a visually striking dessert.
Recipe Variation
Feel free to get creative! Here are some variations to try:
1. Sorbet Version: For a fully fruity and dairy-free option, skip the cream and follow the same method using only fruit juices and sugar.
2. Flavor Infusion: Infuse the heavy cream with herbs like mint or basil before mixing it in for an unexpected flavor twist.
3. Rainbow Sherbet Popsicles: Pour your layered mixtures into popsicle molds for a fun and refreshing treat that’s perfect for hot days.
4. Alcohol Infusion: For adult gatherings, adding a splash of fruit-flavored liqueur can turn your sherbet into a fun frozen cocktail.
Freezing and Storage
– Storage: Keep the homemade rainbow sherbet stored in an airtight container to prevent freezer burn. It’s best enjoyed within two weeks but can last up to a month.
– Tips for Preventing Ice Crystals: To maintain its smooth texture, ensure the container is well-sealed and try to limit opening the freezer too frequently.
Special Equipment
You may not need much to create your Homemade Rainbow Sherbet, but having the right tools makes the process easier:
– Blender: Essential for mixing the juices and cream smoothly.
– Mixing Bowls: A few bowls will allow you to separate the mixtures for coloring.
– Freezer-safe Container: Store your sherbet in a container with a tight-fitting lid to keep it fresh.
– Ice Cream Scoop: A sturdy scoop makes serving easier and more fun.
Frequently Asked Questions
How can I tell if my sherbet is frozen enough?
You’ll know it’s ready when it is firm to the touch and holds its shape when scooped.
Can I use frozen fruit instead of juice?
Yes, blending frozen fruit can yield a thicker, creamier mixture for your sherbet.
Is there a way to make it sugar-free?
Absolutely! Use sugar substitutes like stevia or erythritol to achieve the desired sweetness without added sugar.
Can I make it alcoholic?
Yes, you can incorporate a small amount of your favorite liqueur after blending to create a fun adult dessert!
What if I don’t have food coloring?
Don’t worry! You can create natural colors using colorful fruits like beets for red, spinach for green, or blueberries for blue.
Conclusion
Making your Homemade Rainbow Sherbet is not only a joyful activity but also results in a delicious, vibrant treat perfect for any occasion. Each delightful scoop brings a fusion of flavors that can brighten even the hottest summer days. As you customize your sherbet with various fruits and colors, the possibilities are endless. This homemade delight will surely become a beloved staple in your dessert repertoire, bringing smiles and joy to everyone who tries it!

Homemade Rainbow Sherbet Recipe: An Incredible Ultimate Delight!
- Total Time: 15 minutes
Ingredients
– 4 cups fruit juice (e.g., orange, raspberry, lemon, lime)
– 2 cups heavy cream
– 1 cup sweetened condensed milk
– 1 cup granulated sugar
– 1 teaspoon vanilla extract
– Food coloring (optional, for richer colors)
– Fresh fruit for garnishing (optional)
Instructions
Creating your Homemade Rainbow Sherbet is a fun and straightforward adventure! Just follow these easy steps:
1. Prepare the Juices: In a blender, combine the fruit juices of your choice with half of the sugar. Blend until well mixed.
2. Mix the Cream: In a separate bowl, whisk together the heavy cream, sweetened condensed milk, and vanilla extract until smooth.
3. Combine for Flavor: Gradually add the juice mixture into the cream mixture. Stir until completely blended.
4. Separate Mixtures: Divide the mixture equally into separate bowls according to the number of colors you would like to create.
5. Add Colors: Add food coloring to each bowl to achieve desired vibrant shades. Stir until colors are evenly distributed.
6. Layer the Mixtures: In a freezer-safe container, carefully layer the colors, starting with one color and adding the next gently to avoid mixing.
7. Freeze: Cover the container with a lid or plastic wrap and place it in the freezer for at least 4 hours or until firm.
8. Scoop and Serve: Once the sherbet is frozen solid, let it sit at room temperature for a few minutes before scooping. Use an ice cream scoop to serve.
9. Garnish: Optionally, top with fresh fruit to enhance the presentation and flavor.
These simple yet effective steps will ensure that your Homemade Rainbow Sherbet turns out incredible, filled with layers of fruity goodness!
- Prep Time: 15 minutes
- Cook Time: 0 minutes
Nutrition
- Serving Size: 10
- Calories: 200 kcal per serving
- Fat: 5g
- Protein: 1g