The peanut butter and jelly sandwich, or PB&J, is a timeless classic for a reason. It’s simple, satisfying, and brings back a sense of childhood for many. While it might seem incredibly straightforward, even the most basic recipes benefit from a little guidance. This isn’t just about slapping ingredients between two slices of bread. This guide is specifically designed for those who might feel like they need a little extra help – the complete beginner. So, if you’ve ever wondered how to make a peanut butter and jelly sandwich, you’ve come to the right place, let’s embark on this tasty journey together!
Gathering Your Ingredients and Tools
The Basic Necessities: What you need to make a peanut butter and jelly sandwich
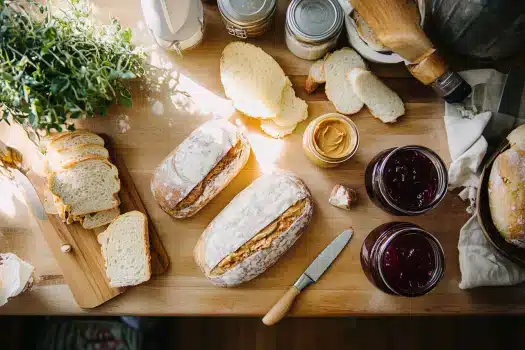
To craft the perfect pb&j, first we need to gather all of our essential items. The first step is the bread, so we need to choose our favorite slices. Freshness is key, so check for that before anything else. You can choose white, wheat, whole grain, or any other favorite type of bread. Next, you will need peanut butter, creamy or chunky, and a jelly of your choice, you can choose classic grape, strawberry or raspberry for instance. Don’t forget, a butter knife for spreading, and a plate or cutting board to work on, and then you are ready to go!
The Bread: Choosing the Right Slices
The foundation of any great sandwich is undoubtedly the bread. Fresh bread will always lead to a better pb&j, so give it a quick squeeze. If it feels soft, you’re on the right track! The type of bread you choose can impact the overall taste and texture. White bread is a common choice because of its mild flavor, but wheat or whole grain will bring a heartier, nuttier option to the table. Any bread you like is perfectly acceptable, it just needs to be soft, and fresh.
Peanut Butter: Selecting the Right Spread
Peanut butter is essential for any pb&j. The first thing to decide is creamy or chunky? Creamy peanut butter will provide a smoother texture, while chunky peanut butter will give you a bit of a crunch. You should choose a brand of peanut butter that you find enjoyable and that aligns with your personal preference. Also consider exploring natural peanut butter that contains only peanuts and salt, which would provide a purer taste. The main goal is to pick one that satisfies your craving!
Jelly: What Flavor Should You Use?
The jelly you pick adds that sweet, fruity taste to your classic sandwich. While classic grape is a popular option, strawberry and raspberry jellies bring a delicious alternative. However, there are no rules as long as you have jelly. Explore different jam and jelly alternatives like apricot or mixed berries if you’re feeling adventurous. The key is to select a jelly that complements the peanut butter and is something you find delicious.
The Right Tools
You will only need very basic tools for this simple recipe. A butter knife for spreading is very crucial, it will help to apply both peanut butter and jelly smoothly. A plate or a cutting board will keep your working area clean and make the whole preparation process easier, providing a stable space for you while making the sandwich. These tools will ensure the sandwich making process goes smoothly, and then you can enjoy your delicious pb&j!
Preparing Your Workspace
Setting up for success: Making your PB&J workspace
Before you start assembling your pb&j, setting up a clean workspace is the first step of many. This way, you’ll have all your essentials and you can make a sandwich faster. It will also prevent any unwanted spills or messes from happening and allow you to keep a clean preparation space.
Creating a Clean Area: Importance of a Clear Counter
A clear counter is essential for a stress-free pb&j experience. Before you even start taking things out, make sure your surface is free from any clutter or any debris and it is clean. You don’t want any unexpected sticky spots or crumbs to get in your sandwich. This will prevent you from a messy sandwich making, it is much easier and more comfortable to work with clean space. A clean area will definitely lead to a smoother and more enjoyable pb&j creation.
Laying Out Your Tools and Ingredients
To make your peanut butter and jelly instructions easier, lay out your tools and ingredients within your reach. Grab your bread, peanut butter jar, jelly jar, knife, and plate. Keeping everything within an arm’s length will make your process more efficient, and make it easier to see everything at a glance. By having all the essentials nearby you’ll minimize any disruptions and streamline the whole sandwich making process. This also makes the process enjoyable!
Opening jars and packaging
Before beginning to assemble your pb&j, opening your jars and packages is essential for a smooth sandwich making process. Make sure to open both the peanut butter and jelly jars ahead of time, so you don’t need to stop midway through. You should also have the bread out of its packaging and ready. It may seem like a minor step, but doing this ahead of time will make your sandwich assembly much easier. So, take those lids off, and let’s get started!
Spreading the Peanut Butter
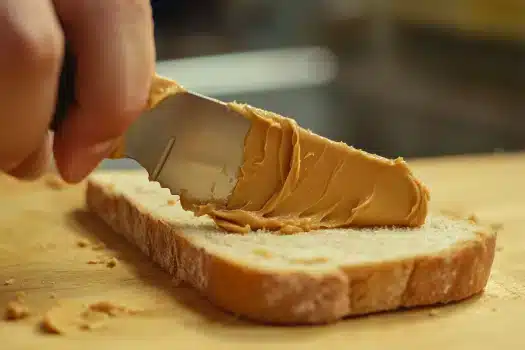
The Heart of the Sandwich: Applying the peanut butter
The peanut butter is a key ingredient to your sandwich and also an important part of the preparation. You can take the time to spread the peanut butter perfectly on your bread. The next step will be to learn the techniques for how to spread it without tearing the bread and achieving an even layer. So let’s take a look on how to spread the peanut butter in order to improve your sandwich.
How Much Peanut Butter?
The amount of peanut butter you spread on your bread can impact your overall sandwich. Spreading a reasonable amount of peanut butter is crucial to achieve the perfect pb&j. If you add too little, the sandwich might be dry, if you add too much, it will be overly sticky and messy. So, applying a thin layer is recommended, and making sure that it’s spread evenly is crucial for a balanced flavor. You should try to avoid applying too much as to not overwhelm your pb&j.
Technique for Smooth Spreading
The technique for smooth spreading is a vital part of the whole process. Using your butter knife, gently pick up some peanut butter from the jar. Begin from the center of the bread slice and spread outwards towards the edges. Try to use smooth and even strokes, which will help you avoid tearing the bread. This way you’ll get an even layer, a smooth texture, and a perfect sandwich without any accidents.
Spreading close to the edges
When spreading close to the edges you need to try your best to cover all the space on the bread with the peanut butter. Do not forget about the edges, as they are an important part of the sandwich. You want your peanut butter to be spread in such a way that it will reach all the nooks and crannies of the slice, and leave no part untouched by this delightful ingredient. This step will improve your sandwich making technique greatly.
Applying the Jelly or Jam
Adding the Sweetness: Layering the Jelly
The jelly provides that sweet, fruity element, which makes it the perfect contrast to the peanut butter. Therefore, it is very important to add it correctly. Applying it after the peanut butter and spreading it evenly is the next crucial step, and this is how it’s done.
How Much Jelly is Enough
Just like with peanut butter, you need to be careful about the amount of jelly you put on your bread. Not too much jelly is essential to maintain a good balance of flavors. Overdoing it might make the sandwich soggy or too sweet. Aim for a thin layer of jelly, just enough to complement the peanut butter. This will guarantee the perfect balance and texture for your delicious treat.
Techniques for Smooth Jelly Spreading
After applying the peanut butter on one slice of the bread, it’s time to apply the jelly. Using a clean butter knife, pick up some jelly from the jar and apply it on the other slice of bread. This will avoid mixing the pb with the jelly, so your sandwich will have separate flavors, without an over saturated taste. Spread the jelly gently and evenly, making sure to not tear the bread, just like you did with the peanut butter, and do it close to the edges.
Adding it to the correct bread slice
It’s very important to add the jelly to the correct bread slice! This might seem like a small thing, but it makes a big difference in terms of texture and experience. You need to spread the peanut butter on one slice of bread and the jelly on the other. If you try to spread them on the same slice, you will most likely mix the ingredients and it will make the whole process messy. That’s why it’s important to have each spread on its own slice of bread.
Assembling Your Masterpiece
Bringing it all together: putting together your pb&j
Now that you have two slices of bread with your favorite ingredients layered evenly, it’s time for the final touch, putting together your pb&j. This is the moment when all the hard work and effort come together, creating a complete, ready to eat sandwich.
Carefully Joining the Bread Slices
The first thing that you need to keep in mind while assembling your pb&j is the right positioning of the two slices of bread. With the peanut butter side facing down, carefully flip over the bread slice with the jelly and place it on top of the other slice. Do this carefully to avoid any mess or displacement of the ingredients. Ensure that the bread slices align perfectly for an ideal perfect sandwich.
Gentle Pressing for a Secure Seal
After joining the two slices, you need to press them softly. Pressing the sandwich softly will help the layers stick together securely. Use a gentle touch; do not apply too much pressure, this will keep all the spreads in place, and it will ensure a well-made and a secure pb&j.
Properly Positioning the top slice
After you place the top slice on your sandwich, make sure it is properly positioned. The edges of the top slice should align perfectly with the edges of the bottom slice. You want a neat and evenly aligned pb&j that’s pleasing to the eye and easy to handle. A properly positioned top slice will definitely enhance your whole pb&j experience.
The Finishing Touches (Optional)
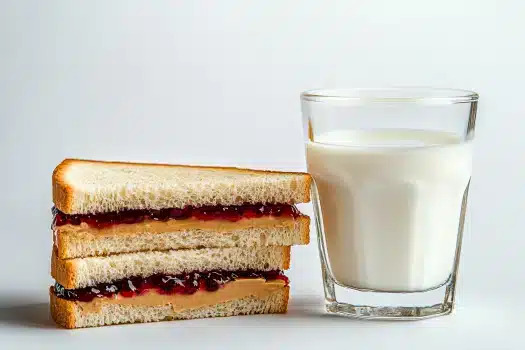
Elevating your sandwich: Optional additions and tips for improvement.
While the pb&j is already a perfect treat on its own, there are many things that you can add to it to make it more appealing. These tips will take your sandwich to the next level, making it even better than before.
Cutting Your Sandwich
Cutting your sandwich is a very important step. You can choose whether you want to cut it diagonally or vertically, or not cut it at all. The most classic choice is a diagonal cut, that will result in two triangles. Why cutting is important, you might wonder? Because it makes the sandwich easier to handle and eat and sometimes it improves the presentation. It depends on your personal preference, so choose the cutting technique that is more convenient for you.
Removing the crust: A Personal Choice
Removing the crust is a matter of preference, and it is not a necessary step. Some people just don’t like the texture or taste of the crust, while others enjoy it. If you don’t like the crust, you can remove it, there’s no right or wrong answer here, it’s a personal choice. It does not make much of a difference in how you experience the pb&j, so do as your preference tells you.
Adding extra touches: Side options and serving ideas
You can add some extra touches to your pb&j to have the best experience. Side options such as sliced fruits or some veggies will make the meal more balanced, and it will bring a variety of textures and flavors. You can also pair your sandwich with milk, or other drink that you enjoy. Serving your pb&j with some yummy side dishes or beverages will surely make it more satisfying.
This is the end of part 6. Let me know when you’re ready for the next one!
FAQ: Frequently Asked Questions
- Can I use other types of bread?
Absolutely! While white bread is classic, feel free to use wheat, whole grain, sourdough, or any other type you prefer. Just make sure it’s soft and fresh for the best experience. - What is the best way to prevent my bread from tearing while spreading?
The key is to use gentle, even strokes with your butter knife. Avoid applying too much pressure, and start from the center, working your way outward towards the edges. Make sure your bread is fresh. - Is it okay to use chunky peanut butter?
Of course! Chunky peanut butter adds a nice crunch. It’s all about personal preference, so if you enjoy the texture, go for it. - How do I avoid my sandwich from getting soggy?
Avoid putting too much jelly in your sandwich, since jelly can make your bread soft and soggy. Also, consume your sandwich within a few hours of assembling it for best quality. - Can I make a peanut butter and jelly sandwich in advance?
Yes, you can, but it’s best consumed within a few hours to avoid sogginess. Wrap it tightly in plastic wrap or place it in an airtight container, and store it in a cool place. - What are some ways to make my PB&J more exciting?
Try adding slices of banana or strawberries, or swap your peanut butter for almond butter. Use a different jelly, or add honey or marshmallow fluff. Grilling your pb&j is also a great option. - What’s the best type of jelly to use?
The best type of jelly is the one you enjoy the most! Grape, strawberry, and raspberry are classic choices, but feel free to experiment with other flavors. - Can I use different spreads instead of peanut butter?
Yes, absolutely! Almond butter, cashew butter, or sunflower seed butter make great alternatives. These also cater to allergies and dietary needs. - Can I warm up my sandwich?
Yes, you can grill it in a pan with some butter, or put it in a panini maker. This will give you a warm and crispy snack! - How do I stop the peanut butter from sticking to the knife?
Run the knife under warm water before using it. This will help prevent the peanut butter from sticking and make spreading easier.
Conclusion
So, there you have it! Making a peanut butter and jelly sandwich doesn’t have to be a mystery anymore. From picking the perfect bread and spreads, to putting all the ingredients together and adding the finishing touches, we’ve covered all the essential steps. Remember that a great pb&j is more than just a simple recipe, it’s all about putting the ingredients you enjoy together. Feel free to experiment with different variations, toppings, and techniques to create your perfect sandwich. Now, go ahead, grab your ingredients and enjoy your delicious creation!thumb_upthumb_down
For more informations:

