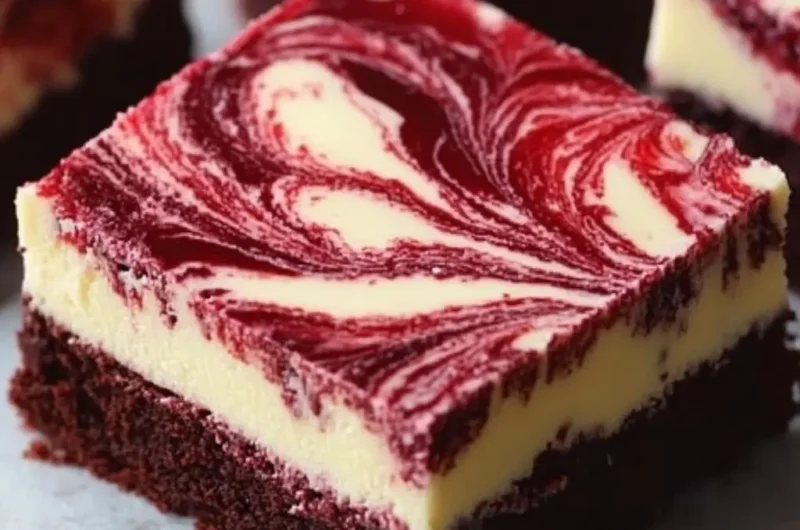
Marbled Red Velvet Cheesecake Bars are a deliciously unique dessert that combines the rich flavors of red velvet cake with the creamy texture of cheesecake. This amazing dessert will captivate your taste buds and impress your friends and family. The initial bite features the moist, dense red velvet cake, followed by the luscious cheesecake layer that perfectly balances sweet and tangy flavors. Elevate your dessert game with this recipe that’s perfect for any occasion, be it a birthday party, holiday celebration, or simply a delightful treat at home.
Have you ever craved a dessert that satisfies both cake lovers and cheesecake aficionados? The Marbled Red Velvet Cheesecake Bars fulfill that need beautifully. With its stunning visual appeal and luscious taste, they are bound to steal the show at any gathering. By following this guide, you’ll learn not only how to make these delightful bars but also why they are worth every minute of your time in the kitchen!
Get ready to immerse yourself in the wonderful world of baking as we explore what makes these Marbled Red Velvet Cheesecake Bars an irresistible treat. You’ll discover the simple ingredients involved, the straightforward process of creating these beautiful bars, and tips for serving that make the experience all the more enjoyable. Let’s get started on this exciting culinary journey!
Why You’ll Love This Recipe
Marbled Red Velvet Cheesecake Bars are not just another dessert; they are an experience. Here are several reasons why you’ll fall in love with this recipe:
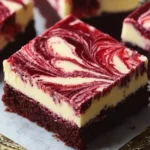
1. Stunning Visual Appeal: The marbling effect of red velvet and cheesecake creates an Instagram-worthy presentation that will wow your guests.
2. Irresistible Flavor: The combination of rich cocoa flavor with cream cheese creates a soft, sweet, and tangy treat that is simply delightful.
3. Easy to Make: With a straightforward approach, even novice bakers can master this recipe.
4. Perfect for Any Occasion: Whether you’re hosting a special event or just treating yourself, these bars are versatile enough for any gathering.
5. Transportable: Easily slice the bars and take them to parties, picnics, or potlucks without fuss.
6. Rich and Decadent: Each bite offers a perfect balance of sweetness and tanginess, providing an exceptional indulgence for dessert lovers.
By the end of this guide, you will understand why Marbled Red Velvet Cheesecake Bars are a must-try dessert that will leave everyone asking for more!
Preparation and Cooking Time
Making Marbled Red Velvet Cheesecake Bars is a straightforward process that requires time management. Here’s a clear breakdown of the preparation and cooking times:
– Preparation Time: 30 minutes
– Cooking Time: 40-45 minutes
– Cooling Time: 30 minutes (or until set)
In total, you will spend around 1 hour and 15 minutes creating these wonderful bars. Keep in mind that individual times may vary depending on your baking experience and kitchen equipment. Planning ahead will make the process smoother and more enjoyable.
Ingredients
– For the Red Velvet Layer:
– 1 ½ cups all-purpose flour
– 1 cup granulated sugar
– 1 teaspoon baking powder
– ½ teaspoon baking soda
– ½ teaspoon salt
– 1 teaspoon unsweetened cocoa powder
– ½ cup vegetable oil
– 1 large egg
– 1 cup buttermilk
– 1 tablespoon red food coloring
– 1 teaspoon vanilla extract
– 1 teaspoon white vinegar
– For the Cheesecake Layer:
– 16 ounces cream cheese, softened
– ½ cup granulated sugar
– 1 teaspoon vanilla extract
– 2 large eggs
Step-by-Step Instructions
Creating Marbled Red Velvet Cheesecake Bars can be a rewarding and breezy process if you follow these steps:
1. Preheat Oven: Preheat your oven to 350°F (175°C). Grease a 9×9-inch baking pan or line it with parchment paper for easy removal.
2. Mix Dry Ingredients: In a large mixing bowl, whisk together the flour, sugar, baking powder, baking soda, salt, and cocoa powder.
3. Combine Wet Ingredients: In another bowl, beat together the vegetable oil, egg, buttermilk, red food coloring, vanilla extract, and white vinegar until well blended.
4. Combine Mixtures: Gradually add the wet ingredients to the dry ingredients, stirring until just combined. Do not overmix.
5. Prepare Cheesecake Layer: In a separate bowl, beat the softened cream cheese until smooth. Add in the granulated sugar and vanilla extract, then mix until fully combined. Beat in the eggs one at a time until smooth.
6. Layer the Mixtures: Pour half of the red velvet batter into the prepared pan. Then, spoon the cheesecake layer evenly over it. Finally, drop spoonfuls of the remaining red velvet batter on top of the cheesecake layer. Use a knife to swirl them together for the marbled effect.
7. Bake the Bars: Bake in the preheated oven for 40-45 minutes, or until a toothpick inserted in the center comes out clean. Allow to cool in the pan for 30 minutes before transferring to a wire rack to cool completely.
How to Serve
Serving Marbled Red Velvet Cheesecake Bars can be just as delightful as making them. Here are some tips to enhance your presentation and enjoyment:
1. Cutting: Use a sharp knife to cut even squares for a clean presentation. Wipe the knife after each cut to maintain the marbled design.
2. Plating: Serve the bars on a decorative plate or a cake stand for an elegant look. You can also dust them with powdered sugar or drizzle with chocolate sauce for added flair.
3. Accompaniments: Pair your bars with whipped cream, fresh berries, or a scoop of vanilla ice cream for a decadent dessert experience.
4. Beverage Pairing: These bars go excellently with coffee, milk, or a glass of dessert wine, which can enhance the flavor of the cheesecake.
5. Storage: Keep any leftovers in an airtight container in the refrigerator. They can last up to a week, but they’re so good that they might not last long!
By keeping these serving suggestions in mind, you can create an unforgettable dessert experience for your guests or for a quiet night at home. Enjoy every luscious bite of your Marbled Red Velvet Cheesecake Bars!
Additional Tips
– Use Quality Ingredients: For the best flavor, opt for high-quality cocoa powder and cream cheese. This will ensure the bars taste rich and delicious.
– Allow to Cool Completely: Make sure the bars are completely cooled before slicing. This helps maintain their structure and prevents them from crumbling.
– Experiment with Toppings: Feel free to add toppings such as chocolate shavings, crushed nuts, or a drizzle of caramel for an extra touch of indulgence.
– Keep the Red Velvet Layer Moist: To maintain moisture, consider slightly underbaking the red velvet layer. This will keep it soft and prevent dryness.
– Serve with a Flourish: Enhance your serving presentation with a dollop of whipped cream or a sprinkle of fresh berries beside the bars.
Recipe Variation
Feel free to switch things up! Here are a few variations to explore:
1. Chocolate Swirl Version: Add melted dark chocolate to the cheesecake layer for a chocolate twist.
2. Nutty Crunch: Incorporate chopped walnuts or pecans into the red velvet layer for added texture and flavor.
3. Mini Cheesecake Bars: Use a muffin tin to create individual marbled cheesecake bites for portion control and easy serving.
4. Vegan Alternative: Substitute dairy ingredients with plant-based counterparts like almond milk and dairy-free cream cheese.
5. Add Fruit: Swirl in some raspberry or cherry puree to the cheesecake layer for a fruity contrast.
Freezing and Storage
– Storage: Store the bars in an airtight container in the refrigerator for up to a week. They taste even better after a day or two as the flavors meld.
– Freezing: You can freeze the Marbled Red Velvet Cheesecake Bars. Wrap them tightly in plastic wrap, then place them in a freezer-safe container. They can be frozen for up to three months.
– Thawing: To enjoy, remove the bars from the freezer and let them thaw in the refrigerator overnight.
Special Equipment
You will need a few essential tools to prepare these bars successfully:
– Mixing bowls: A medium bowl for dry ingredients and a large bowl for wet ingredients.
– Electric mixer: Useful for mixing the cream cheese and ensuring it’s smooth.
– Whisk: Ideal for combining dry ingredients and mixing the wet ingredients thoroughly.
– 9×9-inch baking pan: The perfect size for these bars, ensuring they bake evenly.
– Parchment paper: Helpful for easy removal of the bars from the pan.
Frequently Asked Questions
How do I know when the bars are done baking?
Insert a toothpick into the center. If it comes out clean or with a few moist crumbs, they are ready.
Can I make these bars ahead of time?
Absolutely! These bars keep very well, so you can prepare them a day or two before your event for convenience.
Can I use gluten-free flour?
Yes, you can substitute with a gluten-free all-purpose flour blend to make the bars gluten-free.
What if I don’t have buttermilk?
You can make buttermilk by adding one tablespoon of lemon juice or vinegar to a cup of regular milk, letting it sit for a few minutes to sour.
Can I adjust the sweetness?
Certainly! You can reduce the sugar in the cheesecake layer according to your preference for a less sweet dessert.
Conclusion
Marbled Red Velvet Cheesecake Bars are a delightful fusion of rich dessert flavors that no one can resist. Their combination of velvety red cake and creamy cheesecake not only creates an enticing look but also a tantalizing taste. With simple steps and the option to customize, you can transform this recipe into something personal and unique. Give it a try, and get ready to impress friends and family with these beautiful and scrumptious bars!
Marbled Red Velvet Cheesecake Bars: An Incredible 7-Step Recipe
- Total Time: 1 minute
Ingredients
– For the Red Velvet Layer:
– 1 ½ cups all-purpose flour
– 1 cup granulated sugar
– 1 teaspoon baking powder
– ½ teaspoon baking soda
– ½ teaspoon salt
– 1 teaspoon unsweetened cocoa powder
– ½ cup vegetable oil
– 1 large egg
– 1 cup buttermilk
– 1 tablespoon red food coloring
– 1 teaspoon vanilla extract
– 1 teaspoon white vinegar
– For the Cheesecake Layer:
– 16 ounces cream cheese, softened
– ½ cup granulated sugar
– 1 teaspoon vanilla extract
– 2 large eggs
Instructions
Creating Marbled Red Velvet Cheesecake Bars can be a rewarding and breezy process if you follow these steps:
1. Preheat Oven: Preheat your oven to 350°F (175°C). Grease a 9×9-inch baking pan or line it with parchment paper for easy removal.
2. Mix Dry Ingredients: In a large mixing bowl, whisk together the flour, sugar, baking powder, baking soda, salt, and cocoa powder.
3. Combine Wet Ingredients: In another bowl, beat together the vegetable oil, egg, buttermilk, red food coloring, vanilla extract, and white vinegar until well blended.
4. Combine Mixtures: Gradually add the wet ingredients to the dry ingredients, stirring until just combined. Do not overmix.
5. Prepare Cheesecake Layer: In a separate bowl, beat the softened cream cheese until smooth. Add in the granulated sugar and vanilla extract, then mix until fully combined. Beat in the eggs one at a time until smooth.
6. Layer the Mixtures: Pour half of the red velvet batter into the prepared pan. Then, spoon the cheesecake layer evenly over it. Finally, drop spoonfuls of the remaining red velvet batter on top of the cheesecake layer. Use a knife to swirl them together for the marbled effect.
7. Bake the Bars: Bake in the preheated oven for 40-45 minutes, or until a toothpick inserted in the center comes out clean. Allow to cool in the pan for 30 minutes before transferring to a wire rack to cool completely.
- Prep Time: 30 minutes
- Cook Time: 40-45 minutes
Nutrition
- Serving Size: 16 bars
- Calories: 280 kcal
- Fat: 14g
- Protein: 4g