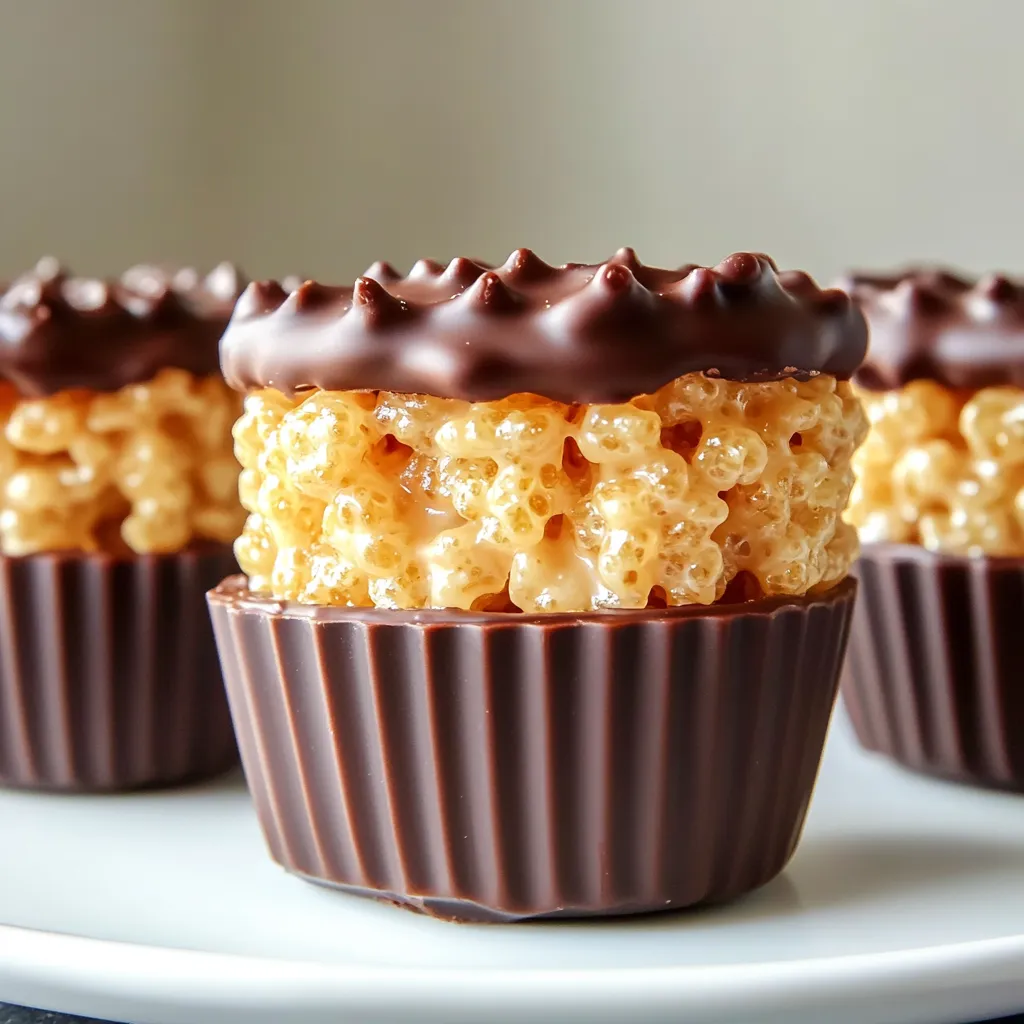
These cute little cups are made with gooey peanut butter Rice Krispie treats on the bottom, a smooth chocolate-peanut butter ganache on top, and a sprinkle of flaky salt to finish it off. You press them into a muffin tin instead of a baking pan, which makes them perfectly portioned and kind of irresistible.
I first made these for a bake sale at my kid’s school and they sold out so fast. I had people texting me later asking for the recipe, which is always a sign that you’re on to something good.
Why You’ll Love This Recipe
- No-bake: No oven, no stress—just melt, mix, press, and chill.
- Portion-perfect: Made in muffin tins, they’re the perfect handheld size.
- Sweet-salty perfection: Peanut butter and chocolate are the ultimate dream team.
- Easy to make ahead: They store well in the fridge or freezer.
- Kid- and adult-approved: Loved by everyone from toddlers to grown-up peanut butter addicts.
Prep Time and Servings
- Total Time: 25 minutes + chill time
- Servings: Makes 12 treat cups
- Calories per cup: ~220
- Protein: 4g | Carbs: 24g | Fat: 12g
Ingredients
For the Rice Krispie Base:
- 3 cups Rice Krispies cereal
- ½ cup creamy peanut butter
- ¼ cup honey or maple syrup
- 2 tablespoons coconut oil or butter
- 1 teaspoon vanilla extract
- Pinch of salt
For the Chocolate Topping:
- ½ cup semi-sweet chocolate chips
- ¼ cup creamy peanut butter
- Optional: flaky sea salt for topping
Step-by-Step Instructions
Step 1: Line Your Muffin Tin
- Line a 12-cup muffin tin with paper liners or lightly grease with coconut oil or cooking spray.
- You can also use silicone muffin cups for easy removal.
Step 2: Make the Rice Krispie Base
- In a medium saucepan, combine peanut butter, honey (or syrup), and coconut oil.
- Warm over medium-low heat, stirring until melted and smooth—don’t let it boil.
- Remove from heat and stir in vanilla and a pinch of salt.
- Fold in the Rice Krispies and mix until everything is well-coated.
Tip: Work quickly—the mixture sets fast as it cools!
Step 3: Press into Cups
- Spoon the mixture evenly into the muffin cups, about 2 tablespoons each.
- Press down firmly with the back of a spoon or your fingers to flatten.
Pro tip: Lightly grease your fingers or spoon with coconut oil to prevent sticking.
Step 4: Make the Chocolate Topping
- In a small bowl, melt the chocolate chips and peanut butter together (microwave in 20–30 second bursts, stirring between, or use a double boiler).
- Stir until smooth and glossy.
Step 5: Top and Chill
- Spoon a heaping teaspoon of the chocolate mixture over each cup and spread gently to cover the top.
- Sprinkle with flaky sea salt if using.
- Place the muffin tin in the fridge for about 30–45 minutes, or until the chocolate is set.
How to Serve
These are perfect chilled or slightly softened at room temperature. Here’s how to enjoy them:
- Straight from the fridge: For a firm, chewy bite.
- With coffee or tea: They pair perfectly with a hot drink.
- As lunchbox treats: Pop one in a kid’s or grown-up’s lunch.
- Party platter: Arrange them on a tray with fruit and mini cookies for a no-fuss dessert board.
Additional Tips
- Use natural peanut butter: The kind with just peanuts and salt gives the best texture and flavor. Stir well before measuring!
- Avoid overheating: Heat the peanut butter-honey mixture just until smooth. Too much heat can make the bars hard.
- Swap the sweetener: Maple syrup adds a deeper flavor, while honey keeps it classic and a bit chewier.
- Add-ins? Go for it! Mini chocolate chips, chopped peanuts, or even shredded coconut can be stirred into the cereal base.
- Chill time matters: Make sure they’re fully chilled before removing from the pan, especially if you’re skipping liners.
Recipe Variations
- Nut-free: Use sunflower seed butter or Wowbutter instead of peanut butter.
- Vegan: Use maple syrup instead of honey and dairy-free chocolate chips.
- Extra crunchy: Add chopped roasted peanuts to the base layer.
- Double chocolate: Stir in mini chocolate chips or cocoa nibs before pressing the cereal layer into the tin.
- Layered: Press half the cereal mix into the cups, add a dollop of peanut butter, then cover with the remaining mix before topping with chocolate
Storage
- Fridge: Store in an airtight container for up to 1 week.
- Freezer: Freeze in a single layer until firm, then transfer to a container. Keeps well for up to 2 months. Thaw in the fridge or at room temp for a few minutes before eating.
Special Equipment
- 12-cup muffin tin: The perfect size for treat cups.
- Mixing bowls: For your cereal base and chocolate topping.
- Spatula or spoon: To help mix and press.
FAQ
Can I use marshmallows instead of peanut butter in the base?
Totally—but then it’s more like a classic Rice Krispie treat. You’ll need about 3 cups marshmallows and 2 tablespoons butter.
Can I make these in a square pan instead of cups?
Yes! Press into an 8×8 pan and slice into squares once set.
Do I have to refrigerate them?
Not necessarily, but they hold their shape best when chilled. Especially helpful in warmer climates.
Can I make these ahead of time?
Absolutely. These keep really well in the fridge or freezer—just bring to room temp for a softer bite.
What other nut butters work?
Almond butter, cashew butter, or sunflower seed butter are all great options.
Can I add protein powder?
Yes—add 1–2 tablespoons of unflavored or vanilla protein powder to the peanut butter mixture before mixing in the cereal.
Are these gluten-free?
They can be! Just make sure your Rice Krispies and other ingredients are certified gluten-free.
Can I make them less sweet?
Try using unsweetened nut butter and reducing the sweetener slightly. You can also go for dark chocolate chips.
Conclusion
Peanut Butter Chocolate Rice Krispie Treat Cups are one of those genius little desserts that hit every craving—chewy, crunchy, sweet, salty, chocolatey—and they come together in a flash. Keep a batch in your fridge or freezer and thank yourself later when that afternoon sweet tooth hits.
If you make these, I’d love to see your creations! Tag me and show off your treat cups—I promise they won’t last long.
Print
Peanut Butter Chocolate Rice Krispie Treat Cups
- Total Time: 45 min
Description
These peanut butter chocolate Rice Krispie treat cups are a delightful twist on a classic treat. With gooey marshmallow and peanut butter layered with rich chocolate, they make the perfect bite-sized dessert for parties, lunchboxes, or after-school snacks.
Ingredients
-
3 cups Rice Krispies cereal
-
1/2 cup creamy peanut butter
-
2 tbsp unsalted butter
-
1 1/2 cups mini marshmallows
-
1 cup chocolate chips (semi-sweet or milk chocolate)
-
1 tsp coconut oil or butter (for melting chocolate)
-
Optional: flaky sea salt or chopped peanuts for topping
Instructions
1️⃣ Lightly grease a 12-cup muffin tin or line with paper liners.
2️⃣ In a large saucepan, melt butter and peanut butter over low heat. Add marshmallows and stir until fully melted and smooth.
3️⃣ Remove from heat and quickly stir in Rice Krispies cereal until evenly coated.
4️⃣ Spoon mixture into the muffin tin, pressing gently into each cup to form a base.
5️⃣ In a microwave-safe bowl, melt chocolate chips with coconut oil in 30-second intervals, stirring until smooth.
6️⃣ Spoon melted chocolate over each Rice Krispie base and spread evenly.
7️⃣ Sprinkle with sea salt or chopped peanuts if desired.
8️⃣ Chill in the refrigerator for 30 minutes until set. Remove from muffin tin and enjoy!
Notes
-
Use natural peanut butter for a healthier option.
-
Store in an airtight container at room temperature or refrigerate for longer shelf life.
-
For a fun twist, add mini M&Ms or crushed pretzels before the chocolate sets.
- Prep Time: 15 min
- Cook Time: 30 min