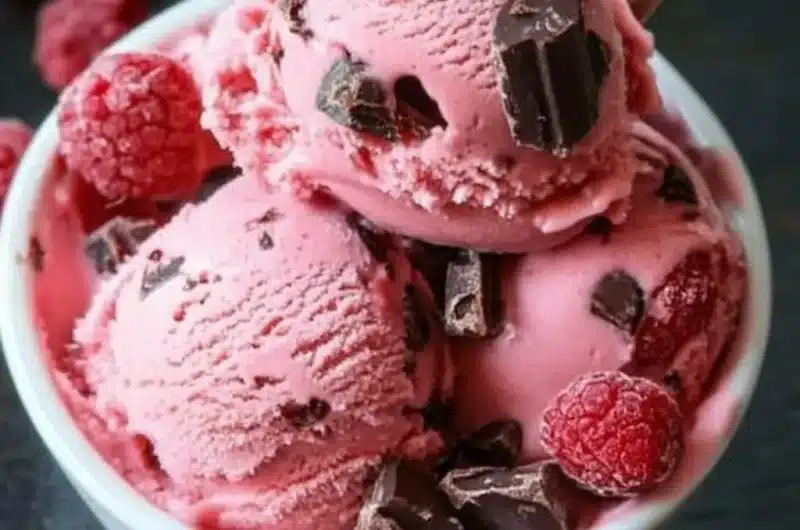
Raspberry Chocolate Chunk Ice Cream is a delightful treat that combines the rich flavor of chocolate with the refreshing zing of raspberries. This ice cream is an incredible dessert that everyone will love, whether on a hot summer day or at a cozy winter gathering. The fusion of sweet and tart raspberry swirls with luscious chocolate chunks makes each bite an unforgettable experience.
Imagine a warm day when you crave something sweet and cool. Suddenly, you remember the Raspberry Chocolate Chunk Ice Cream waiting in your freezer. You grab a scoop, and as it melts in your mouth, the smooth chocolate blends with the vibrant raspberry flavor, creating a magical moment. It’s not just ice cream; it’s pure bliss in a bowl.
This amazing recipe will walk you through each step so you can make this irresistible ice cream at home. Whether you’re a beginner or an experienced ice cream maker, you’ll appreciate the creamy texture and delightful tastes. Below, let’s explore why this recipe is so beloved, how to prepare it, and tips on serving it perfectly.
Why You’ll Love This Recipe
There are countless reasons why Raspberry Chocolate Chunk Ice Cream stands out among other frozen desserts. Here are a few highlights that make this recipe so special:
1. Simple Ingredients: The ingredients are straightforward and generally easy to find at your local grocery store.
2. Bursting with Flavor: The combination of raspberries and chocolate creates a vibrant flavor profile that satisfies any sweet tooth.
3. Homemade Goodness: Making your ice cream allows you to control ingredients, ensuring it’s fresh and delicious.
4. Great for Any Occasion: This ice cream is perfect for celebrations, dessert after a family dinner, or a treat just for yourself.
5. Customizable Recipe: You can adjust the chocolate chunks and raspberry puree based on your preference, making it versatile.
6. Easy to Follow Instructions: The recipe features clear steps so that anyone can execute it perfectly.
These aspects make Raspberry Chocolate Chunk Ice Cream a fantastic choice for dessert lovers everywhere. The delightful balance of flavors will leave your guests amazed and reaching for seconds!
Preparation and Cooking Time
Ready to make your own Raspberry Chocolate Chunk Ice Cream? Here’s a breakdown of the time involved:
– Preparation Time: 15 minutes
– Chill Time: 4-6 hours (or overnight)
– Churning Time: 20-25 minutes
In total, you can expect to invest about 4 to 6 hours into making this dessert. Most of that time will be spent allowing the ice cream mix to chill and thicken!
Ingredients
– 2 cups fresh raspberries
– 1 cup granulated sugar (divided)
– 2 cups heavy cream
– 1 cup whole milk
– 1 teaspoon vanilla extract
– ¼ teaspoon salt
– ½ cup semi-sweet chocolate chunks
Step-by-Step Instructions
Creating your Raspberry Chocolate Chunk Ice Cream is an enjoyable and straightforward process. Follow these steps to make it a reality:
1. Prepare Raspberries: Rinse the raspberries under cold water. In a medium bowl, mash them with a fork and mix in ½ cup of granulated sugar. Allow this mixture to sit for about 10 minutes to release the juices.
2. Mix Base: In a separate bowl, combine the remaining ½ cup of granulated sugar, heavy cream, whole milk, vanilla extract, and salt. Whisk until the sugar is fully dissolved.
3. Combine Mixtures: Fold the raspberry mixture into the cream mixture. Make sure not to over-mix to preserve some of the raspberry chunks.
4. Chill the Mixture: Cover the bowl and refrigerate your mixture for at least 4 hours, or overnight for best results.
5. Churn Ice Cream: Pour the chilled mixture into your ice cream maker. Follow the manufacturer’s instructions for churning. Typically, you will churn for about 20-25 minutes until it reaches a soft-serve consistency.
6. Add Chocolate Chunks: During the last few minutes of churning, add in the semi-sweet chocolate chunks to the ice cream base.
7. Freeze: Transfer the ice cream to an airtight container. Freeze it for at least 2 hours to firm up before serving.
8. Serve and Enjoy: Once ready, scoop and serve your homemade Raspberry Chocolate Chunk Ice Cream!
How to Serve
When it comes to serving Raspberry Chocolate Chunk Ice Cream, presentation and pairing can elevate the experience:
1. Presentation: Use colorful bowls or dessert cups to showcase the beautiful pink and chocolate swirls of the ice cream.
2. Toppings: Enhance the dessert with fresh raspberries, whipped cream, or a drizzle of chocolate sauce for a decadent touch.
3. Serving Size: Aim for generous scoops, as guests will likely come back for more. Make sure to keep extra scoops handy!
4. Beverage Pairing: Consider pairing with a refreshing lemon soda or sweet iced tea to complement the tartness of the raspberries.
5. Creative Alternatives: Try serving the ice cream between two cookies for an indulgent ice cream sandwich. This adds another layer of texture and flavor.
With these serving tips, your Raspberry Chocolate Chunk Ice Cream will not only taste incredible but also look stunning on the plate! Enjoy this delightful treat with family and friends!
Additional Tips
– Quality Raspberries: For the best flavor, use ripe, fresh raspberries. They should be firm and brightly colored.
– Blend Chocolate Types: Mix semi-sweet chocolate chunks with dark chocolate for a more complex flavor profile.
– Chill Your Equipment: Consider chilling your mixing bowls and paddle attachments in the freezer for about 15 minutes before making the ice cream. It helps keep the mixture cold.
– Taste as You Go: Adjust the ratio of sugar to your liking. If you prefer a less sweet ice cream, feel free to decrease the sugar slightly.
– Serve Immediately: For the best experience, serve the ice cream right after removing it from the freezer. Let it sit for about 5 minutes to soften slightly.
Recipe Variation
Here are some creative ways to vary the Raspberry Chocolate Chunk Ice Cream recipe:
1. Berry Blend: Incorporate other berries like blueberries or blackberries along with raspberries for a mixed berry flavor.
2. Mint Infusion: Add a few drops of mint extract to the mixture for a refreshing minty twist.
3. Nutty Delight: Mix in crushed nuts such as almonds or pecans to add a lovely crunch to your ice cream.
4. Non-Dairy Option: Use coconut cream and almond milk as substitutes for heavy cream and whole milk to make a dairy-free version.
5. Egg custard base: For a richer flavor, consider using an egg custard base instead of a simple cream mix.
Freezing and Storage
– Storage: Store your Raspberry Chocolate Chunk Ice Cream in an airtight container in the freezer. This will help prevent ice crystals from forming.
– Shelf Life: Properly stored ice cream can last up to 2-3 weeks in the freezer. However, it’s freshest when consumed within a week.
– Serving Tip: If ice cream becomes too hard after freezing, let it sit at room temperature for about 5-10 minutes before scooping.
Special Equipment
To make this delicious Raspberry Chocolate Chunk Ice Cream, here are some essential tools you will need:
– Ice cream maker: A good-quality machine will churn the mixture to a perfect consistency.
– Mixing bowls: At least two bowls, one for the raspberry mixture and another for the cream base.
– Whisk: To mix your ingredients thoroughly and blend the raspberry and cream mixtures.
– Rubber spatula: For folding the raspberry puree into the cream mixture gently.
– Airtight container: To store the ice cream once it’s churned.
Frequently Asked Questions
How do I prevent ice crystals from forming in my ice cream?
Churning the mixture regularly while freezing helps incorporate air and keeps the texture smooth, reducing the possibility of ice crystals.
Can I use frozen raspberries instead of fresh ones?
Yes, you can use frozen raspberries, but make sure to thaw them before mashing and mixing.
Is it necessary to have an ice cream maker?
While an ice cream maker simplifies the process, you can make ice cream without one by periodically stirring the mixture every 30 minutes as it freezes.
How do I know when my ice cream is done churning?
The ice cream should have a soft-serve consistency and increase in volume as air is incorporated into the mixture.
Can this recipe be adjusted for a lower sugar content?
Absolutely! Feel free to reduce the sugar as per your taste. Using ripe raspberries will also offer natural sweetness.
Conclusion
Raspberry Chocolate Chunk Ice Cream is not just a dessert; it’s an experience. With the delightful contrast of tart raspberries and rich chocolate chunks, it offers a burst of flavors that are sure to impress. With this simple and approachable recipe, you can make refreshing ice cream that captivates your family’s taste buds. Enjoy it on hot days, celebrate special occasions, or simply indulge in a scoop after dinner. The joy of homemade ice cream awaits you!

Raspberry Chocolate Chunk Ice Cream: An Amazing Ultimate Recipe
- Total Time: 47 minute
Ingredients
– 2 cups fresh raspberries
– 1 cup granulated sugar (divided)
– 2 cups heavy cream
– 1 cup whole milk
– 1 teaspoon vanilla extract
– ¼ teaspoon salt
– ½ cup semi-sweet chocolate chunks
Instructions
Creating your Raspberry Chocolate Chunk Ice Cream is an enjoyable and straightforward process. Follow these steps to make it a reality:
1. Prepare Raspberries: Rinse the raspberries under cold water. In a medium bowl, mash them with a fork and mix in ½ cup of granulated sugar. Allow this mixture to sit for about 10 minutes to release the juices.
2. Mix Base: In a separate bowl, combine the remaining ½ cup of granulated sugar, heavy cream, whole milk, vanilla extract, and salt. Whisk until the sugar is fully dissolved.
3. Combine Mixtures: Fold the raspberry mixture into the cream mixture. Make sure not to over-mix to preserve some of the raspberry chunks.
4. Chill the Mixture: Cover the bowl and refrigerate your mixture for at least 4 hours, or overnight for best results.
5. Churn Ice Cream: Pour the chilled mixture into your ice cream maker. Follow the manufacturer’s instructions for churning. Typically, you will churn for about 20-25 minutes until it reaches a soft-serve consistency.
6. Add Chocolate Chunks: During the last few minutes of churning, add in the semi-sweet chocolate chunks to the ice cream base.
7. Freeze: Transfer the ice cream to an airtight container. Freeze it for at least 2 hours to firm up before serving.
8. Serve and Enjoy: Once ready, scoop and serve your homemade Raspberry Chocolate Chunk Ice Cream!
- Prep Time: 15 minutes
- Cook Time: 20-25 minutes
Nutrition
- Serving Size: 4-6 servings
- Calories: 350 kcal
- Fat: 24g
- Protein: 5g