Red Velvet Cookie Cake is a delightful fusion of flavors and textures that creates a cake like no other. This fun twist on the classic red velvet cake captures the rich essence of the beloved dessert while introducing the irresistible chewiness of cookies. With its stunning red color and creamy frosting, this cake is sure to impress at any celebration or even during a cozy family gathering.
Imagine biting into a piece of Red Velvet Cookie Cake, where every forkful brings a blend of soft, cookie goodness and luscious cream cheese frosting. It’s a delightful dessert that combines the nostalgia of cookies and the celebration of cake in one amazing creation. This recipe allows you to indulge your sweet tooth while providing a unique treat that will have everyone talking.
In this guide, you will learn why this recipe is a favorite, how to prepare it, and tips for serving it perfectly. Whether you consider yourself a novice baker or an experienced confectioner, the Red Velvet Cookie Cake is straightforward yet incredibly rewarding to make. Let’s dive into what makes this cake irresistible and why it should be at the top of your dessert list!
Why You’ll Love This Recipe
The Red Velvet Cookie Cake combines simple ingredients to create an extraordinary dessert experience. Here are a few reasons why you’ll be head over heels for this recipe:
1. Unique Flavor Profile – This cake brings together the rich chocolate notes of red velvet with the buttery flavor of cookies.
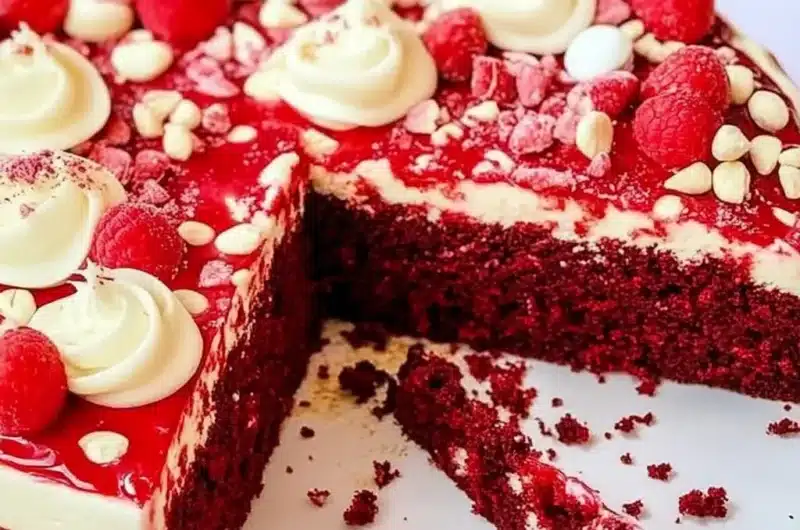
2. Visual Appeal – The vibrant red color topped with fluffy cream cheese frosting makes it an eye-catching centerpiece for any occasion.
3. Adaptable – You can customize this cake by adding mix-ins like chocolate chips, nuts, or even sprinkles to match any celebration.
4. Easy to Make – With a straightforward recipe and clear steps, you can create this impressive cake even with limited baking experience.
5. Perfect for Celebrations – Whether it’s a birthday, anniversary, or simply a treat for yourself, this recipe is sure to wow your guests.
6. Leftovers – Any leftover cake can be stored easily, ensuring you can enjoy this delicious dessert for days to come.
With all these amazing features, it’s no surprise that the Red Velvet Cookie Cake is quickly becoming a fan-favorite recipe in many households!
Preparation and Cooking Time
Making the Red Velvet Cookie Cake is a delightful experience that takes roughly 1 hour and 15 minutes in total. Here’s a breakdown of the time you will need for each phase:
– Preparation Time: 25 minutes
– Cooking Time: 30-35 minutes
– Cooling Time: 15-20 minutes
These times may vary slightly depending on your cooking skills and kitchen equipment, but this framework will guide you to delicious success.
Ingredients
– 2 ½ cups all-purpose flour
– 1 ½ teaspoons baking powder
– 1 teaspoon baking soda
– ½ teaspoon salt
– 1 cup unsalted butter, softened
– 1 ½ cups granulated sugar
– 1 cup brown sugar, packed
– 3 large eggs
– 1 tablespoon vanilla extract
– 1 tablespoon cocoa powder
– 1 teaspoon red food coloring
– 1 cup semi-sweet chocolate chips (optional)
– 2 cups cream cheese frosting (store-bought or homemade)
Step-by-Step Instructions
Creating the Red Velvet Cookie Cake is straightforward if you follow these simple steps:
1. Preheat Oven: Start by preheating your oven to 350°F (175°C). Grease and flour two 9-inch round cake pans.
2. Mix Dry Ingredients: In a medium bowl, whisk together the flour, baking powder, baking soda, salt, and cocoa powder until well combined.
3. Cream Butter and Sugars: In a large mixing bowl, beat the softened butter, granulated sugar, and brown sugar together until the mixture is light and fluffy.
4. Add Eggs and Vanilla: Add the eggs one at a time, mixing well after each addition. Then, stir in the vanilla extract.
5. Incorporate Food Coloring: Carefully mix in the red food coloring until the batter is evenly colored.
6. Combine Mixtures: Gradually add the dry ingredient mixture to the wet ingredients, mixing until just combined. Be careful not to overmix.
7. Fold in Chocolate Chips: If you are adding chocolate chips, gently fold them into the batter for extra texture and sweetness.
8. Divide Batter: Pour the batter evenly among the prepared cake pans, smoothing the tops with a spatula.
9. Bake: Place the pans in the preheated oven and bake for 30-35 minutes, or until a toothpick inserted in the center comes out clean.
10. Cool the Cakes: Allow the cakes to cool in their pans for about 15 minutes, then carefully turn them out onto wire racks to cool completely.
11. Frost the Cakes: Once completely cool, spread cream cheese frosting between the layers and on the top and sides of the cake.
How to Serve
To ensure a memorable experience when serving your Red Velvet Cookie Cake, consider the following tips:
1. Presentation: Use a beautiful cake stand to showcase your creation. A simple design can elevate the presentation beautifully.
2. Garnishments: Consider adding decorative elements like berries, sprinkles, or extra chocolate chips on top for an appealing touch.
3. Slice Size: Serve generous slices, but keep them manageable to encourage your guests to consider seconds.
4. Beverage Pairing: This cake pairs wonderfully with a glass of milk, coffee, or even dessert wine, enhancing the overall taste experience.
With a thoughtful presentation and delicious pairing, your Red Velvet Cookie Cake will undoubtedly impress friends, family, and anyone fortunate enough to enjoy a piece!
Additional Tips
– Use Room Temperature Ingredients: For best results, ensure that your butter and eggs are at room temperature. This helps in achieving a smooth and well-mixed batter.
– Don’t Overmix: When combining the dry and wet ingredients, mix until just combined. Overmixing can lead to a dense cake.
– Chill the Frosting: If you find your cream cheese frosting too runny, chill it briefly in the refrigerator. This will help it thicken for easier spreading.
– Garnish with Pizzazz: Consider garnishing your Red Velvet Cookie Cake with cocoa powder dusting or a chocolate drizzle for extra flair.
Recipe Variation
Explore these creative twists on the classic Red Velvet Cookie Cake recipe:
1. Red Velvet Cookie Brownies: Transform your batter into bars for a chewy brownie texture. Simply spread the batter in a rectangular baking pan and bake until set.
2. Cream Cheese Swirl: Create a marbled effect by swirling the cream cheese frosting into the cake batter before baking. It adds an artistic touch and enhances flavor.
3. Red Velvet Cupcakes: Use the same batter to make festive cupcakes. Top them with cream cheese frosting for easy serving at parties.
4. Layered Cake: For a more decadent option, bake additional layers and stack them with frosting in between each layer. This enhances both flavor and presentation.
Freezing and Storage
– Store Safely: Keep leftover Red Velvet Cookie Cake in an airtight container in the refrigerator. It will stay fresh for about 4 to 5 days.
– Freezing: You can freeze the cake slices by wrapping them individually in plastic wrap followed by aluminum foil. They can be stored for up to 3 months. Thaw overnight in the refrigerator for best results.
Special Equipment
To prepare this delicious Red Velvet Cookie Cake, the following equipment is recommended:
– Mixing Bowls: Have multiple bowls on hand for mixing dry and wet ingredients.
– Electric Mixer: Using a stand mixer or hand mixer will help achieve a well-aerated batter.
– Spatula: A rubber spatula is perfect for folding in ingredients and scraping down bowls.
– Parchment Paper: Line your cake pans with parchment paper for easier removal after baking.
– Cooling Racks: These allow proper airflow around the cakes as they cool, ensuring they don’t become soggy.
Frequently Asked Questions
Can I make this cake gluten-free?
Yes! Swap the all-purpose flour for a gluten-free flour blend, ensuring it has a good balance of starches.
How should I slice the cake for serving?
Use a sharp serrated knife for clean cuts. For best results, clean the knife between cuts by wiping it with a damp cloth.
Can I use different food coloring?
Certainly! While red is traditional, you could experiment with other colors to suit different themes or preferences.
What’s the best way to decorate the cake?
You can use fresh berries, edible flowers, or additional frosting swirls to decorate your cake however you like.
Is it necessary to let the cakes cool completely before frosting?
Yes, please ensure they are completely cool. Frosting warm cakes can melt the frosting and make a mess.
Conclusion
The captivating Red Velvet Cookie Cake is a unique treat that seamlessly combines the flawed indulgence of cookies with the celebratory spirit of cakes. Its vibrant hue and soft texture make it an impressive dessert for any occasion. Whether it’s a birthday party, a holiday gathering, or a simple family dinner, this cake is bound to delight everyone around the table. With its straightforward instructions and flexible variations, you can personalize it to suit your tastes. Enjoy baking and indulging in this lovely masterpiece!

Red Velvet Cookie Cake: An Amazing Ultimate Recipe
- Total Time: 56 minute
Ingredients
– 2 ½ cups all-purpose flour
– 1 ½ teaspoons baking powder
– 1 teaspoon baking soda
– ½ teaspoon salt
– 1 cup unsalted butter, softened
– 1 ½ cups granulated sugar
– 1 cup brown sugar, packed
– 3 large eggs
– 1 tablespoon vanilla extract
– 1 tablespoon cocoa powder
– 1 teaspoon red food coloring
– 1 cup semi-sweet chocolate chips (optional)
– 2 cups cream cheese frosting (store-bought or homemade)
Instructions
Creating the Red Velvet Cookie Cake is straightforward if you follow these simple steps:
1. Preheat Oven: Start by preheating your oven to 350°F (175°C). Grease and flour two 9-inch round cake pans.
2. Mix Dry Ingredients: In a medium bowl, whisk together the flour, baking powder, baking soda, salt, and cocoa powder until well combined.
3. Cream Butter and Sugars: In a large mixing bowl, beat the softened butter, granulated sugar, and brown sugar together until the mixture is light and fluffy.
4. Add Eggs and Vanilla: Add the eggs one at a time, mixing well after each addition. Then, stir in the vanilla extract.
5. Incorporate Food Coloring: Carefully mix in the red food coloring until the batter is evenly colored.
6. Combine Mixtures: Gradually add the dry ingredient mixture to the wet ingredients, mixing until just combined. Be careful not to overmix.
7. Fold in Chocolate Chips: If you are adding chocolate chips, gently fold them into the batter for extra texture and sweetness.
8. Divide Batter: Pour the batter evenly among the prepared cake pans, smoothing the tops with a spatula.
9. Bake: Place the pans in the preheated oven and bake for 30-35 minutes, or until a toothpick inserted in the center comes out clean.
10. Cool the Cakes: Allow the cakes to cool in their pans for about 15 minutes, then carefully turn them out onto wire racks to cool completely.
11. Frost the Cakes: Once completely cool, spread cream cheese frosting between the layers and on the top and sides of the cake.
- Prep Time: 15 minutes
- Cook Time: 30-35 minutes
Nutrition
- Serving Size: 12
- Calories: 400 kcal
- Fat: 18g
- Protein: 4g