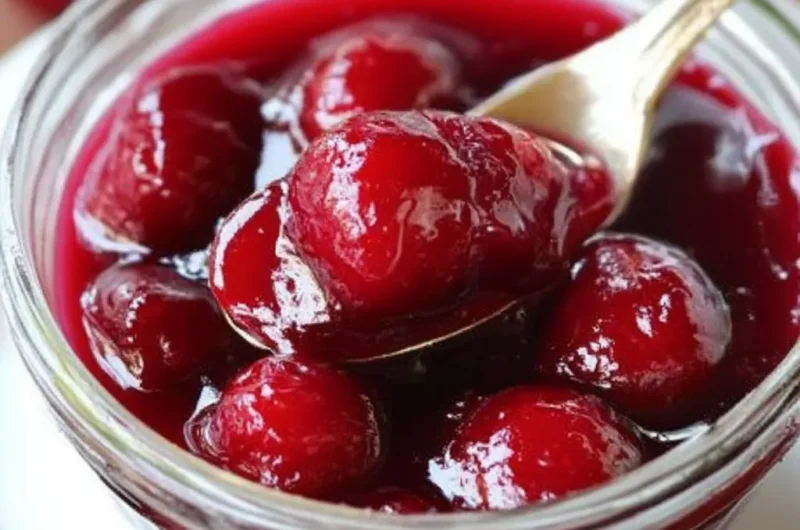
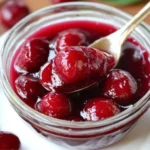
Simple Cherry Pie Filling is an incredible way to elevate your desserts and bring a burst of sweet, tangy flavor to your favorite treats. This luscious filling can be used in various recipes, from classic cherry pies to delicious tarts and desserts. Even if you’re new to cooking, this simple recipe offers an enchanting twist that will impress family and friends alike. The cherry’s natural sweetness and vibrant color make this filling a stunning addition to any dessert table.
Imagine biting into a warm slice of pie with a rich, gooey cherry filling, glistening under a flaky crust. The combination of sweet cherries paired with a hint of tanginess creates an irresistible flavor explosion that dances on your palate. This Simple Cherry Pie Filling recipe captures all of that magic in just a few simple steps. In this guide, you will discover what makes this filling truly special, how to prepare it effortlessly, and tips for serving it perfectly. If you love cherries, get ready for a wonderful culinary journey that will leave you craving more.
The beauty of this recipe lies in its simplicity. With just a handful of ingredients and straightforward steps, you can create a filling that rivals any bakery’s. Whether you’re preparing for a special occasion, the holiday season, or just a family gathering, this Simple Cherry Pie Filling is the ultimate way to treat your loved ones. Let’s dive into the recipe and uncover why it’s a must-try for every cherry lover!
Why You’ll Love This Recipe
There are numerous reasons why this Simple Cherry Pie Filling is sure to win your heart:
1. Fresh Ingredients: Using fresh cherries elevates the flavor, but frozen ones work beautifully too!
2. Versatile: Perfect for a variety of desserts, from pies to pancakes and more.
3. Quick and Easy: You can prepare this filling in under 30 minutes.
4. Customizable: Add your favorite spices or zest to adjust the flavor profile.
5. Perfectly Sweetened: The balanced sweetness makes it delightful, not overpowering.
6. Homemade Goodness: Making it from scratch ensures no preservatives or artificial ingredients.
These reasons highlight why this Simple Cherry Pie Filling is not only a recipe but a delicious addition to your culinary repertoire. You’ll find yourself reaching for this recipe time and again!
Preparation and Cooking Time
Creating this Simple Cherry Pie Filling is a breeze! Here’s a breakdown of the time you will need:
– Preparation Time: 10 minutes
– Cooking Time: 15-20 minutes
– Total Time: Approximately 25-30 minutes
This quick preparation makes it an excellent option for spontaneous baking or whenever you want to indulge in something sweet!
Ingredients
– 4 cups fresh or frozen pitted cherries
– 1 cup granulated sugar
– 2 tablespoons cornstarch
– 1 tablespoon lemon juice
– 1 teaspoon vanilla extract
– 1/4 teaspoon almond extract (optional)
– 1/4 teaspoon salt
– 1/2 teaspoon ground cinnamon (optional)
Step-by-Step Instructions
Here’s how to make your Simple Cherry Pie Filling:
1. Prepare the Cherries: If using fresh cherries, wash them thoroughly and remove the pits.
2. Combine Ingredients: In a medium saucepan, combine the cherries, sugar, cornstarch, lemon juice, vanilla extract, almond extract (if using), salt, and cinnamon (if using).
3. Cook the Mixture: Place the saucepan over medium heat. Stir the mixture gently as it heats.
4. Thicken the Filling: Cook for about 10-15 minutes or until the mixture starts to bubble and thickens. Stir constantly to prevent sticking.
5. Cool: Remove the saucepan from heat and allow the filling to cool slightly before using.
6. Store: If not using immediately, transfer the cherry filling to an airtight container and refrigerate. It will last in the fridge for about one week.
This step-by-step process is simple enough for anyone to follow and results in a delectable filling that you’ll be proud to serve.
How to Serve
Once you’ve finished making your Simple Cherry Pie Filling, the possibilities are endless! Here are some fantastic ways to serve it:
1. Classic Cherry Pie: Spoon the filling into your favorite pie crust, top with crumbs or another layer of crust, and bake until golden brown.
2. Tartlets: Use mini tart shells to fill with cherry pie filling for charming bite-sized treats.
3. Pancakes or Waffles: Drizzle the filling over fluffy pancakes or waffles for a delightful breakfast.
4. Frozen Treats: Stir the filling into vanilla ice cream for a refreshing dessert.
5. Cheesecake Topping: Use the cherry filling as a topping for your favorite cheesecake for a beautiful presentation.
6. Yogurt Parfaits: Layer the cherry filling with yogurt and granola for a wholesome, delicious snack.
By serving your Simple Cherry Pie Filling in these various ways, you can impress your guests and enjoy delightful flavors any time you wish!
Additional Tips
– Use Ripe Cherries: For the best flavor, choose ripe, sweet cherries. They will make your Simple Cherry Pie Filling taste exceptional.
– Adjust Thickness: If you prefer a thicker filling, simply increase the amount of cornstarch. Start with an additional half tablespoon and adjust based on your preference.
– Enhance Flavor with Spices: Experiment with additional spices like nutmeg or ginger for a unique twist on the traditional flavor.
– Add Sweetness with Other Fruits: Combine cherries with other fruits such as blueberries or raspberries for a mixed fruit filling.
– Use Alternate Sweeteners: If you’re looking for a healthier option, consider using honey, maple syrup, or a sugar substitute instead of granulated sugar.
Recipe Variation
Feel free to mix things up! Here are some delightful variations of the Simple Cherry Pie Filling:
1. Cherry Almond Variation: Add an extra teaspoon of almond extract to enhance the nutty flavor that pairs beautifully with cherries.
2. Chocolate Flourless Pie: Use this filling in a flourless chocolate crust for an indulgent dessert that combines chocolate and cherries.
3. Spiced Cherry Filling: Add a pinch of cardamom or a teaspoon of vanilla bean paste for a fragrant twist to your cherry filling.
4. Cherry Jam: Cook the mixture a bit longer to create a jam-like consistency. This is perfect for spreading on toast or using in breakfast dishes.
5. Citrus Burst: Add some orange or lime zest to the mixture for a refreshing citrus kick.
Freezing and Storage
– Storage: Keep your Simple Cherry Pie Filling in an airtight container in the refrigerator. It stays fresh for about one week.
– Freezing: You can freeze the filling for up to three months. Make sure to store it in a freezer-safe container. Thaw it in the fridge overnight when you’re ready to use it.
– Reheating: To use frozen filling, simply reheat it in a saucepan over low heat until warmed through. Stir gently to retain the filling’s consistency.
Special Equipment
You won’t need much for this recipe, but having a few essential tools on hand can make the process smoother:
– Medium saucepan for cooking the filling.
– Wooden spoon or spatula for stirring.
– Measuring cups and spoons for accurate ingredient measurement.
– Airtight container for storing any leftover filling.
– Pie crust (homemade or store-bought) for filling.
Frequently Asked Questions
Can I use canned cherries for this recipe?
Yes, canned cherries can work, but drain them well and reduce the sugar, as they may be syrupy.
Can I make this filling ahead of time?
Absolutely! You can prepare it a day in advance and store it in the fridge until needed.
How do I know if my filling is thick enough?
Once it starts to bubble and coats the back of your spoon without running off, it’s ready.
Can I make this filling with other types of fruit?
Definitely! The concept works well with other fruits, such as blueberries or peaches.
What’s the best way to serve this filling?
It pairs wonderfully with vanilla ice cream, or as a topping on a cheesecake or yogurt parfait.
Conclusion
The Simple Cherry Pie Filling is an essential recipe for any cherry lover and a wonderful addition to your dessert repertoire. Its vibrant flavor and easy preparation make it a perfect choice for any occasion. Whether you’re whipping up a classic pie or exploring new dessert ideas, this cherry filling is sure to impress. Give it a try, and indulge in the lovely taste of cherries in every delightful bite!
Simple Cherry Pie Filling: An Amazing Ultimate Recipe
- Total Time: 28 minute
Ingredients
– 4 cups fresh or frozen pitted cherries
– 1 cup granulated sugar
– 2 tablespoons cornstarch
– 1 tablespoon lemon juice
– 1 teaspoon vanilla extract
– 1/4 teaspoon almond extract (optional)
– 1/4 teaspoon salt
– 1/2 teaspoon ground cinnamon (optional)
Instructions
Here’s how to make your Simple Cherry Pie Filling:
1. Prepare the Cherries: If using fresh cherries, wash them thoroughly and remove the pits.
2. Combine Ingredients: In a medium saucepan, combine the cherries, sugar, cornstarch, lemon juice, vanilla extract, almond extract (if using), salt, and cinnamon (if using).
3. Cook the Mixture: Place the saucepan over medium heat. Stir the mixture gently as it heats.
4. Thicken the Filling: Cook for about 10-15 minutes or until the mixture starts to bubble and thickens. Stir constantly to prevent sticking.
5. Cool: Remove the saucepan from heat and allow the filling to cool slightly before using.
6. Store: If not using immediately, transfer the cherry filling to an airtight container and refrigerate. It will last in the fridge for about one week.
This step-by-step process is simple enough for anyone to follow and results in a delectable filling that you’ll be proud to serve.
- Prep Time: 15 minutes
- Cook Time: 15-20 minutes
Nutrition
- Serving Size: 8 servings
- Calories: 205 kcal
- Fat: 0g
- Protein: 2g